3 Easy Ways to Record Screen or Screen Recorder in Windows 10
If you are a creator who often shares video tutorials on the Windows operating system, you definitely need a feature to record the screen. This feature will obviously be useful for those of you who share certain experiences in solving a problem on a computer. By recording the screen, the troubleshooting steps to follow become clearer and easier to understand.
Not only for creators, those of you who often provide training or are a Windows operating system tutor, of course you also need an application to record screens. This application will obviously be useful because the form of video is easier than just a presentation or mere writing. Especially if the tutorial is equipped with audio.
So, how to record screen in Windows? This question will be answered in the article that I present this time. Of course, based on my experience using existing features or applications. This method applies to laptops or Desktop PCs with the Windows 10 operating system.
Why Windows 10? Based on data from Statsounter, until September 2022, the number of Windows 10 users was 71.88 percent. While the latest Windows version, Windows 11 is at 13.61 percent. This indicates that there are still many users who use Windows 10 as their main operating system.
For that, let’s just look at the 3 ways to record the screen and the Screen Recorder that I have tried below.
1. Using Game Bar Features
The first way is not complicated. You don’t need to install anything. Just use the built-in features of Windows. This feature is available in Windows 10 and Windows 11.
To use this feature, you just need to do the following steps.
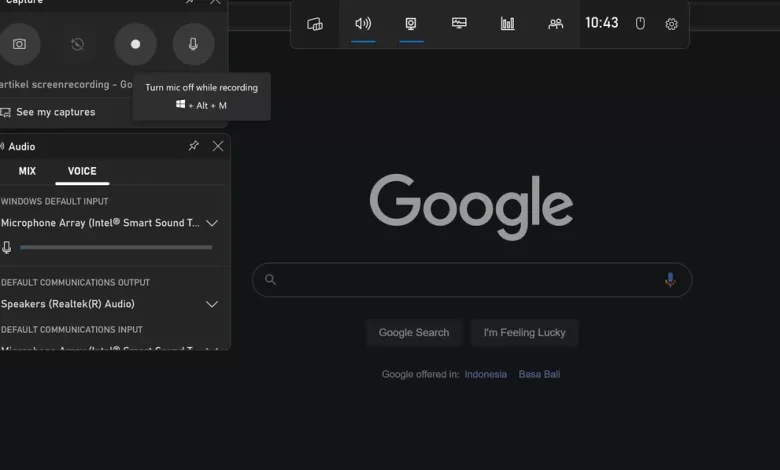
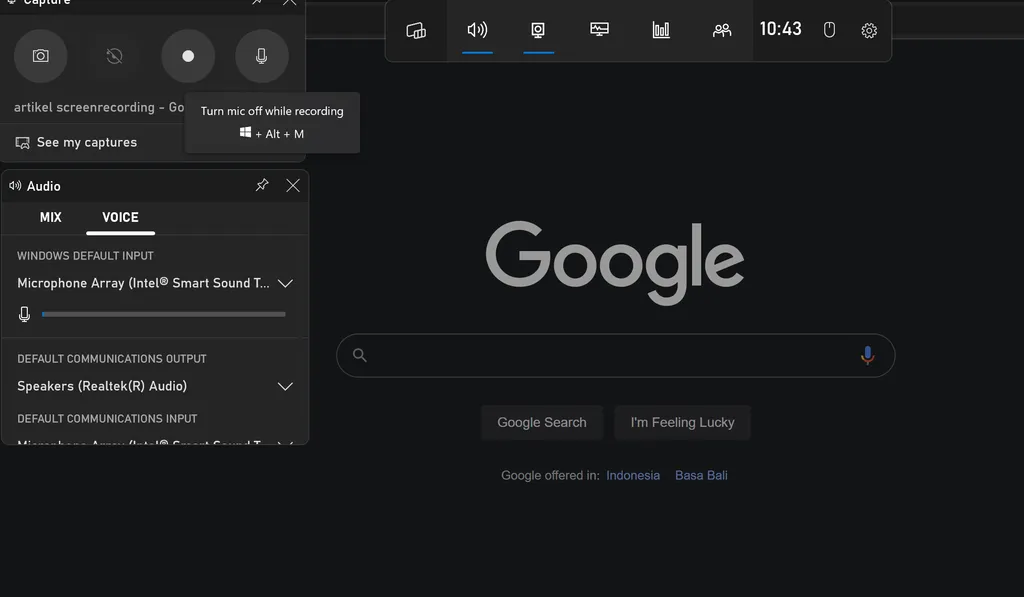
- Press Windows + G on the keyboard of your laptop or Desktop PC. Later features will appear that are useful for recording or capturing screens.
- You can also do a search in the search box in Windows by entering the keyword “Game Bar”. Later an application called Xbox Game Bar will appear as shown below.
- To record, select the recording icon and make a recording. To enter a voice, you click the microphone icon so that it can turn on and record your voice.
- To mute the microphone, simply select the mic icon again. Or you can do it by pressing Windows key + Alt + M.
- Based on the experience of using this feature, I find this feature quite useful and practical. It’s just that the features are not too abundant.
2. Using the App from EaseUS
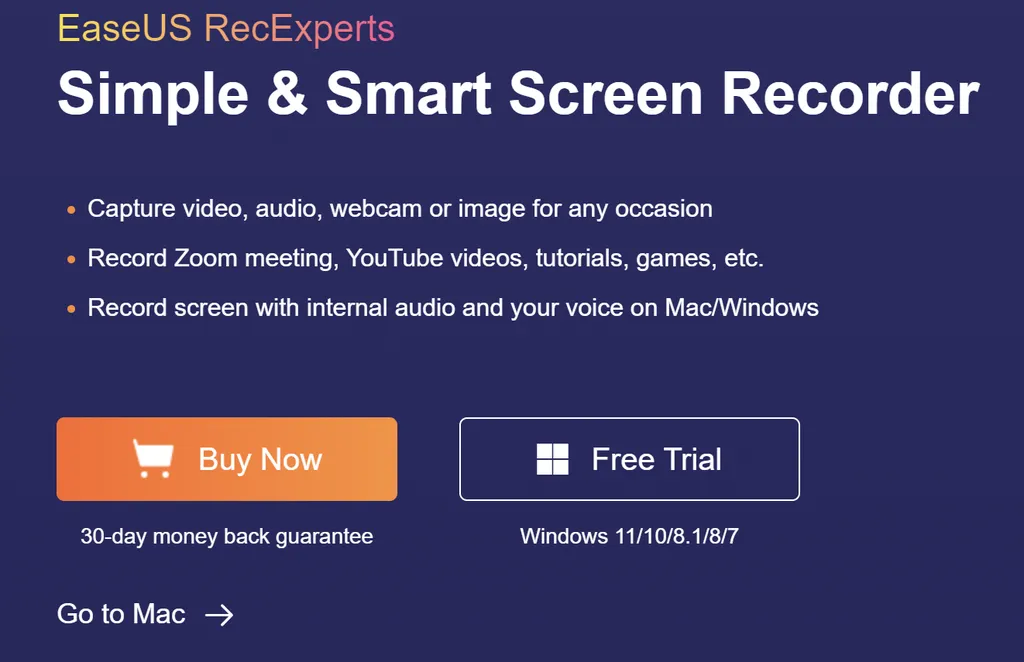
The third way to record the Windows 10 screen is to use an app from EaseUS. The application is called EaseUS RecExperts.
This application is quite good at recording screens. Moreover, the features are also diverse. Not only can you record screen video and audio, this app can also record the games you play. The recording feature during meetings is also available in this application.
EaseUS RecExperts is claimed to be a video recording application that simple and smart. Simply put, this application is an application that is easy for anyone to use but has smart capabilities and features.

To record the screen using this application, you can follow the steps below.
- Download EaseUS RecExperts on the official website. You can choose the paid version or the free version first to try it (free trial).
- For those who use a Mac, you can choose the Mac option on the official website.
- After that, install the application on your Windows operating system.
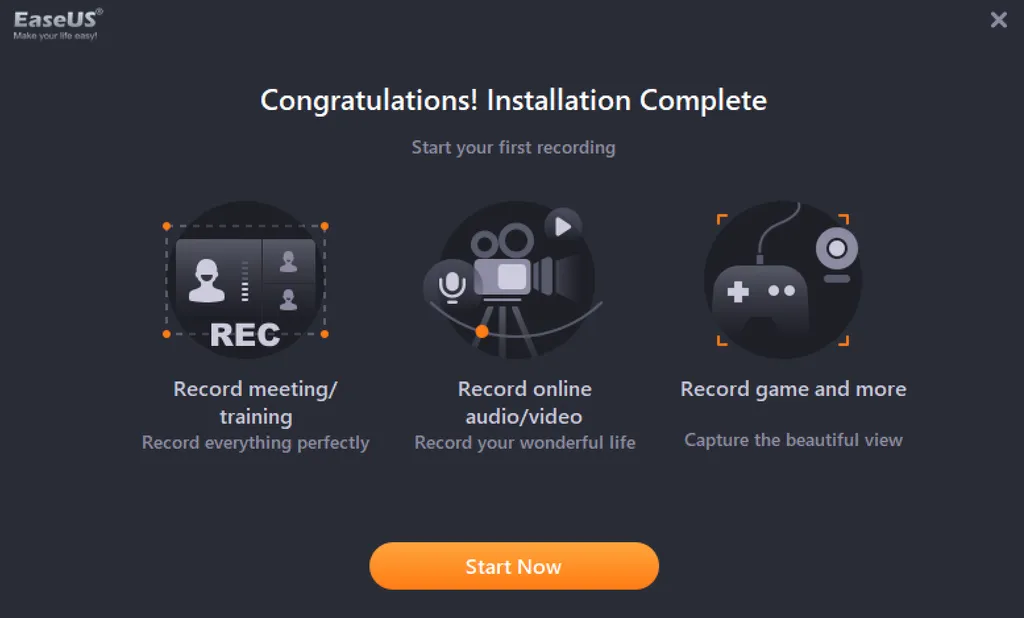
- Run EaseUS RecExperts, if you use the paid version there is a license code that must be entered later in order to use the Pro version
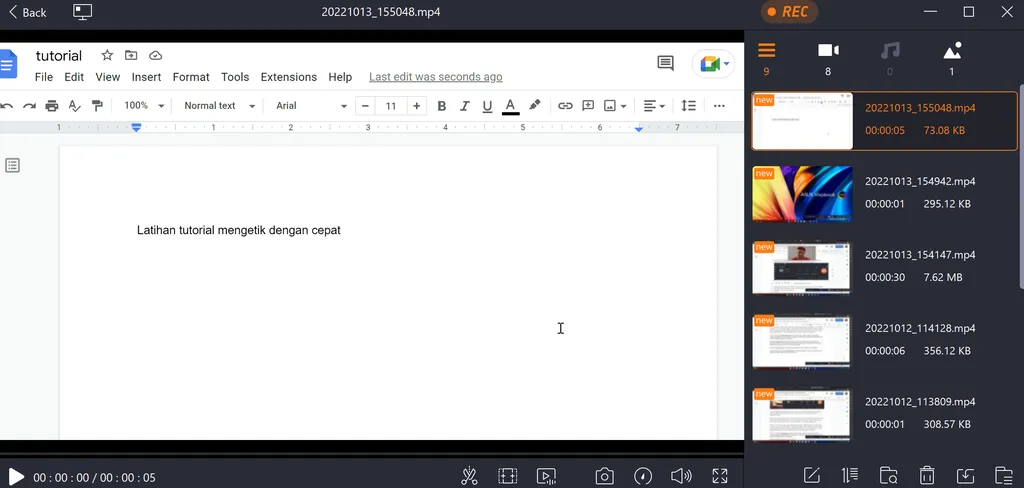
- The application will appear as shown below.
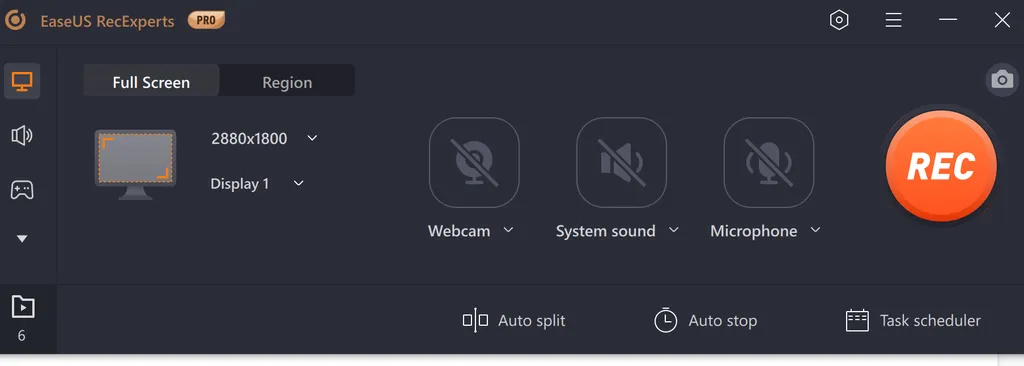
- All you have to do is select the large “Rec” button to record the screen.
- If you want to take a full screen, select the Full Screen option, if you want to take a part of the screen, select the Region option.
- If you want to add your voice, select the mic option, so that your voice is recorded too. If you want to show your face, you just select Webcam. You can choose the System Sound option if you want the sound from Windows 10 like Youtube videos to be heard.
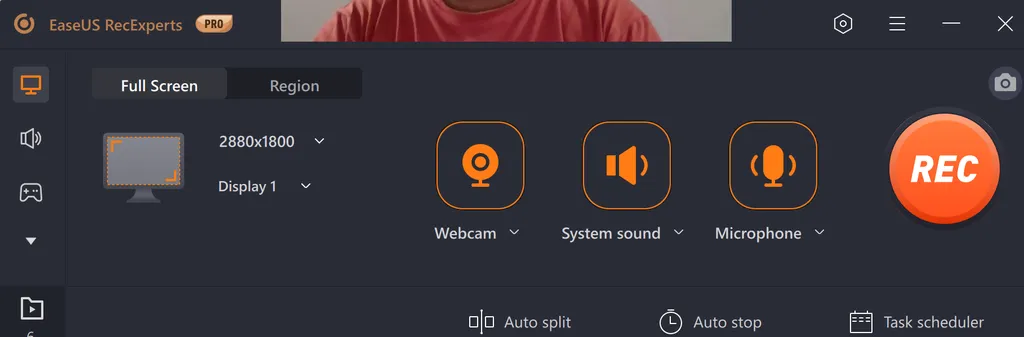
- If you have selected the “REC” option, a prompt will appear to record by counting numbers: 3, 2, and 1.
- While recording, there are several selection buttons that you can choose from. For example a button to pause, a button to stop, and others.

- Interestingly, this application supports keyboard keys for shortcut. For example, to stop recording or stop, just press F9, while to pause or pause, press F10 on the Keyboard key.
- If you have recorded the screen, the results will be immediately visible on the screen, the previous recording is there, aka automatically saved.
- For the recording, you can choose the option to extract only the audio. Who knows, you just need the audio recording.
- You can edit the screen recording in this application directly using the trim feature (scissor icon). This indirectly makes this application not only record but also can directly edit it.
- However, if you want to edit further or Advancedyou can use the app Ease Video Editor. An interesting video editor application from EaseUS.
- If you’ve recorded, you just press the X button on the top right side to close the application, like Windows applications in general.
The steps for recording the screen are classified as. In my personal opinion, this is based on the fact that this application is designed with clear and large icon buttons and features that make it easy to perform various tasks.
In addition, EaseUS RecExperts also has the option to record the game being played. All you have to do is select the ‘joystick’ button on the left. Later there is an option to run the feature with Windows user administrator permissions.
EaseUS RecExperts can be the most interesting option because it has many features to support screen recording. Moreover, this application was developed from EaseUS who are famous always present applications to help users. Examples of applications that help to backup data, move data, storage partition manager, and much more.
EaseUS has been established since 2004. So, this company is quite experienced in presenting supporting applications on Windows or Mac operating systems. I have also used several tools from EaseUS. For example the application Data Recovery Wizard Free.
3. Using Extensions
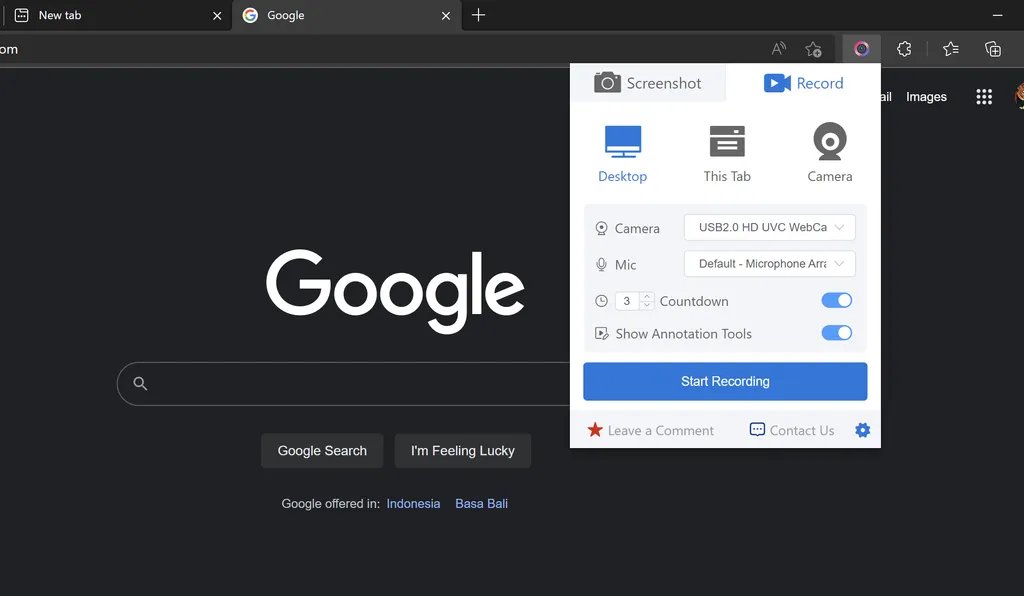
The third way to record the screen is to use an extension application in the browser. The extension is called Apex Screen Recorder & Screenshot Master. You can find it in the Google Chrome extension store or Microsoft Edge Add-on.
Other browsers based on Chromium can generally install this application. Examples such as Opera.
After installing the extension, you simply open the extension, then activate the mic and camera sections by selecting “Authorize”. Later, there is a command from the browser to allow access to the mic and camera sections. The mic is of course used to record video. While the camera aims if you need to record the screen while recording your face.
I have also tried this extension and it is quite okay to use.
Actually, there are many other application options for screen recording in Windows 10 or Windows 11. But obviously, the 3 applications that I have described are applications that are quite interesting, practical, and of course easy to use.