Without an application, here are 6 ways to take screenshots on the Redmi Note 12 series
Xiaomi has released one of its flagship series, the Redmi Note 12 Series, in the HP class mid-range. This series is present in March 2023 as a successor to the previous series, namely the Redmi Note 11 Series which was released in 2022.
Regarding capabilities and features, the Redmi Note 12 Series relies on the interface it uses, namely MIUI 13 and 14. As is well known, MIUI is an interface that offers a variety of interesting features. Unfortunately, the problem of advertising is still difficult to remove in order to cover the low price.
One of the features that MIUI has from the Redmi Note 12 Series is to do screenshot. Not just one, there are several ways that can be used just to do it screenshot. So, if you are a Redmi Note 12 Series user, here are some ways to do it screenshot easily and quickly.
Way to do Screenshot on the Redmi Note 12 Series cellphone
Based on MIUI 13 and 14, the Redmi Note 12 Series has at least six ways to do it screenshot. In these six ways, no one even uses third-party applications at all. So, for those of you who are Redmi Note 12 Series users and want to know how, please see this article until it’s finished, OK?
1. Cara Screenshot Using Physical Key Combinations
One way to do screenshot the most common is to use a combination of physical keys. This method is arguably the most widely used, especially for Android cellphone users. One of the reasons is because it is easy to remember and practical to use.
Just like other Xiaomi cellphones, the Redmi Note 12 Series uses the same physical button combination. The way to use it is by pressing knob power and volume down simultaneously.
If screenshot successful, usually your Redmi Note 12 Series HP screen will flash and make a sound. After that, you will see a preview of the results screenshot it is at the top right. You can ignore it until it disappears because the image will automatically be saved in your cellphone gallery.
Do screenshot using this key combination is indeed quite easy and practical. Unfortunately, this method has drawbacks if used too often. Physical buttons have the risk of wearing out or breaking quickly if used too often, even if used carefully or slowly.
To avoid this risk, there are several alternatives or other methods that can be used to do so screenshot. Other methods are still relatively easy and practical to use. Because it does not require any third party application.
2. Cara Screenshot Through Control Center
One alternative or another way to do screenshot is through control center. This method is also still fairly popular and often used. The reason is, you don’t have to set anything before using this method or feature.
Apart from the Redmi Note 12 Series, other Android phones also have the same method. If something is different, maybe it’s just the appearance or layout and icon images used. So, to make it clearer, please refer to the following steps.
- The first way to do is open control center on the Redmi Note 12 Series HP first.
- You can swipe down from the top of the screen using one finger.
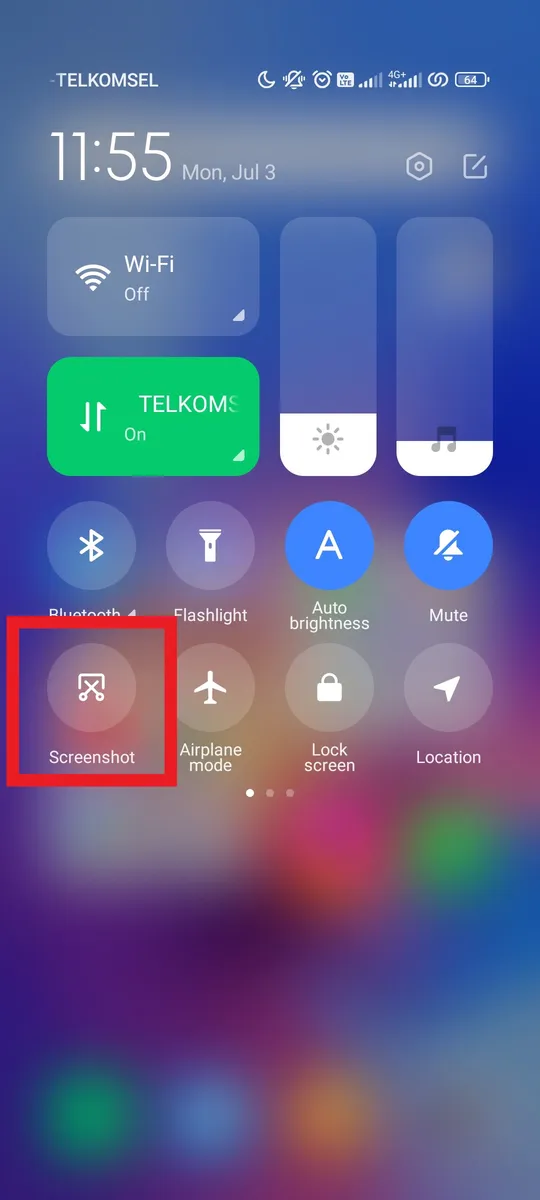
- Once open, please press the scissor icon with the words “Screenshotunder it.
- If successful, the HP screen will flash and preview the results screenshot the.
- You can ignore the preview or get rid of it immediately because the image will automatically be saved in your cellphone gallery.
3. Cara Screenshot Using 3 Finger Gestures
Another way to do screenshot on the Redmi Note 12 Series HP is to use a three-finger gesture. This feature has been widely used by other Android phones, starting from Xiaomi, Realme, Infinix, and so on. It’s just that, you have to activate the feature first before you can use it.
Even so, you still don’t need any third-party apps to activate it. So, to make it clearer, please refer to the following steps.
- The first way to do is open Settings on your Redmi Note 12 Series cellphone.
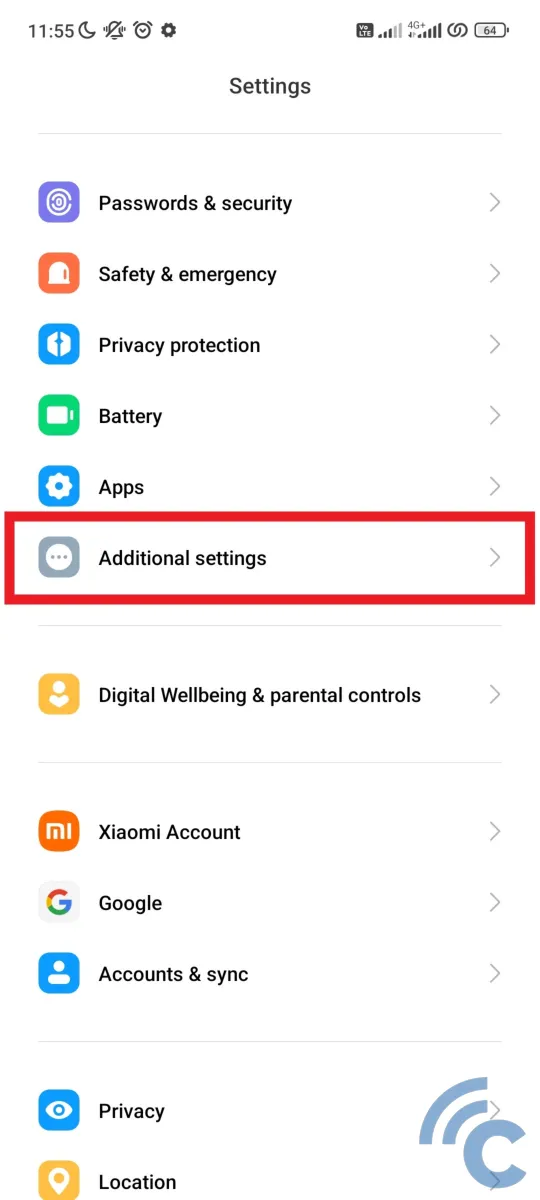
- After that, search and select the menu “Additional settings”.
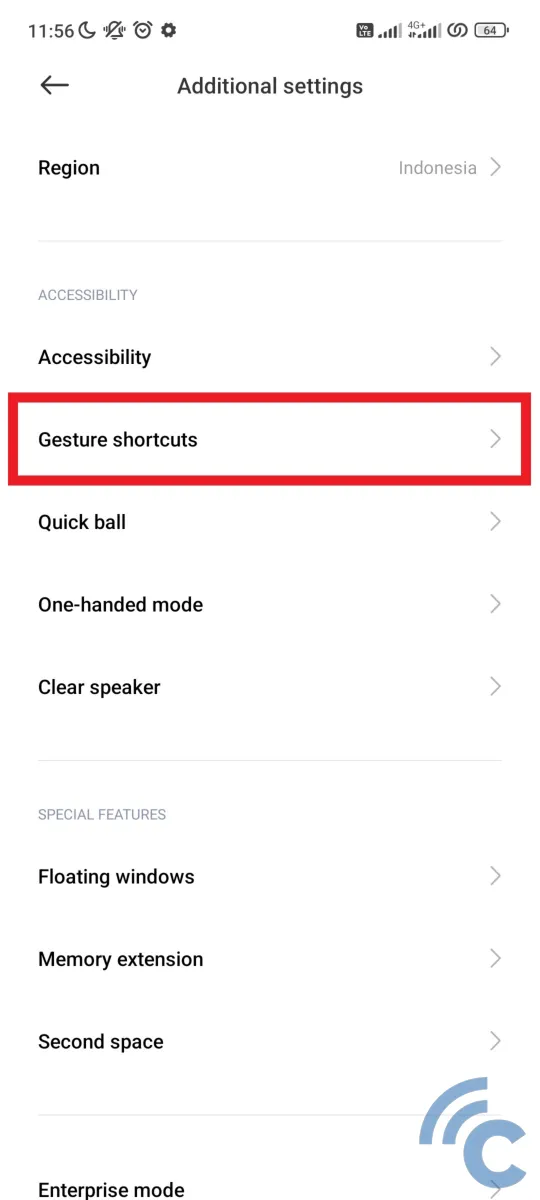
- Then, select the menu “Gesture shortcuts” to set the gesture.
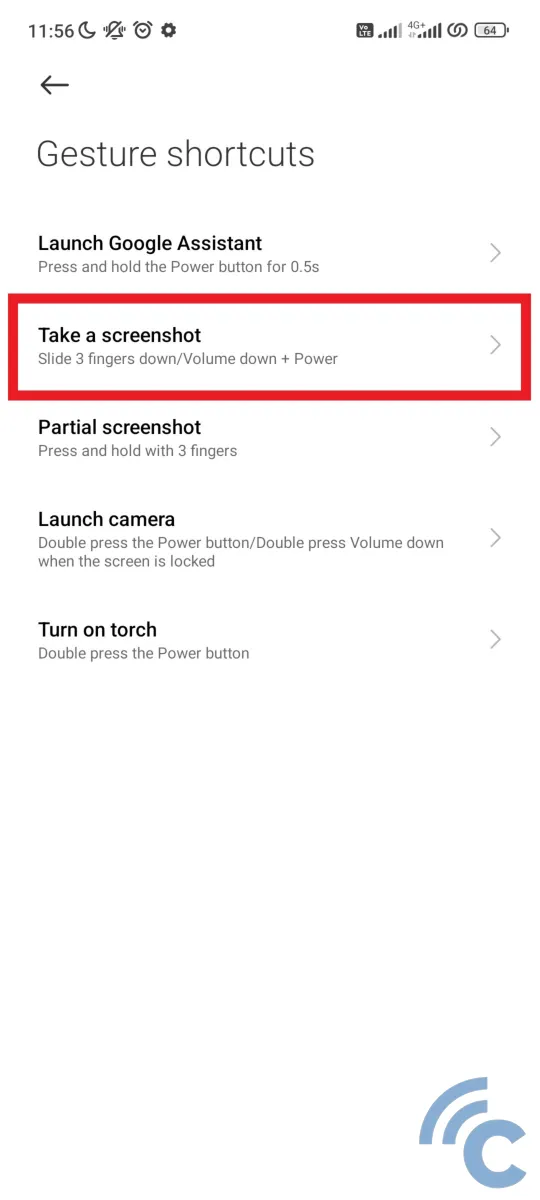
- In it there are several gestures that can be arranged and used.
- To set gestures screenshotplease select menu “Take a screenshot”.
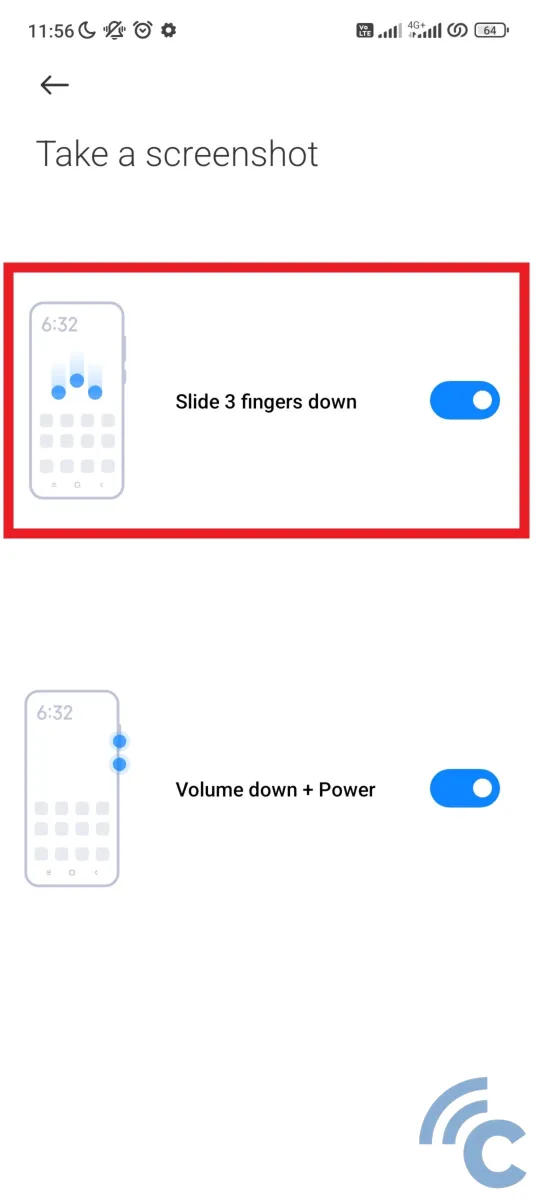
- You can activate it by pressing toggle next to the inscription “Slide 3 fingers down” and “Volume down + Power” (if not already active).
- Once active, please find the information you want to save first.
- To do screenshotswipe down on the screen using three fingers at a time.
- If successful, the screen will flash and show a preview of the result screenshot the.
4. Cara Screenshot Part, Long, and Edit
Apart from using the methods previously mentioned, you can also do screenshot partial, long, or edit it live. Interestingly, you can also use certain gestures to perform screenshot partially similar as when doing screenshot using three fingers.
The way to do it is also quite easy, so that it is more clear, please refer to the following steps.
- To do screenshot length, you can immediately use it.
- Please take screenshot in several ways described in this article.
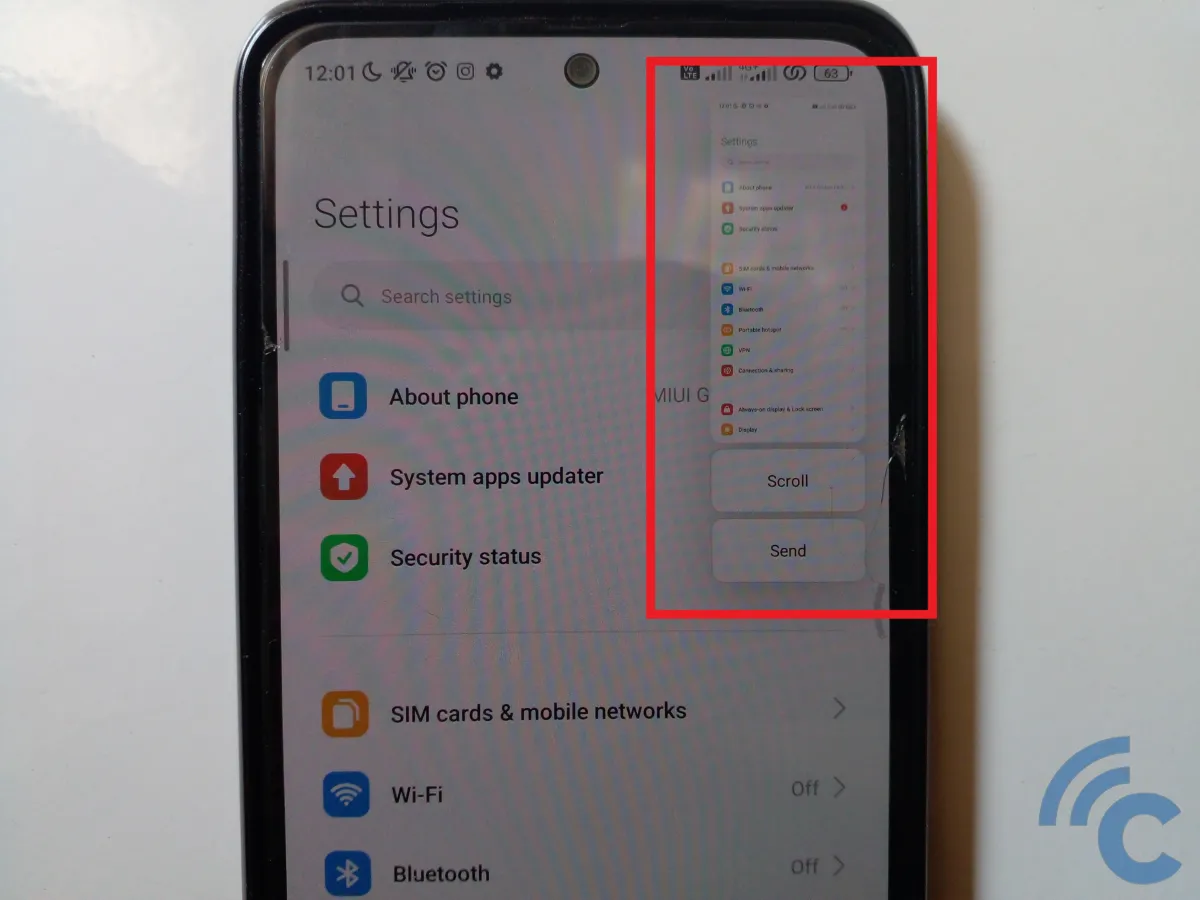
- Try to make sure that the page taken is long enough or can be shifted down, for example, conversation columns, web pages, social media homepages, and so on.
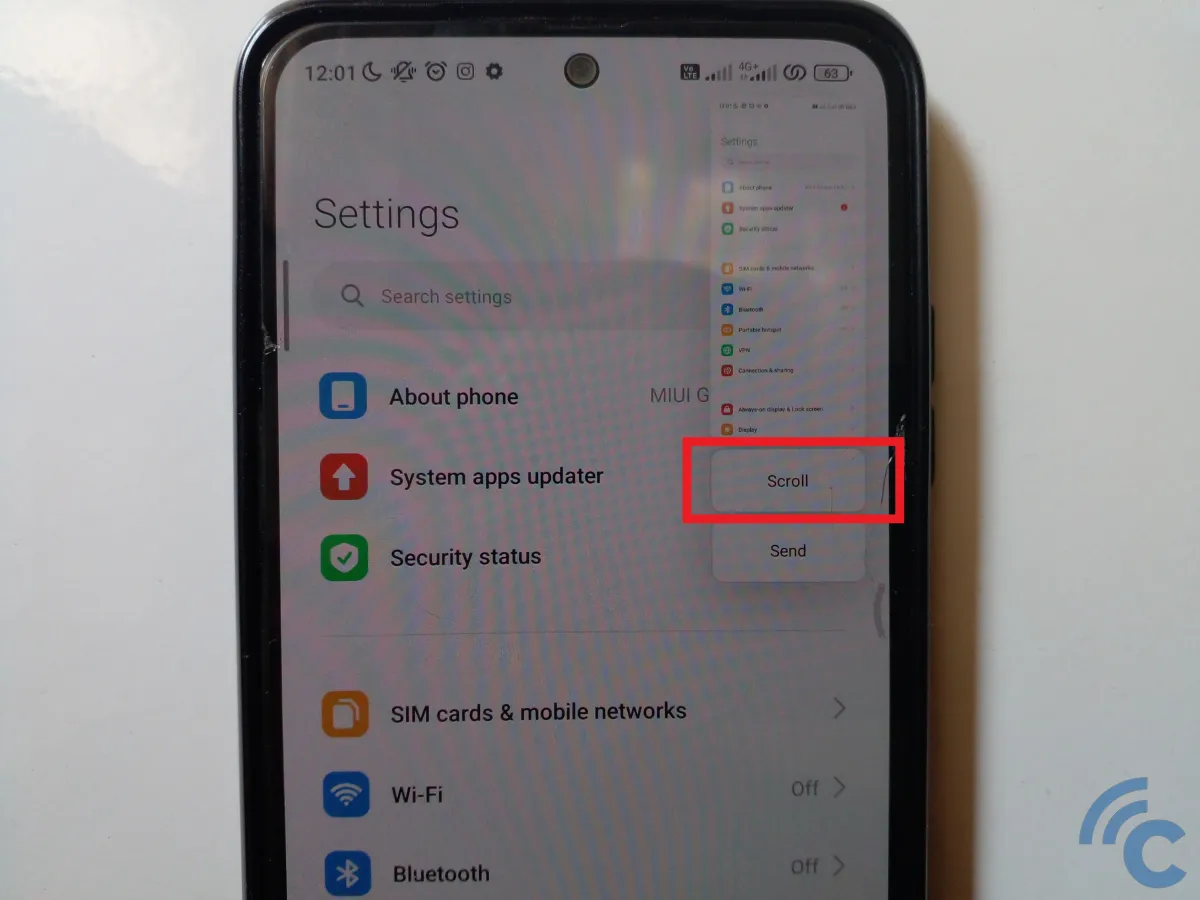
- After successfully doing screenshotplease press the button “Scroll” which is below the preview.
- You can freely swipe down as desired.
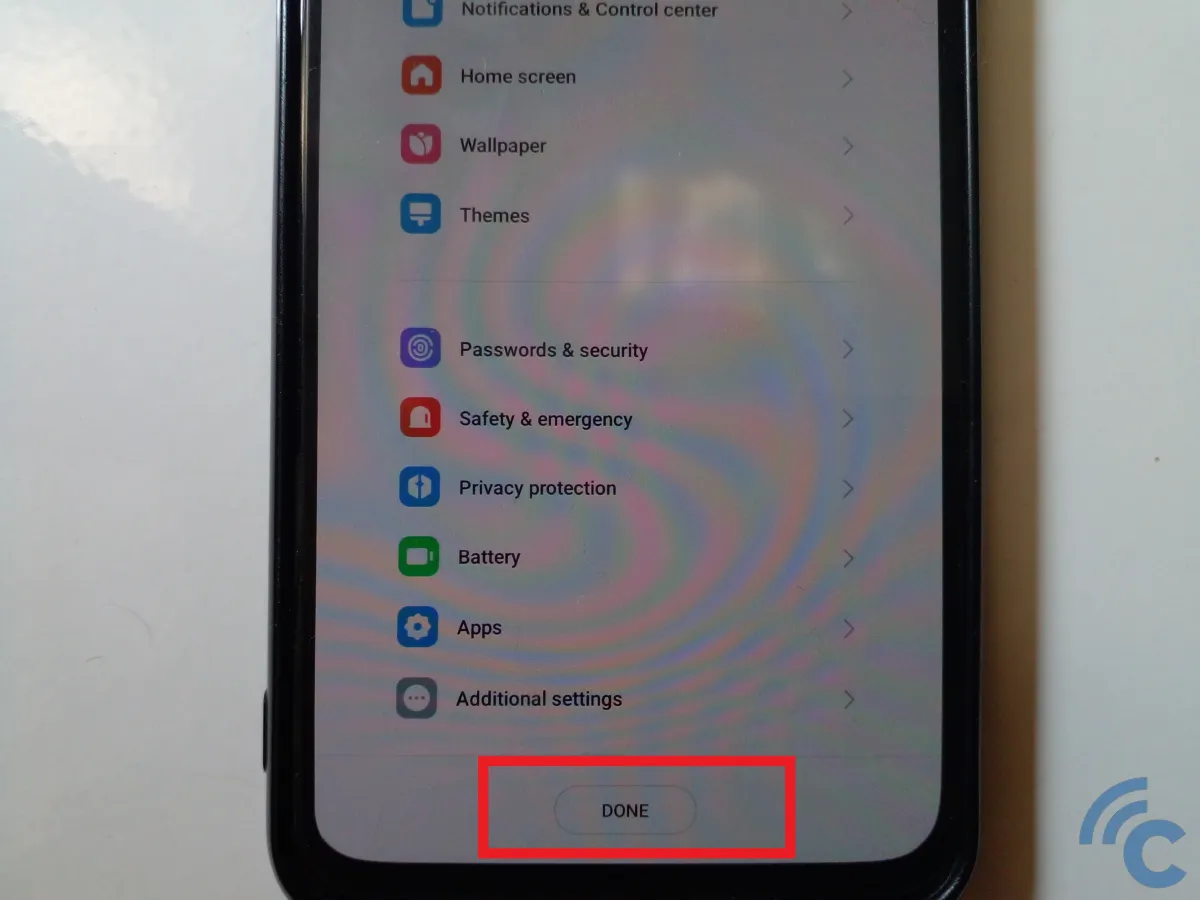
- When finished, please press the button “DONE”.
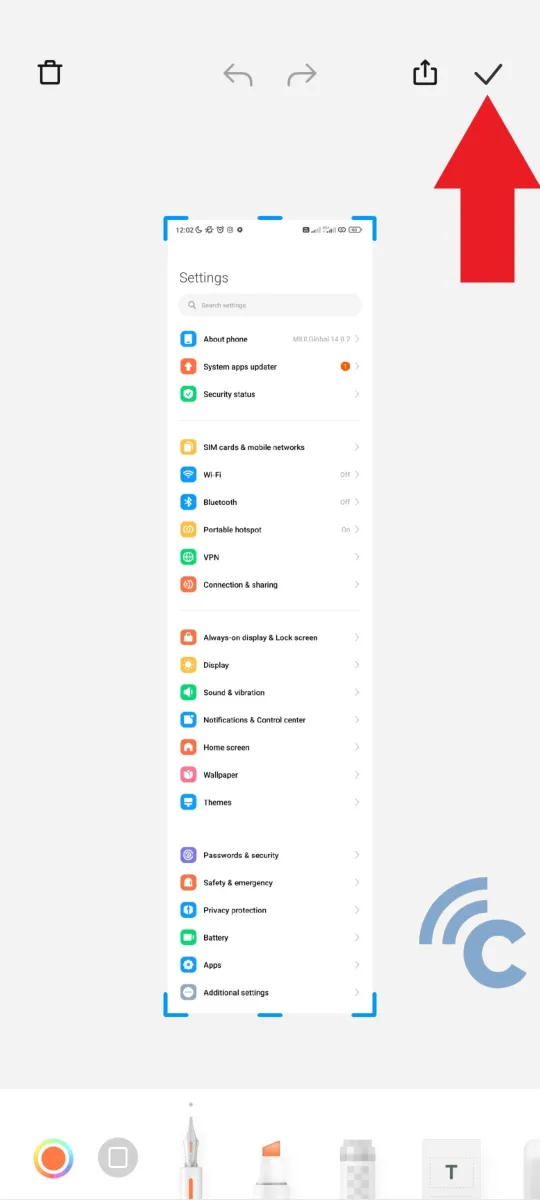
- Then, press the tick icon at the top right to save it to your cellphone gallery.