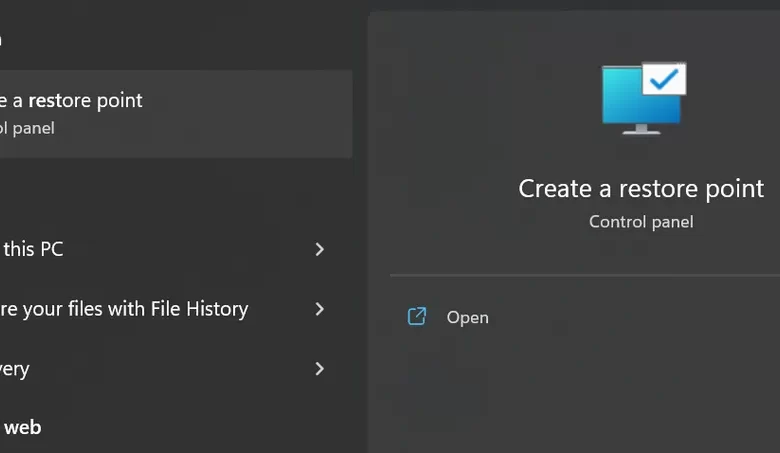
This is an easy and fast way to restore Windows 11
System restore is one of the features that Windows has as a preventive measure for its users. This feature is one of the most useful features for an operating system. By using features system restore In this way, you can repair your PC or laptop from various damage problems.
Therefore, Windows 11 as Microsoft’s newest operating system is also equipped with this feature. Even though Windows 11 is an upgraded version of Windows 10, this operating system still has a chance of crashing. This depends on how the user operates his own PC or laptop.
The damage that is most often experienced by Windows is usually caused by user errors. Starting from the wrong installation, to dangerous malware that enters suddenly due to unnecessary actions.
In fact, it is not uncommon for users who still don’t understand or understand about Registry Editor, even tinkering with these features carelessly. As a result, there are several features that are accidentally turned off or don’t work properly, even though they have quite an important role.
Therefore, before setting up or messing with something in Windows, it’s always a good idea to back up or create restore point first. If you have done a backup, you can do it right away restore on your Windows easily. So, how?
Don’t worry, before discussing how to do it restore on Windows 11, we will first explain how to make restore point first. Cause, action restore on Windows can not do without it restore point. So, please refer to the following steps.
How to Create a Restore Point in Windows 10
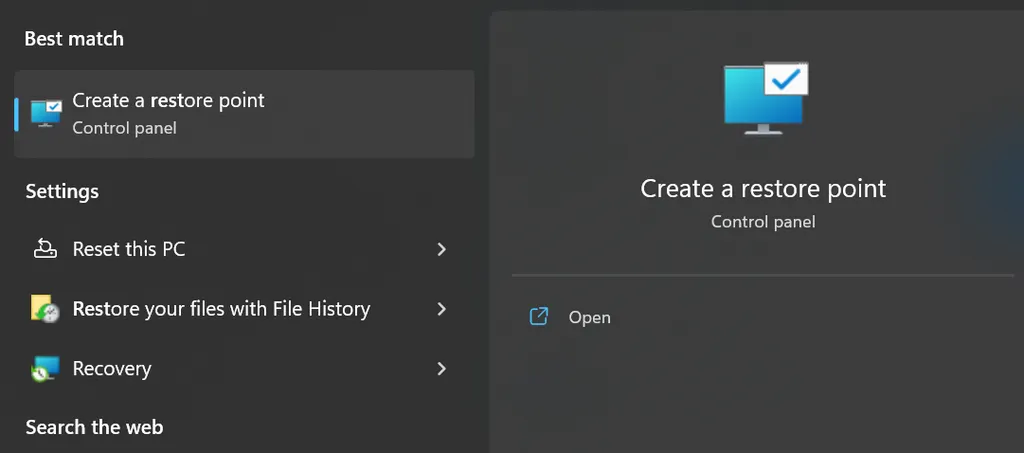
Restore point is one of the backup features frequently used by users of the Windows operating system. This feature already exists from previous generations of Windows. Because this feature is considered useful, Windows 11 finally reinstalls it in the operating system.
As is restore point this, you are free to make changes to your Windows settings. If instead a problem occurs or fails to achieve results, you just have to go back to restore point this. That way, the changes that have occurred will be canceled and Windows is in normal condition.
If you are curious about how, please refer to the following steps.
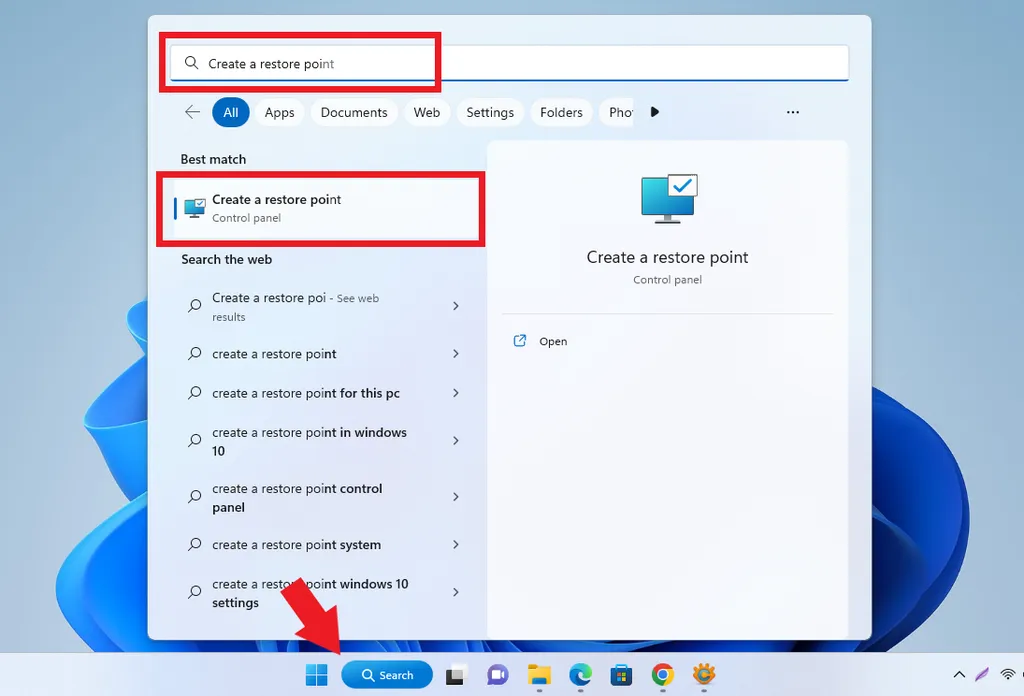
- The first step you have to do is to open “System Properties” through the menu “Start/Windows” on the Taskbar.
- After that, search “Create a restore point” in the search field, then open it.
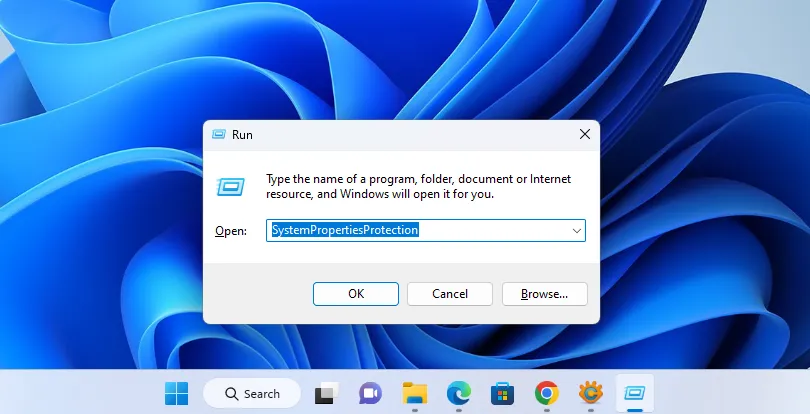
- Apart from going through the menu Start/Windowsyou can also open System Properties through shortcut on keyboard namely by pressing a button “Windows+R”.
- After that write “SystemPropertiesProtection” then press Enter or select OK.
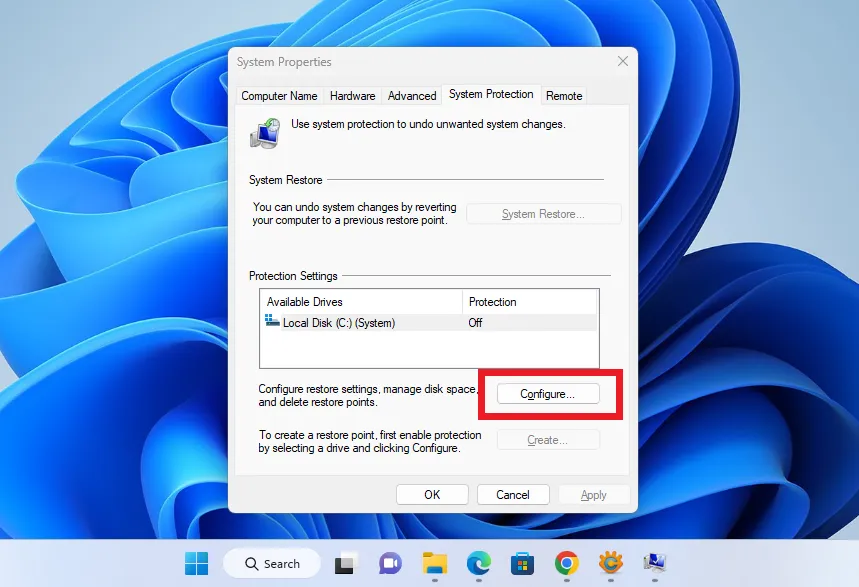
- After successfully opening, select drive C as where the Windows system is located.
- Then choose a button “Configure..”.
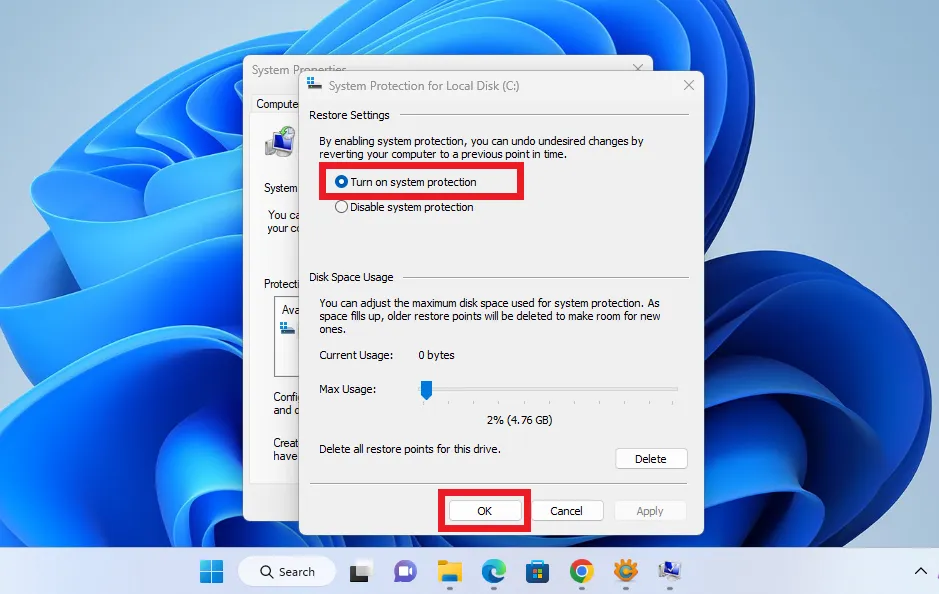
- To activate restore point on C drive, please press option “Turn on system protection”.
- You can also set the maximum allocation from file restore the. However, you can ignore it to set automatically default by the system. Then choose “OK”.

- If system protection If the drive is on, a description will appear “On” next to the drive earlier.
- After that, please press the C drive again, then press “Create…” to start the build process restore point.

- Give a name for restore point so that it is easy to remember and find. If so, please press “Create”.
- Please wait a few moments until the process is complete. When finished, a notification window will appear that the creation process restore point have been successfully.
After successfully creating restore pointyou can freely restore the system settings to when restore point it was made. Even so, you must pay attention to the risks that may occur if you take excessive or dangerous actions.
After finishing discussing how to make restore point in Windows 11, let’s move on to the main discussion which is how to do restore in Windows 11. The following is an explanation and steps.
How to Restore Windows in Windows 11
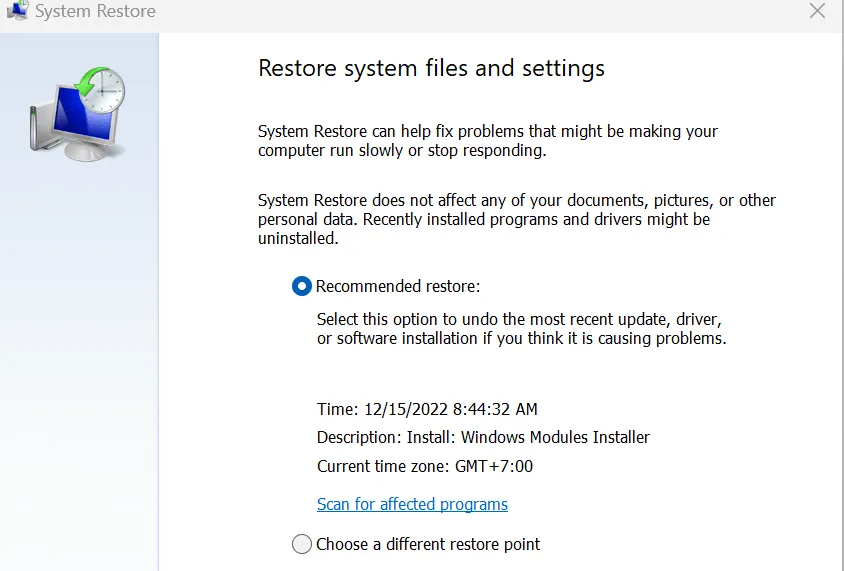
Previously, we have successfully created restore point in WIndows 11. Now, because it already exists restore pointyou can do restore Windows on your Windows 11. It should be noted that to do this method, Windows 11 used on your PC or laptop must be able to boot or enter the system.
If possible, please refer to the following steps.

- The first step to take is to open “System Properties” through the menu “Start/Windows” on the Taskbar.
- After that, search “Create a restore point” in the search field, then open it.

- Apart from going through the menu Start/Windowsyou can also open System Properties through shortcut on keyboard namely by pressing a button “Windows+R”.
- After that write “SystemPropertiesProtection” then press Enter or select OK.
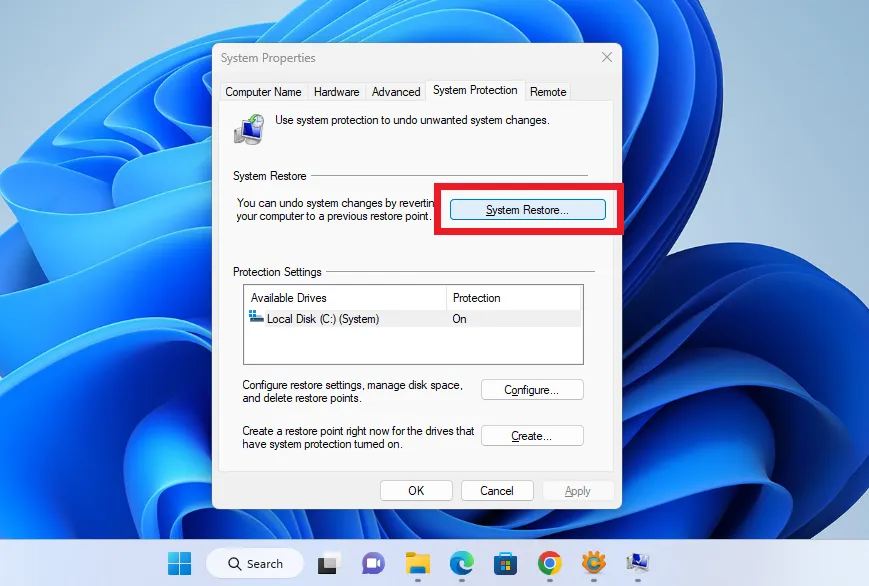
- After that, please choose “System Restore…”.
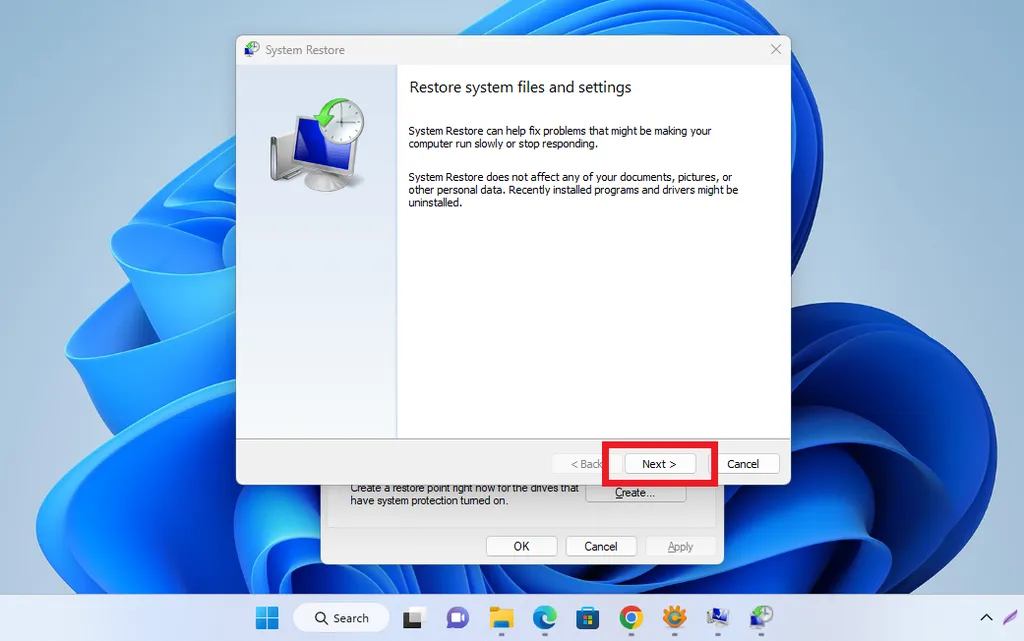
- Select “Next” to open a window system restore.
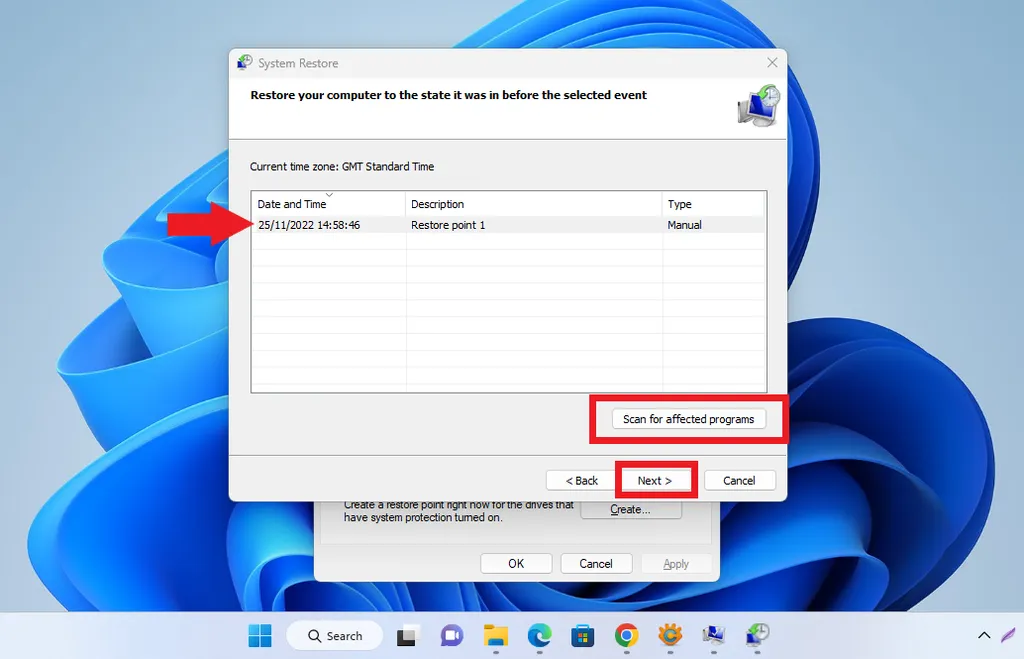
- After window system restore open, please select restore point which was made before.
- If you have time to make some restore pointyou can tell by the name given to it, or by a description of the time it was created restore point the.
- Before that, you can also press the button “Scan for affected program” to see what changes will occur after committing restore point.
- If you already understand what changes will occur, please press “Close” to close the window.
- After that, press “Next” to keep doing restore on restore point the chosen.
- As a final warning, a window will appear asking for approval before processing restore done.
- Please wait for the process to finish. Then press “Finish” to end it.
Well, that’s how you can go about doing it restore Windows in Windows 11 uses restore point. Process restore usually depends on how many changes have to be made since restore point is created.You can create restore point this several times at regular intervals, so that Windows doesn’t go too far back when it commits restore. Good luck.


