How to Split Laptop Screen into 2 in Windows 7, 10, and 11
How to divide a laptop screen into 2 is relatively easy. You can also use this feature on all versions of the Windows operating system. So, in this article, I will explain how to split the screen into 2 in Windows 7, 10, and 11.
How to Split Laptop Screen into 2 in Windows 7 and 10
To split the screen into 2 in Windows 7 and 10, there are two ways you can do it. Read the full discussion here.
1. Using the Cursor
There are ways that can be used to divide the laptop screen into 2 in Windows 7 or Windows 10. One of them is by using a cursor. These are the steps:
- First, please open the application or program that you want to pin on the screen.
- Move the cursor to the top row parallel to the button minimize and close from the application.
- Click and hold on mouse or touchpad.
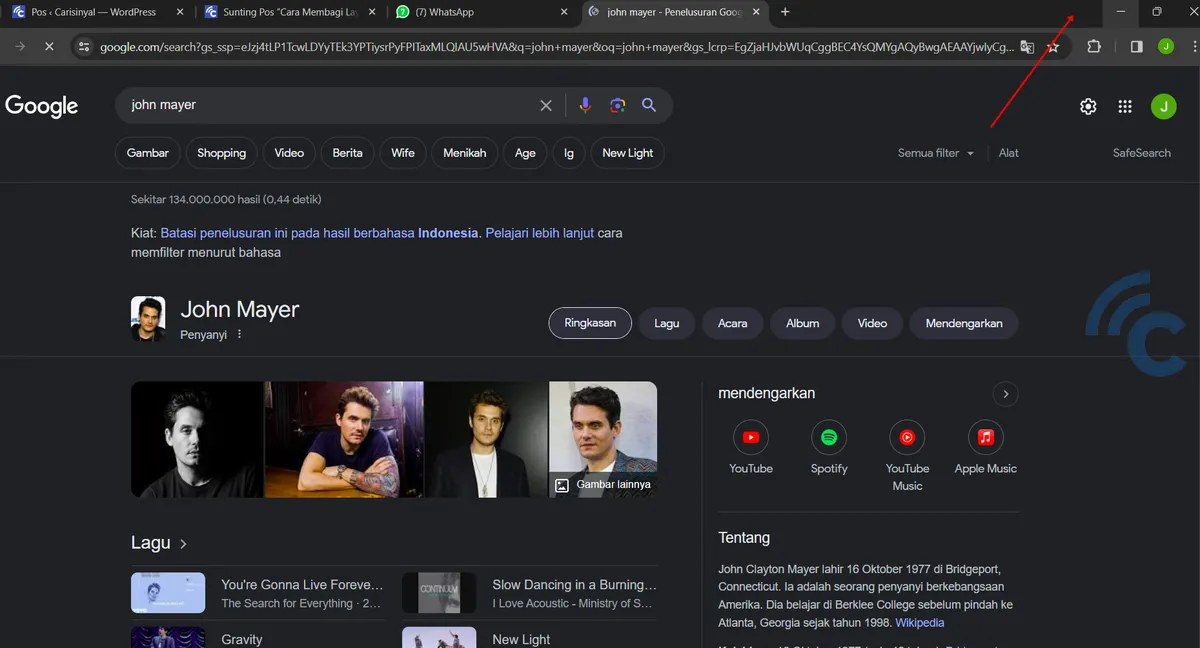

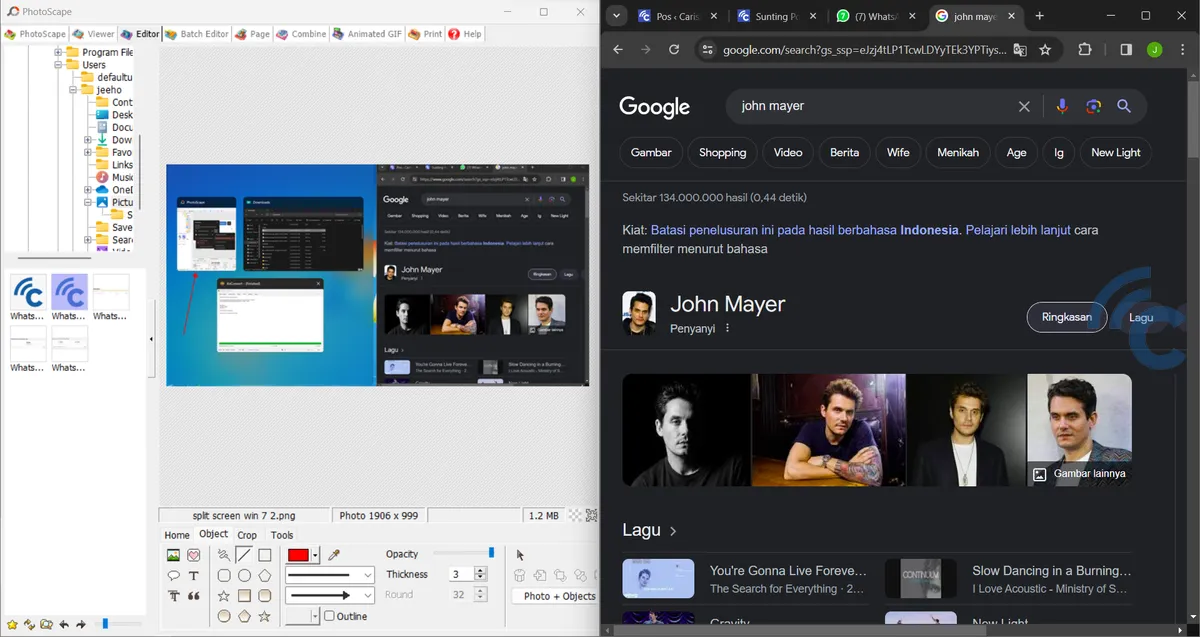
- Drag the app to the right or left according to your needs until the size becomes half the screen. For Windows 7 users, just do the same steps for other applications.
- So, on Windows 10, there is a Snap Assist feature. So, when you split the screen by dragging the first app, thumbnail Other running applications will appear. You live select and click the second application you want to display on the screen.
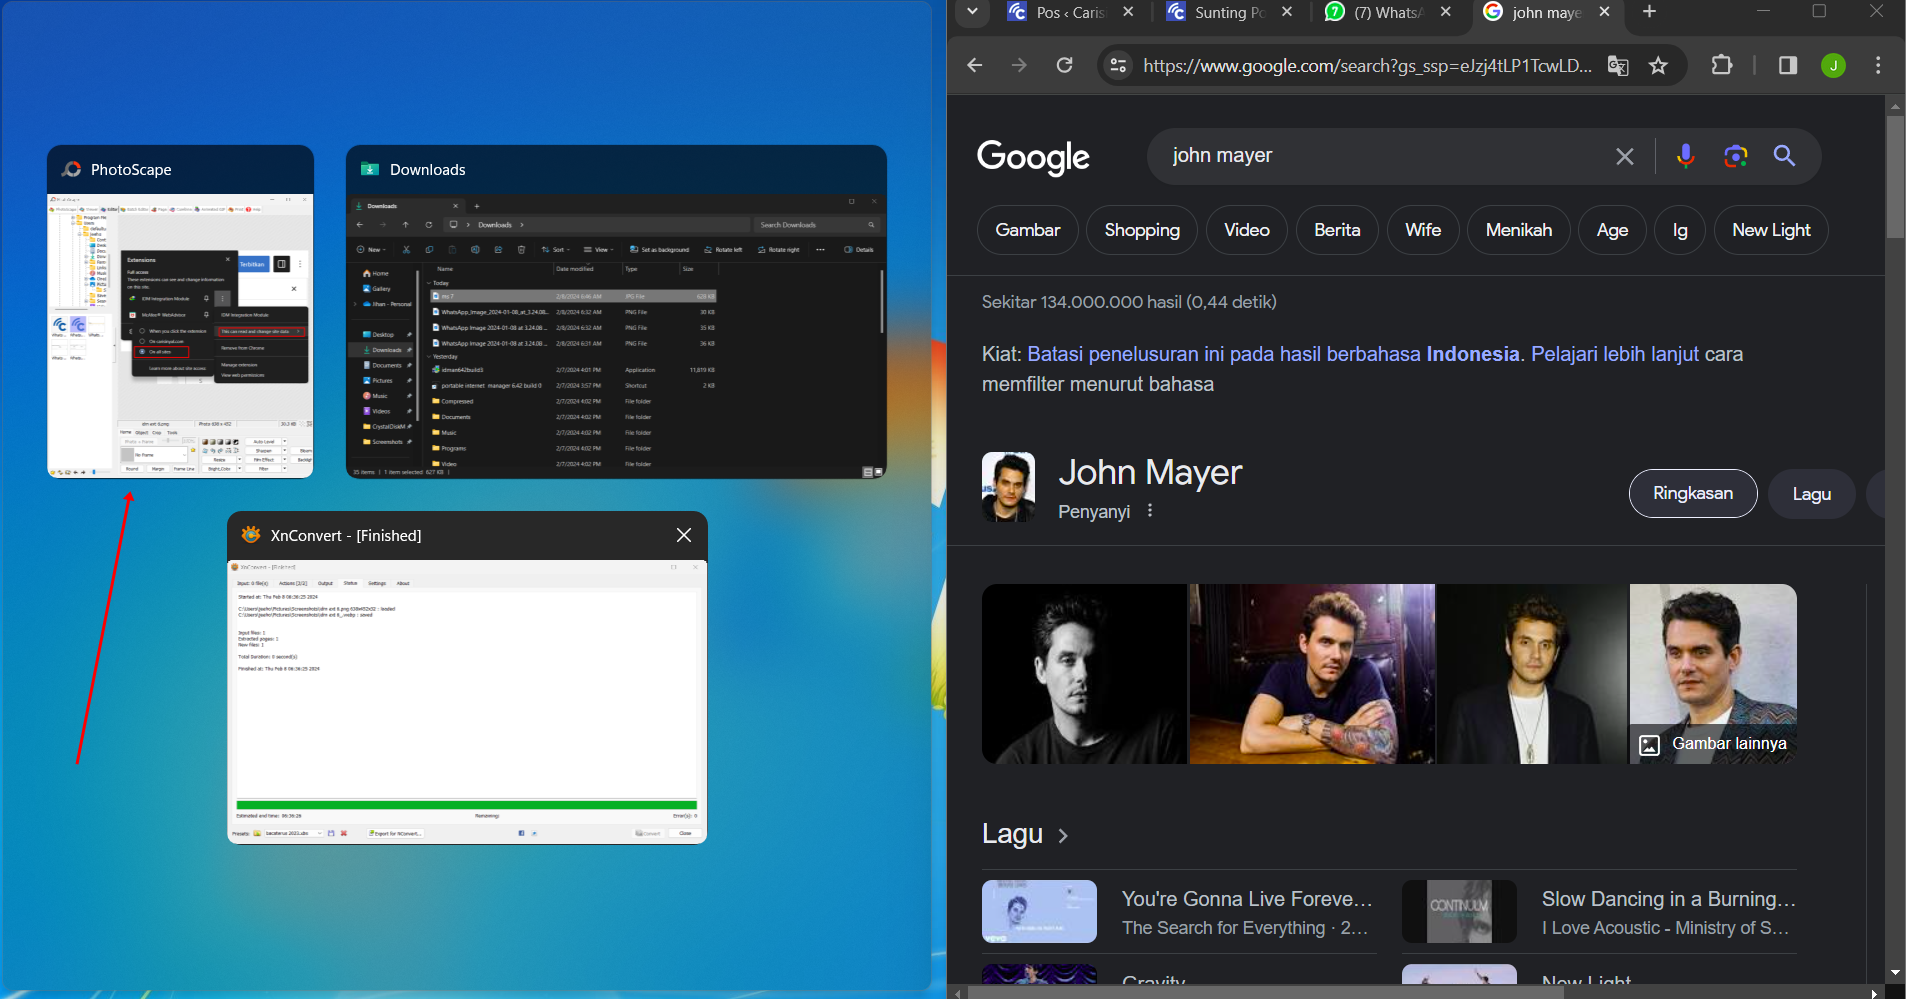

- That way, you will see the two applications or programs directly. You can also add 2 other applications, so the screen can be divided into 4 parts. It's just that the size of each part of the screen has become smaller.

2. Using Keyboard Shortcuts
Apart from dividing the laptop screen into 2 using the cursor, you can also divide the laptop screen using shortcut windows. This method can be practiced on Windows 10. To make it clearer, please see the following steps:
- First, please open two or more applications or programs that you want to use on your laptop.
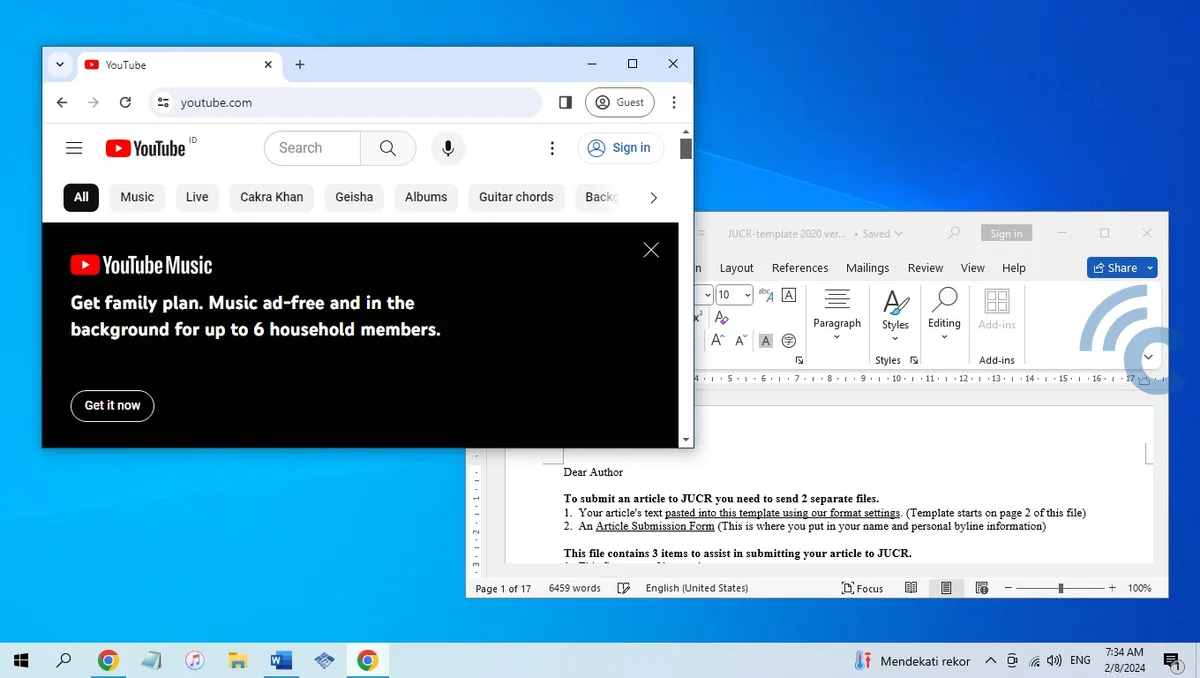

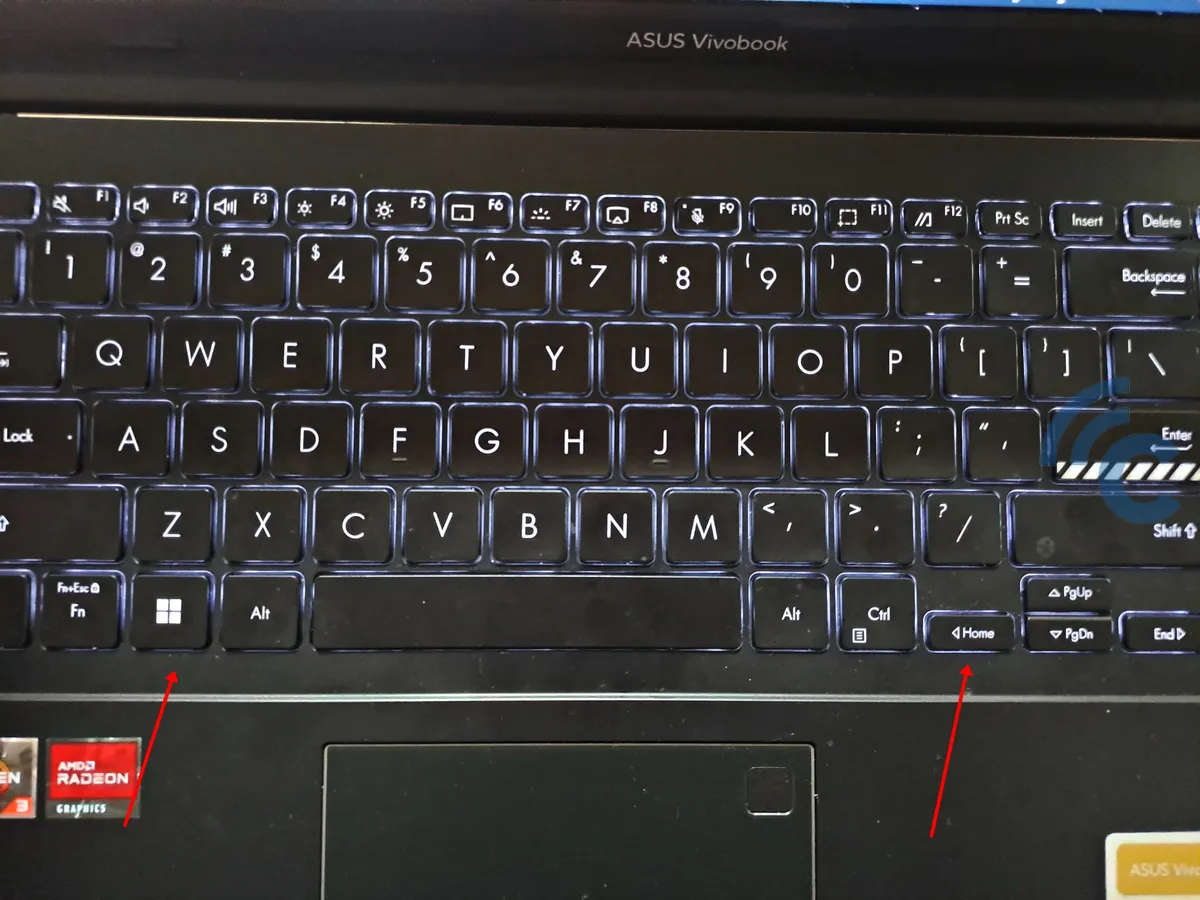
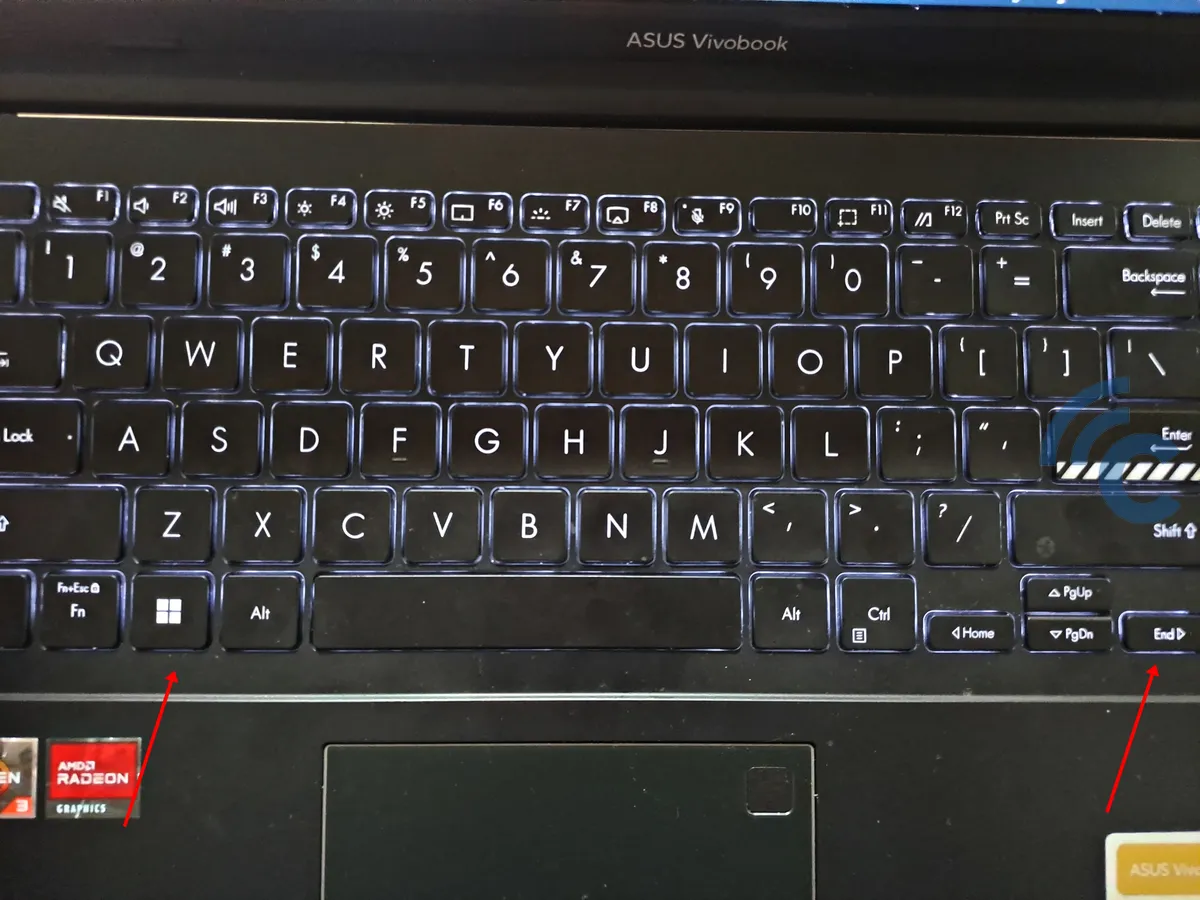
- Select or open the first application, then press Windows key and left or right arrow on the laptop keyboard simultaneously. For example, I moved the application to the left.

- After that, the application or program will automatically become half of the screen on the left.
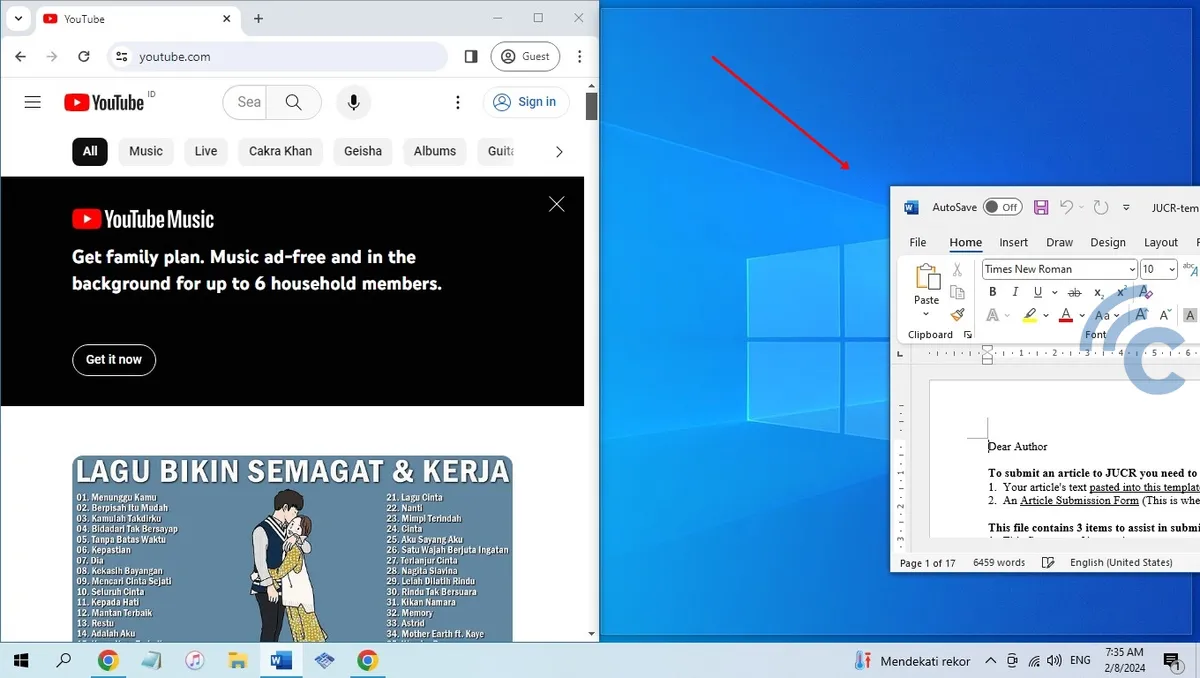

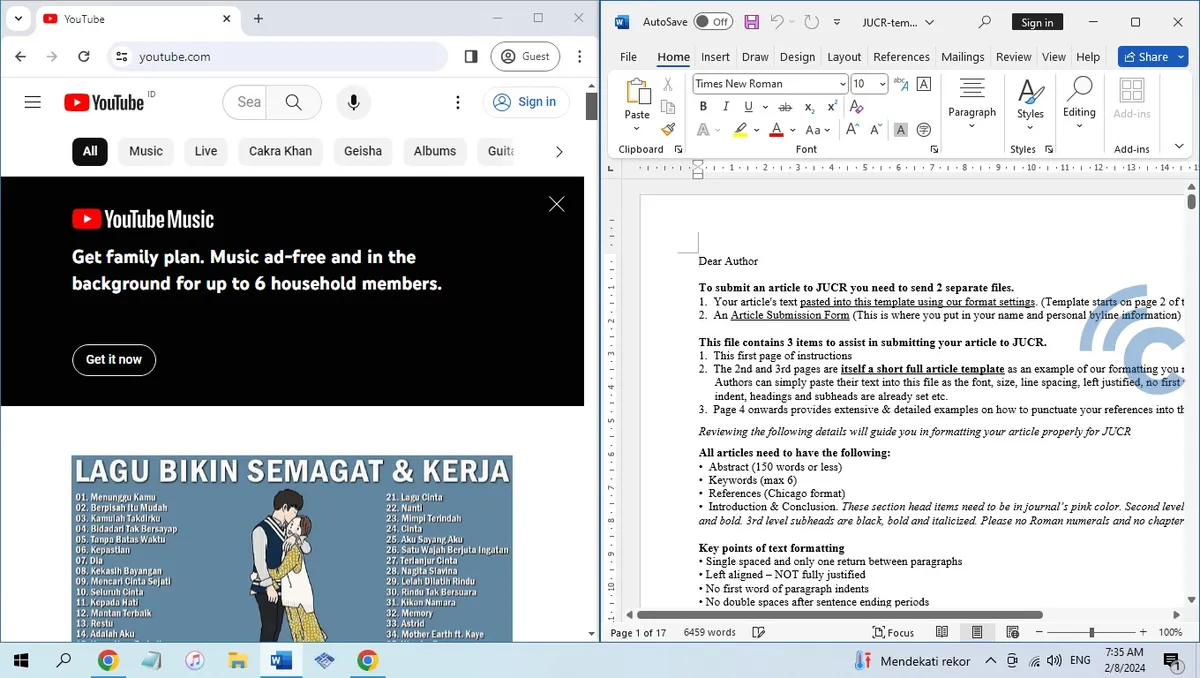
- Open the second app and press Windows key and arrow to the right.

- If you do it correctly, the second application will fill the other half of the screen.

- You can Press the Windows key and the down arrow to reduce the size of the application window.
- To resize a window that has been reduced, you just have to Press the Windows key and the up arrow.
How to Split Laptop Screen into 2 in Windows 11
For those of you who have a Windows 11 laptop, you can now share the laptop screen using the Windows Snap feature. This feature will make it easier for you because it has several modes to display two or more applications on one screen.
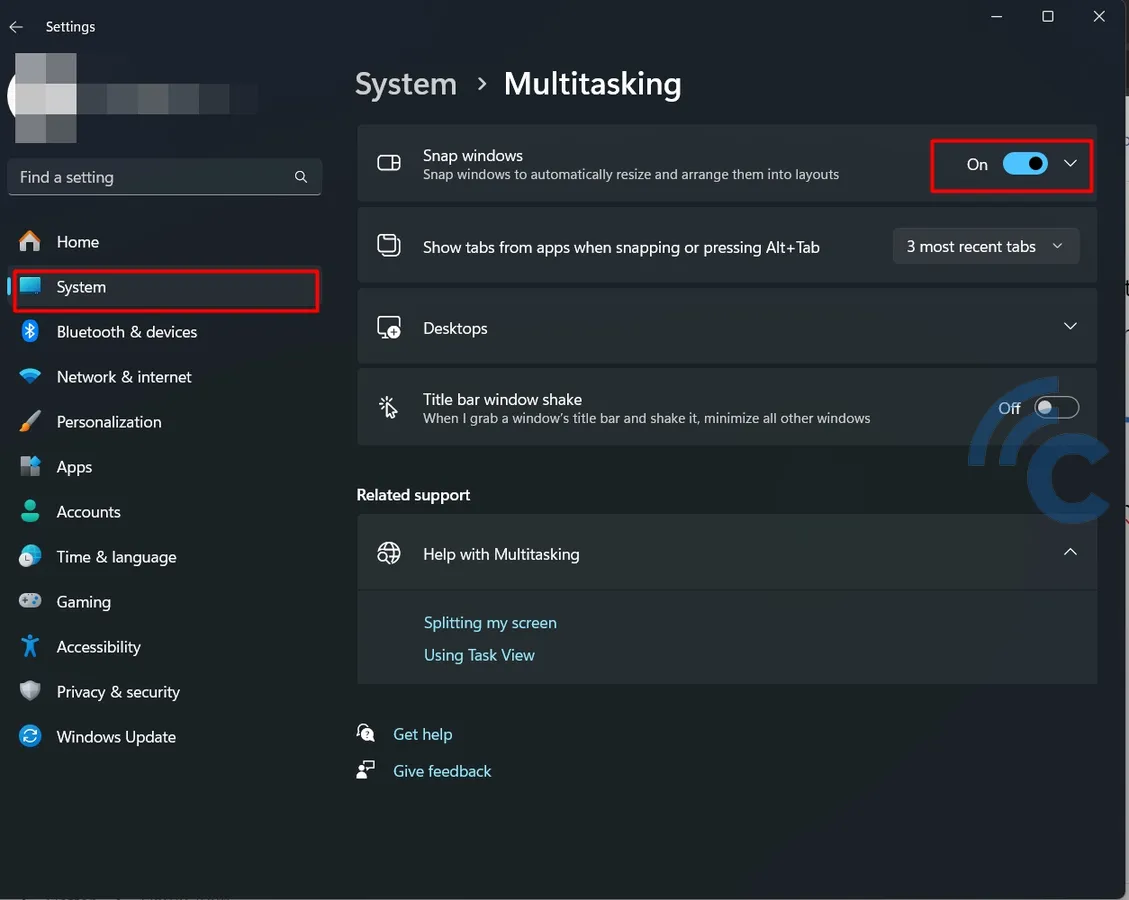

To activate this mode, please go to Settings > System > Multitasking > enable Snap Windows. If it is active, you can immediately use this feature to split the screen into two or more. Check out the following steps for more clarity.
- The first step, please open the application you want to use.
- Place the cursor on the button maximize which is between the buttons minimize and close.
- It will appear later pop up Snap Layout menu below the button maximize.
- Select the desired mode, be it two, three, or four.
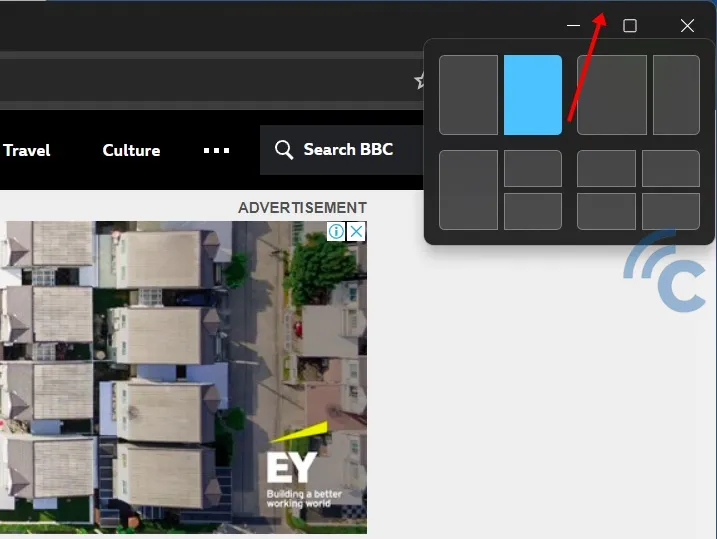

- After that, the application will be moved automatically to the desired position.
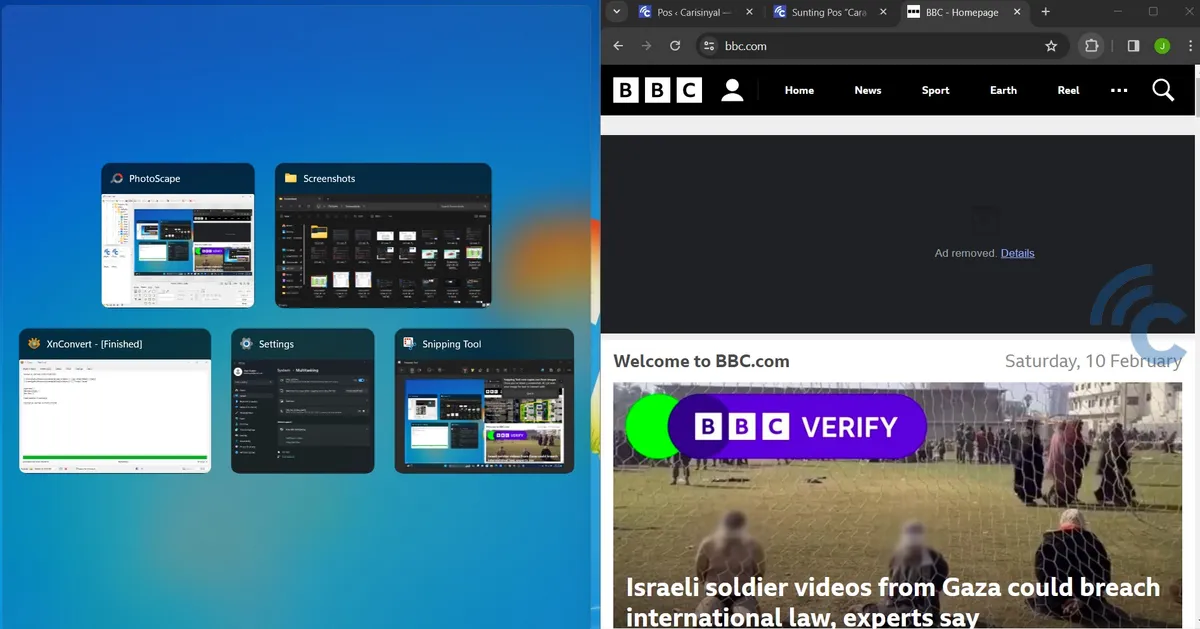

- Select another app to fill the rest of the screen space. For example, I chose PhotoScape.
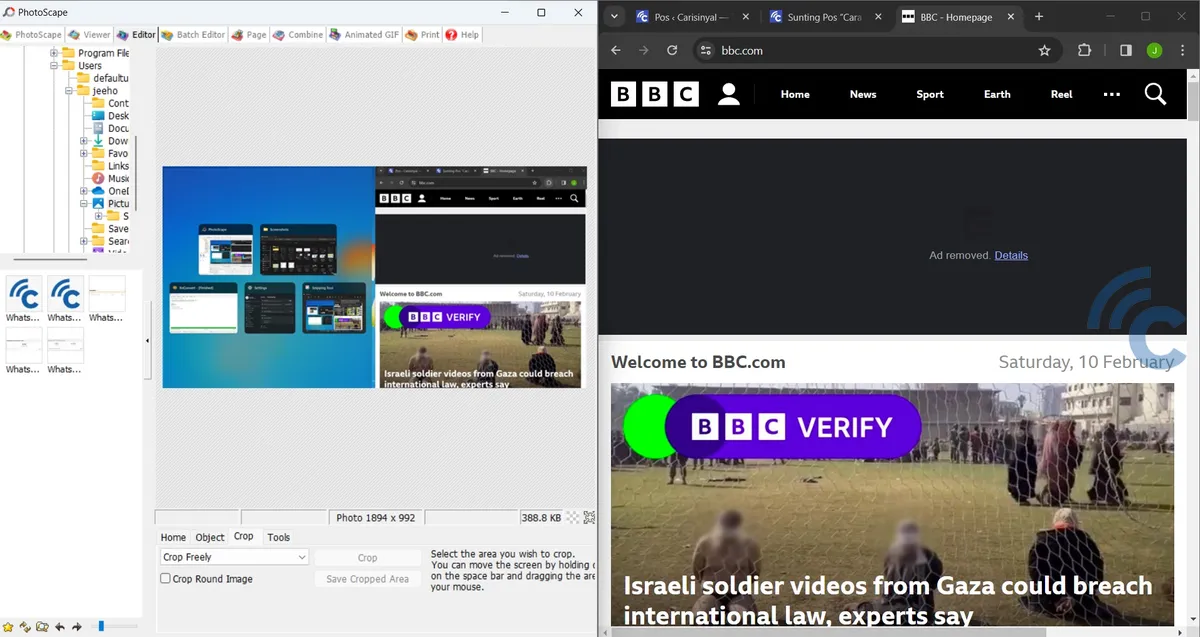

Apart from that, you can still use the same method as for Windows 10. Starting from using the cursor or shortcut to make it easier and faster.
So, those are several methods that can be used to divide the laptop screen into 2 or more. You can do this for Windows 7, 10, or 11 operating systems. With this feature, you can work more productively and complete work faster. This is the end of the discussion for now and good luck.


