6 Ways to Resolve an SD Card That Can't be Formatted
SD card or secure digital card is a flash memory card that is very important nowadays. This tiny card is usually used as a place to store files in the form of photos or videos on portable devices such as digital cameras, cell phones, and others.
SD cards come in three different sizes, namely SD Card (regular), miniSD, and microSD. You can visit the article on the differences between SD Card, miniSD and microSD to make it clearer. What Android phones use today is microSD.
One of the problems often experienced by SD card users is that it cannot be formatted. Many things cause that to happen. For example, like being exposed to a virus, the components are starting to get old, dirty, or just worn out-lock. However, you don't need to worry because an SD card that refuses to be formatted can still be saved.
Check the condition of the SD card
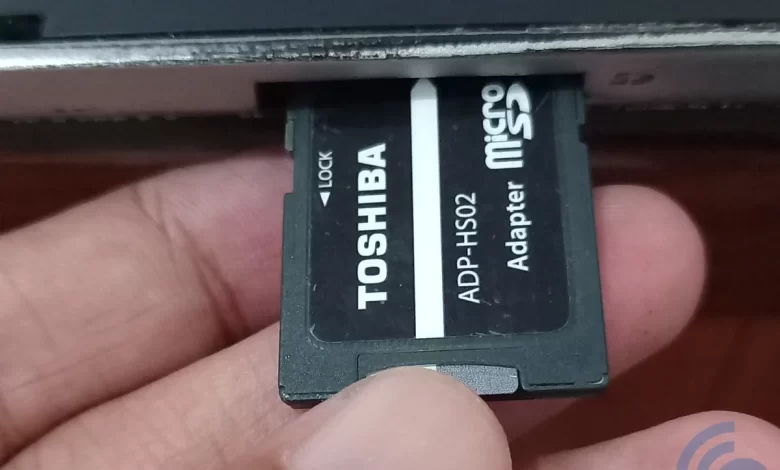
In some cases, the SD Card refuses to be formatted by displaying the notification “the disk is write protected“. This happened because the SD Card was locked, aka locked. So before you try to format, you should check the condition of the SD Card first.
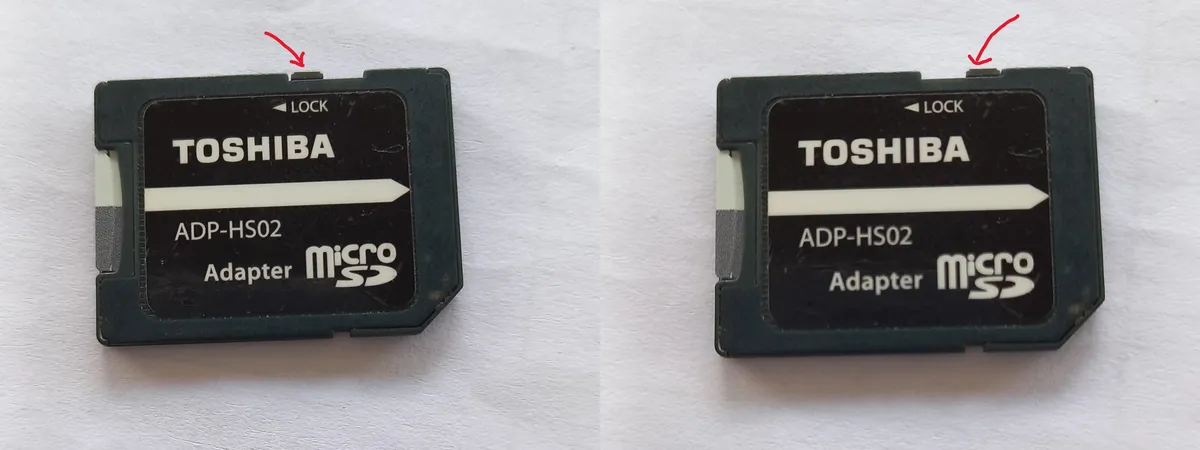

If it is locked, unlock it first, then format it in the usual way. If it doesn't work, please try the various formatting methods below.
How to solve an SD card that cannot be formatted
If the SD card experiences problems during processing formatting data, don't rush to throw it away, OK! It is possible that the damage suffered is not so severe that it can still be saved. Remember, the format process will delete all data on the SD Card.
So you need to back up the data in it first. After that, you can try the following formatting methods.
1. Use another cellphone or camera
Sometimes the device you are using cannot read the SD Card. Then you can install the SD card into another device such as a cellphone or camera. When the SD Card can be read, immediately back up stored data and format it.
The following tutorial uses the Samsung Galaxy M22 cellphone. The steps I have outlined here can be used as a reference, but they may be slightly different from what you have experienced. Here's how.
- Insert the SD Card (microSD) into the cellphone.
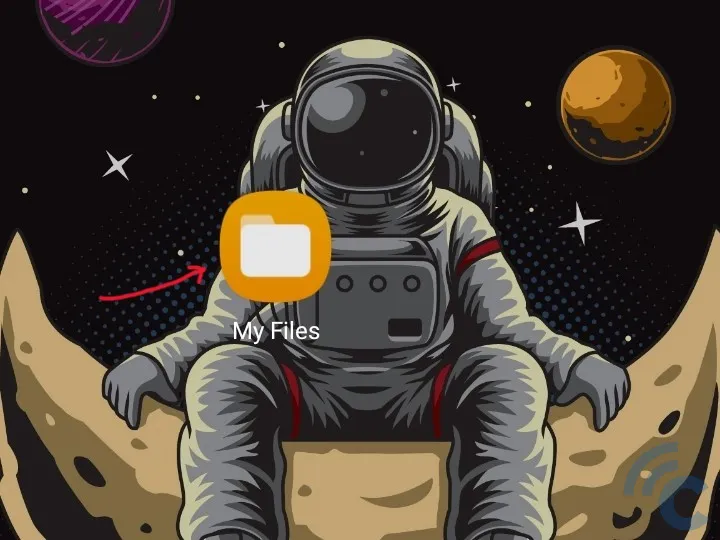
- After the cellphone recognizes the installed SD Card, open the file manager application. On Samsung cellphones, the application is called “My Files”.

- On the very first screen, look for “SD Card”.
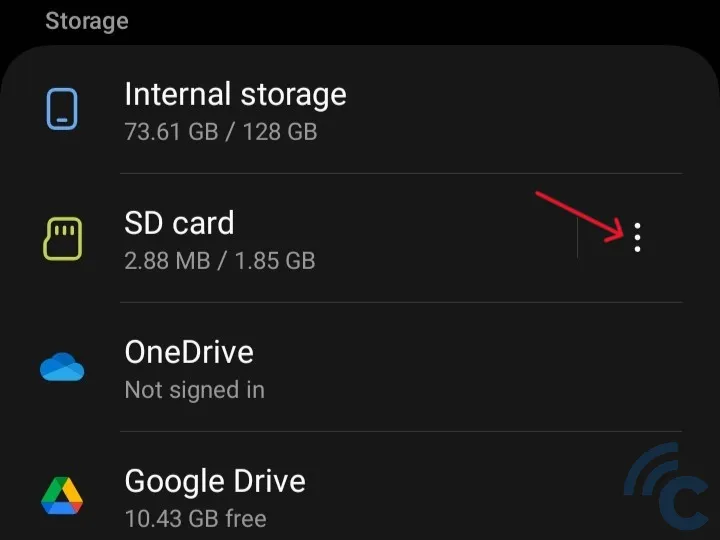

- Click the three dots button to the right of the SD Card.
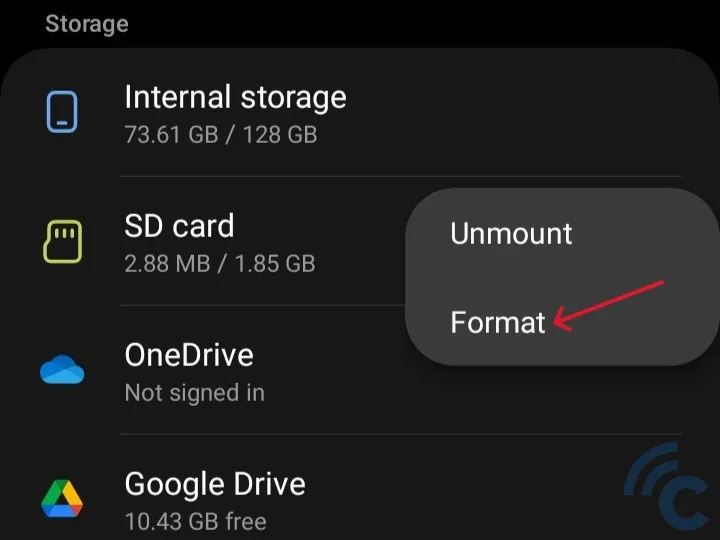

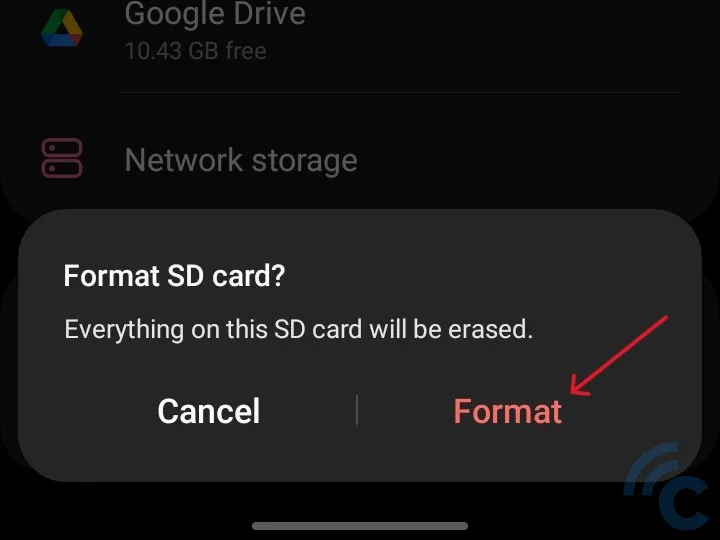

- Select “Format” and wait a moment.
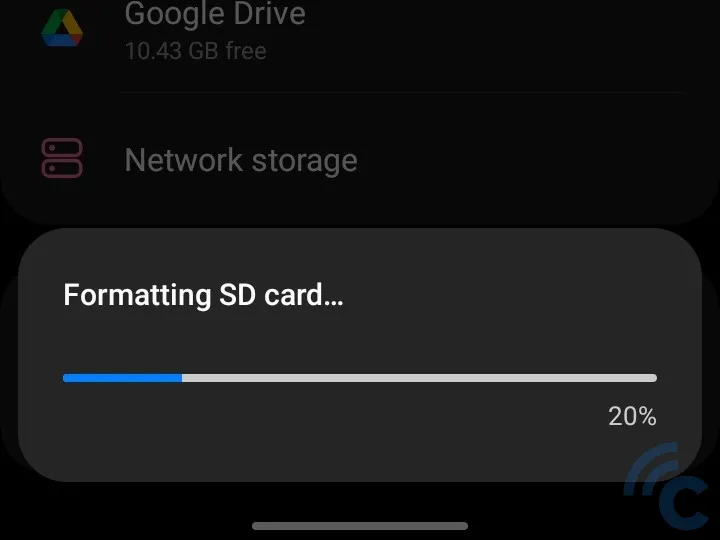

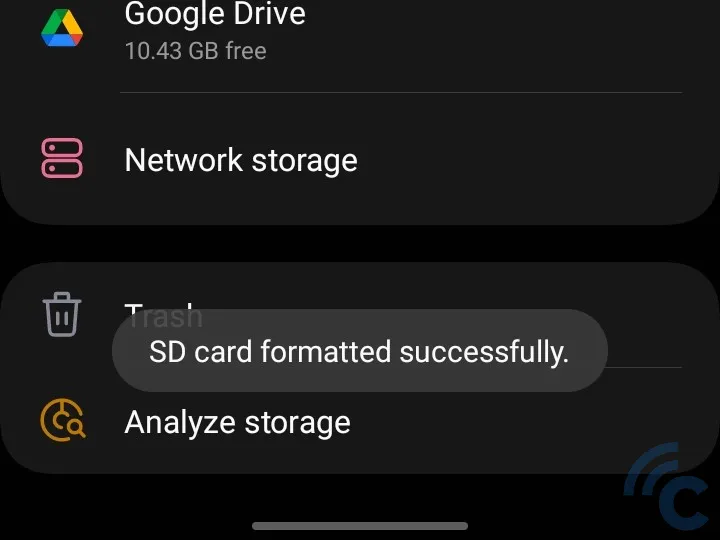

2. Use the Android application
Apart from formatting with the default HP file manager, you can also format with third-party applications. In this tutorial the application used is Files made by Google. You can download it at Play Store.
Follow these procedures to format the SD Card with the Files by Google application.
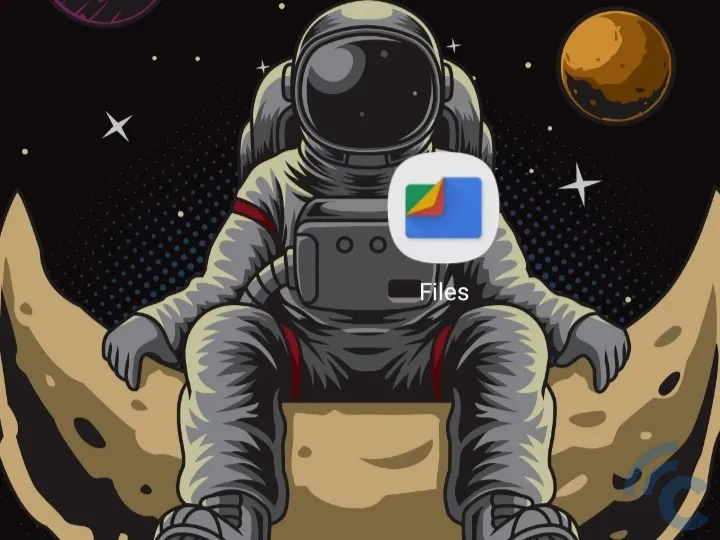
- Open the Files application that you installed.

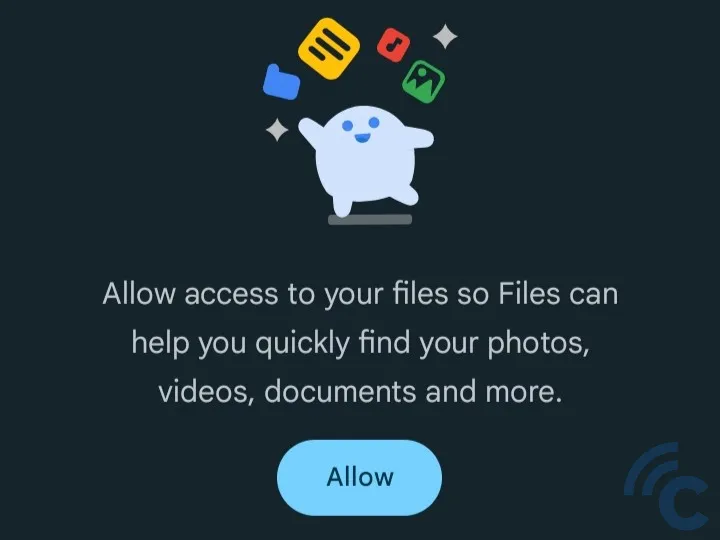
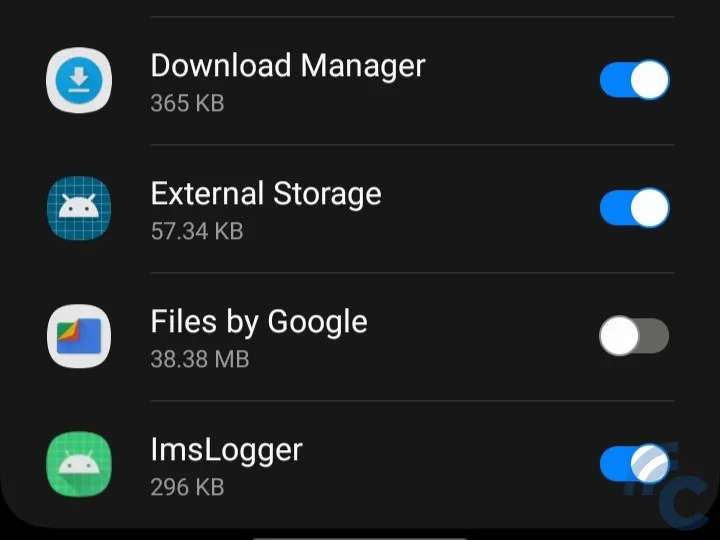
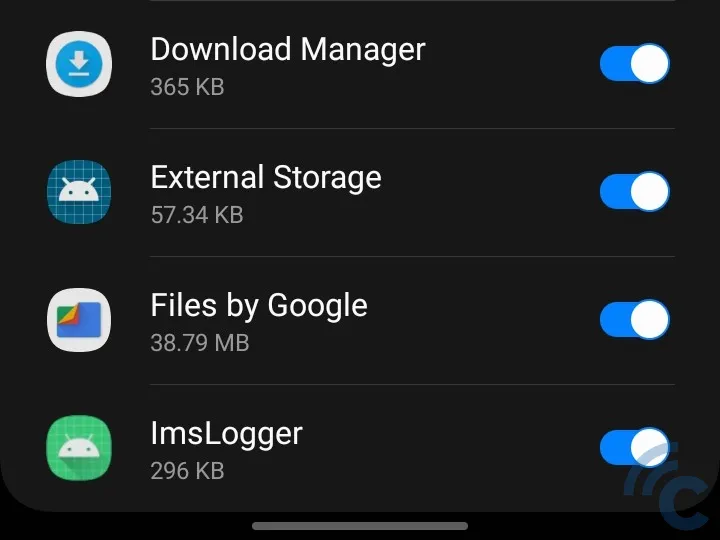
- Give permission so that the application can access all files on the cellphone. To do this, click the “Allow” button, then slide the switch to the right.



- On the very first screen, swipe down and find “SD Card”.
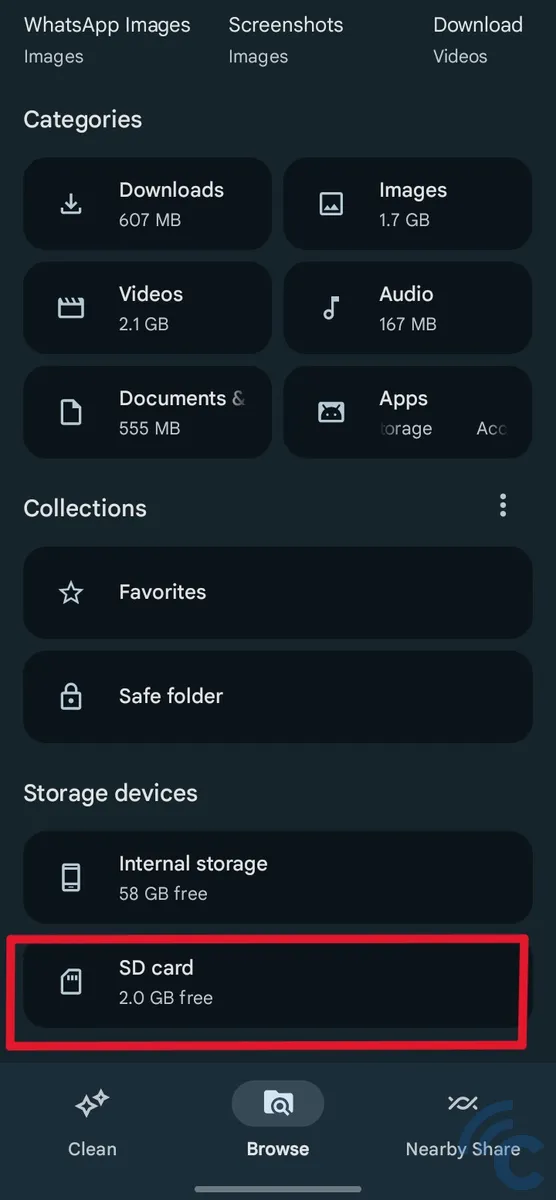

- Click SD Card.
- Click the three dots button to the right of the SD Card.
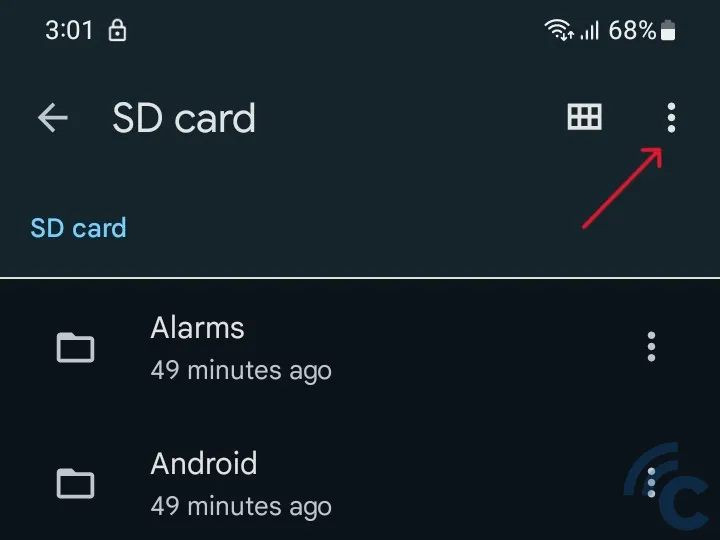

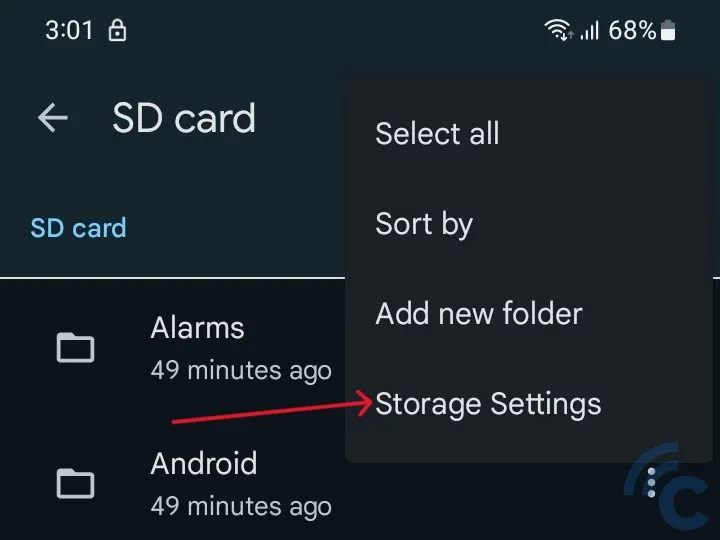
- Select “Storage Settings”.

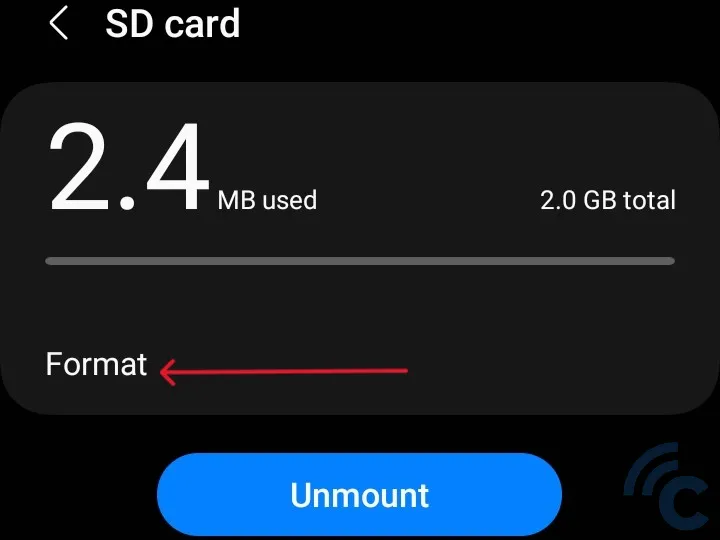
- Click “Format”, then select “Format SD card”.

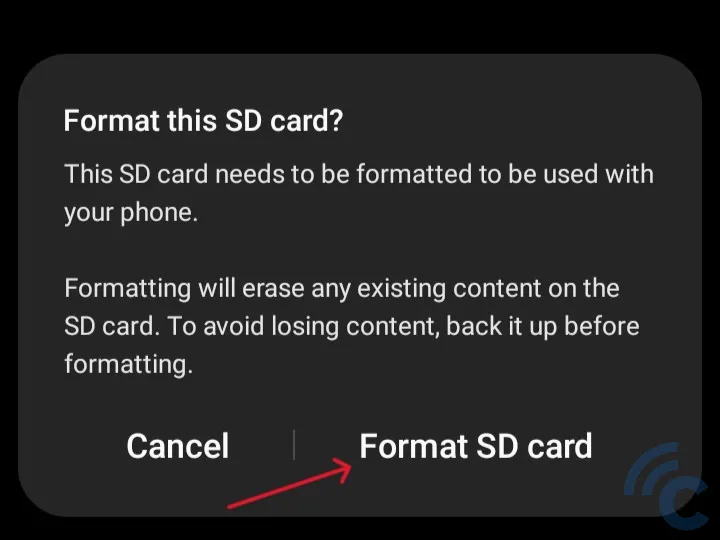

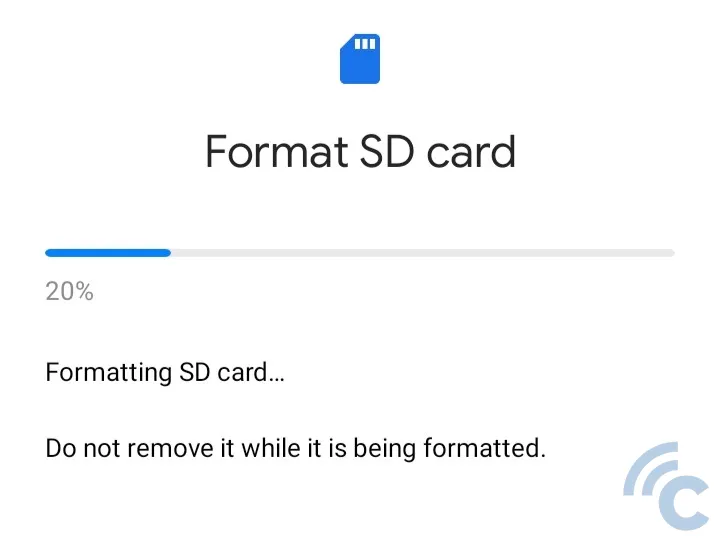
- Wait for the process for a while.

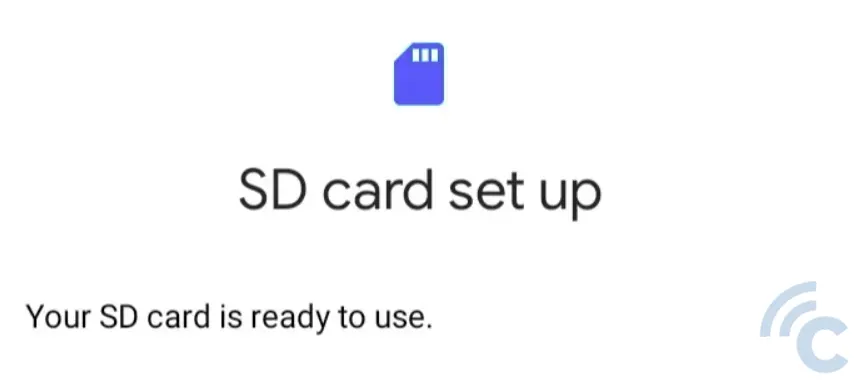
- The SD Card format process is complete.

3. Using Windows Explorer
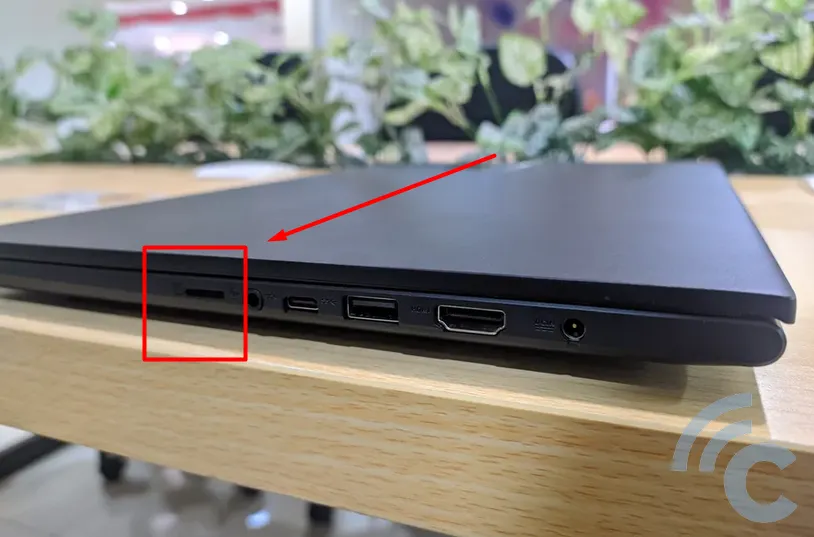

You can format the SD Card using a Desktop PC or Windows laptop if you have difficulty using a cellphone. Some laptops are equipped with an SD Card or microSD slot. However, if the laptop or computer you are using does not have this slot, you can use a card reader via a USB cable or adapter.
In this tutorial, the SD Card adapter for microSD is used. An SD Card adapter can be used if your computer has an SD Card slot. Here are the procedures.
- Plug the microSD into the SD Card adapter.
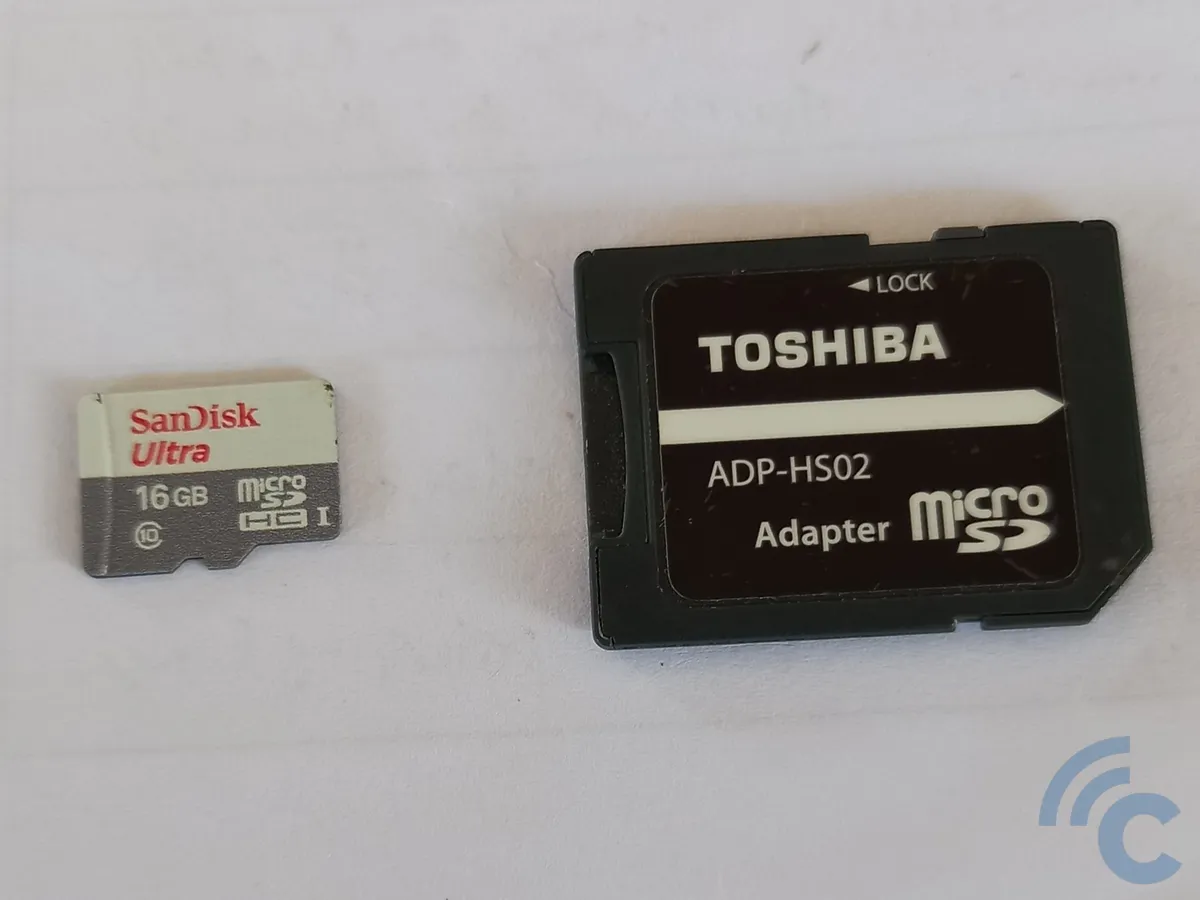

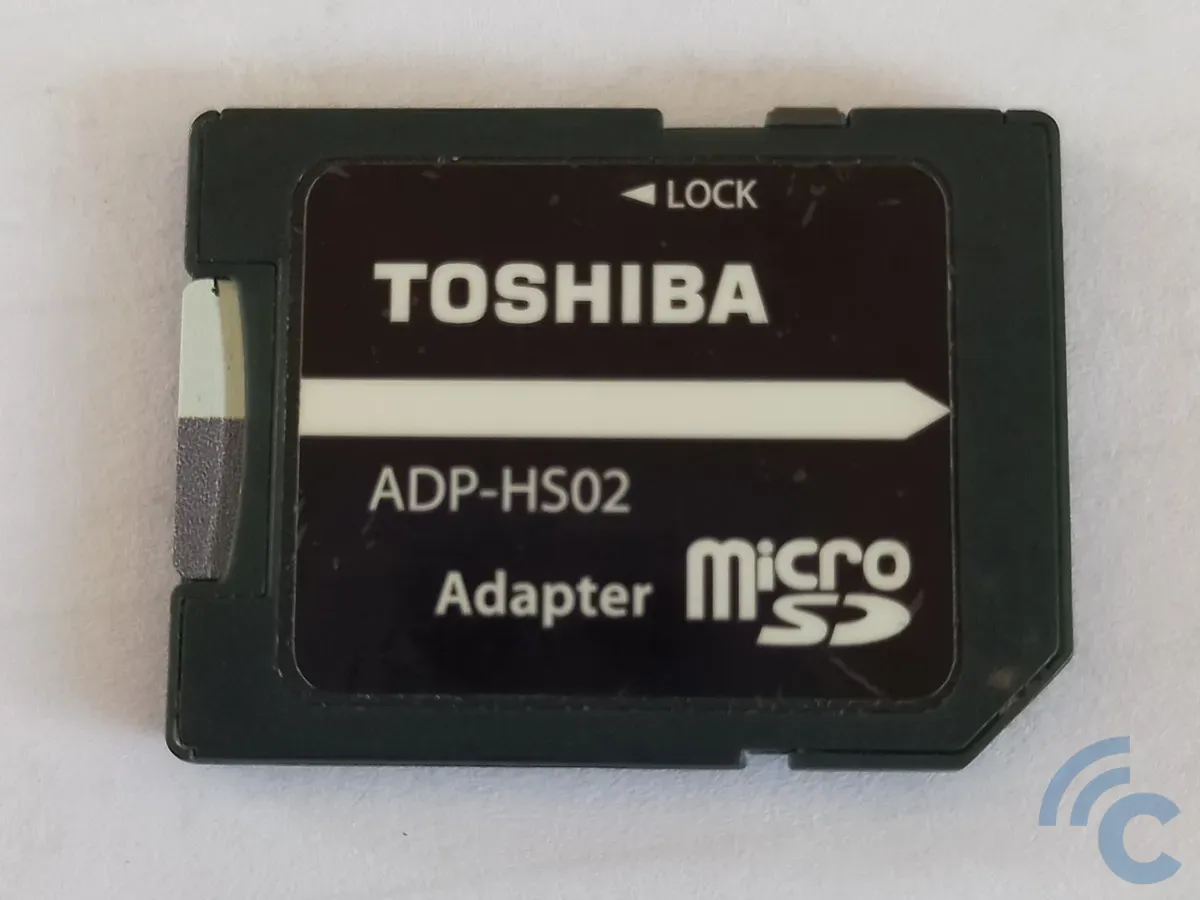

- Plug the adapter filled with microSD into the SD Card slot on the laptop.
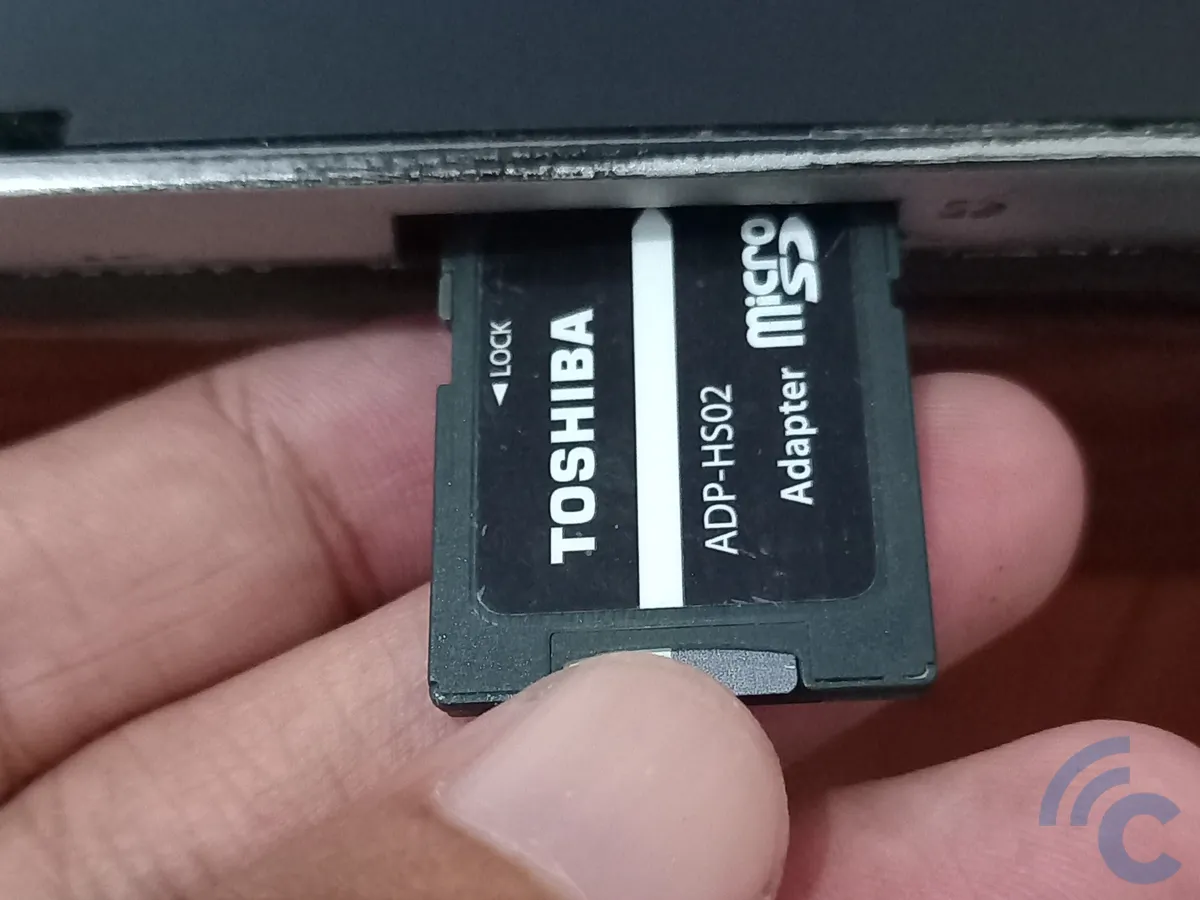

- After the system detects the presence of an SD Card, open Windows Explorer by pressing the button Windows+ E.


- Find the location of the SD Card.
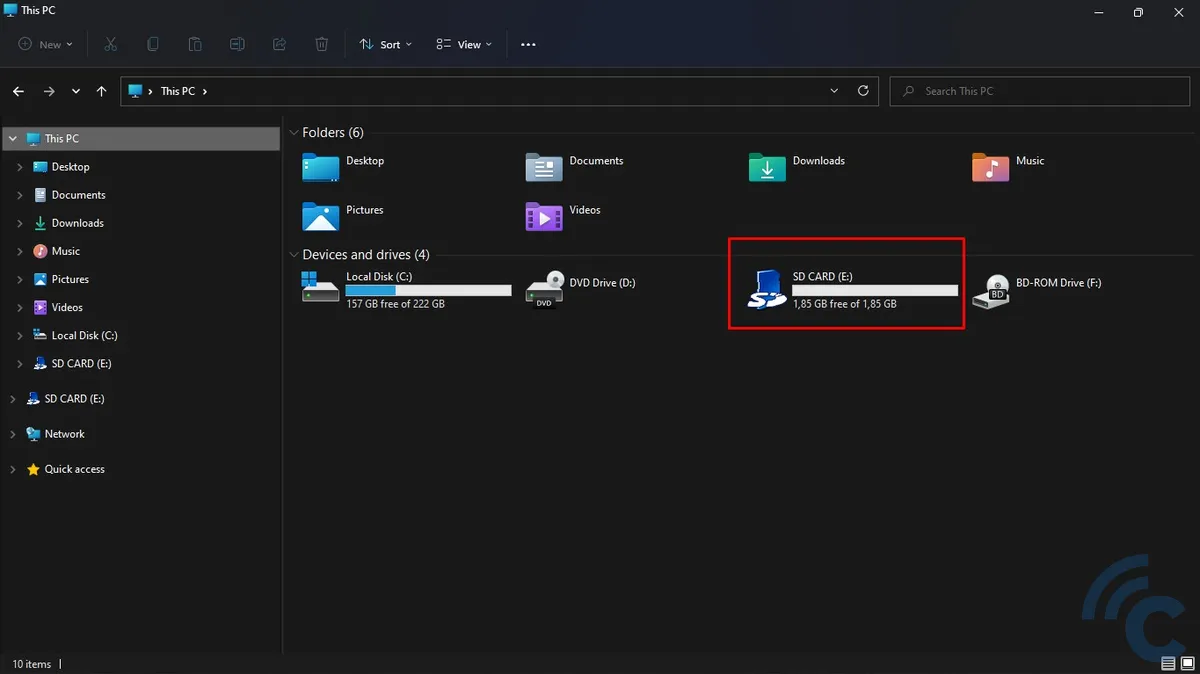

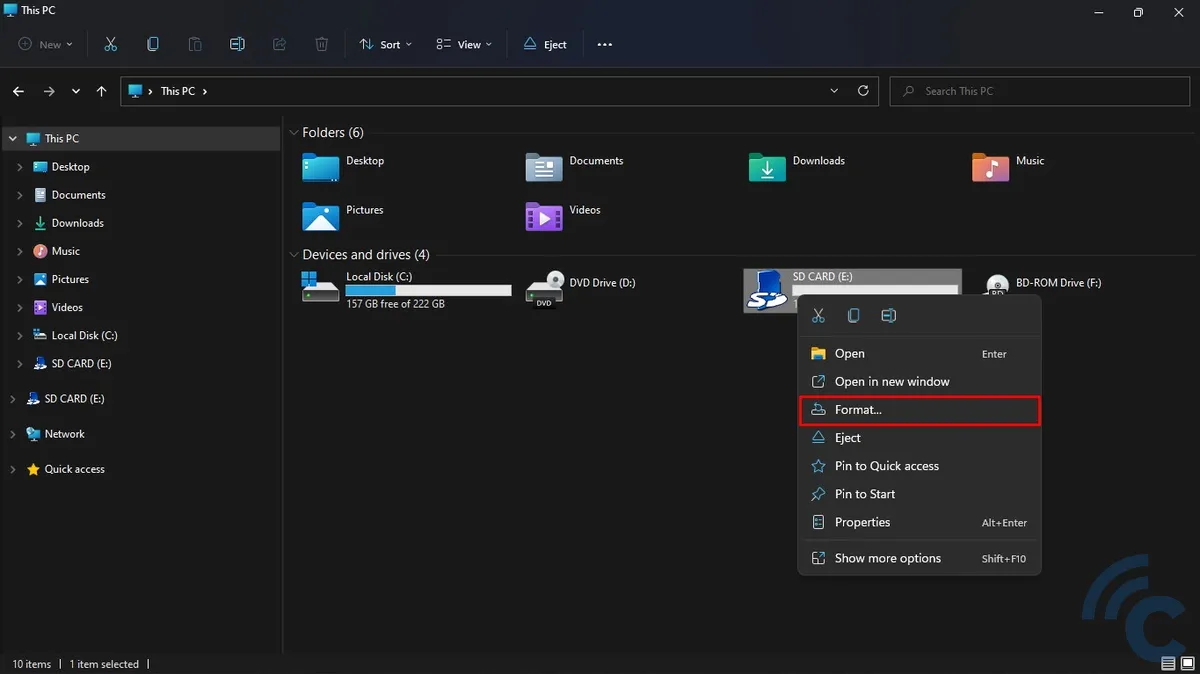
- Right click the SD Card, then select format.

- Set the SD Card file system to the default, which in this tutorial is “FAT“.
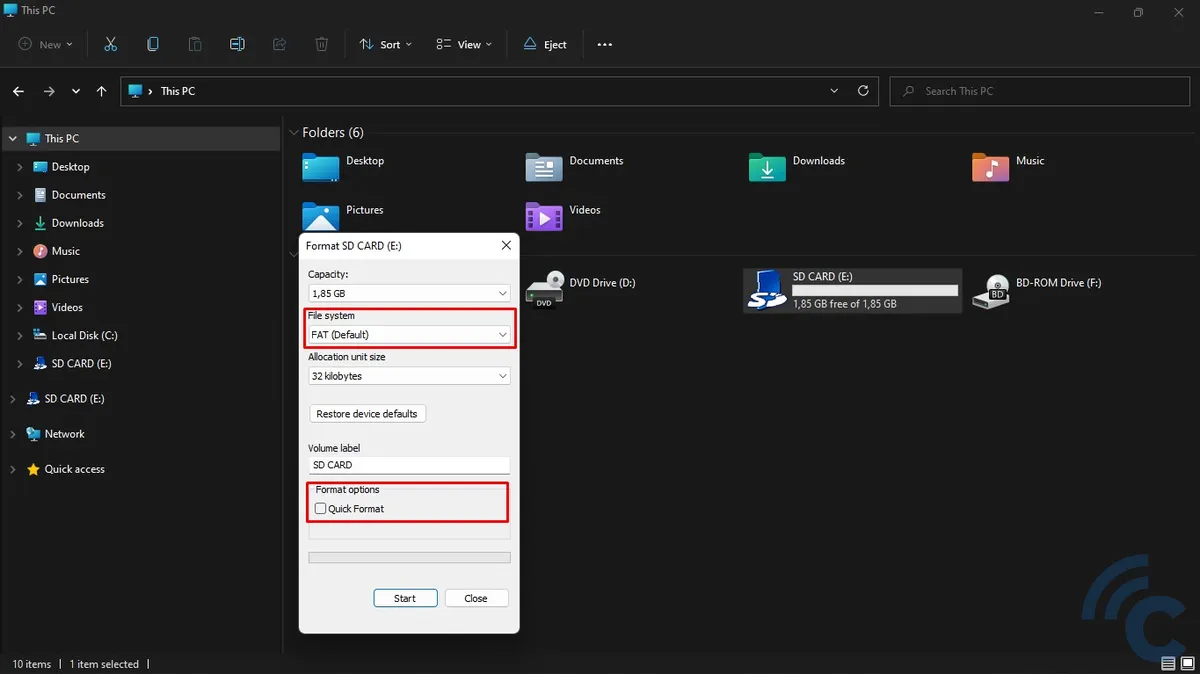

- You can check “Quick Format“. However, it is recommended not to check it so that the format can also improve the condition of the SD Card. The process will of course take longer.
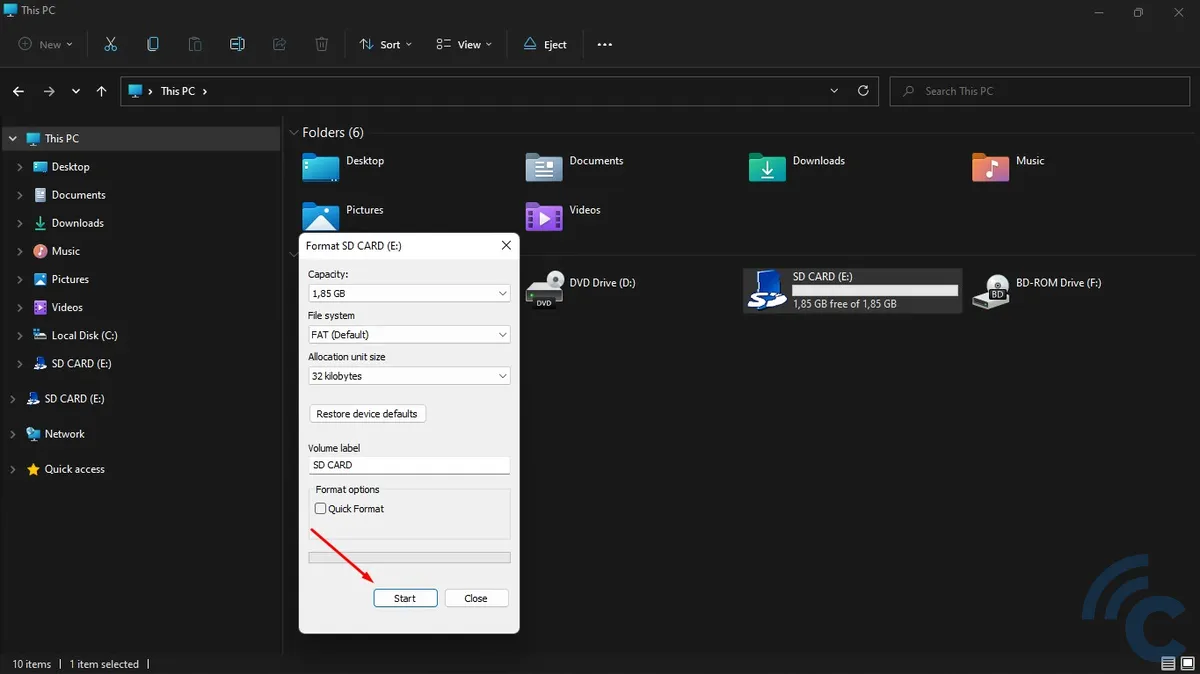
- Click “Start” and “OKthen wait for the formatting process for a few moments.

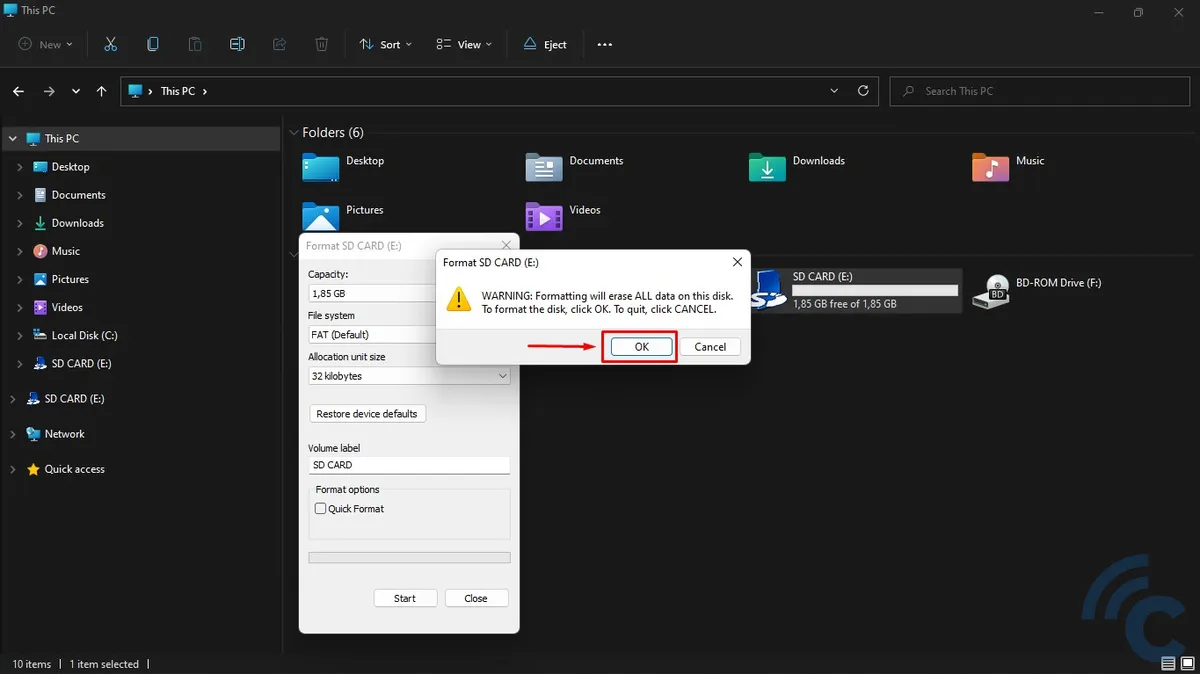

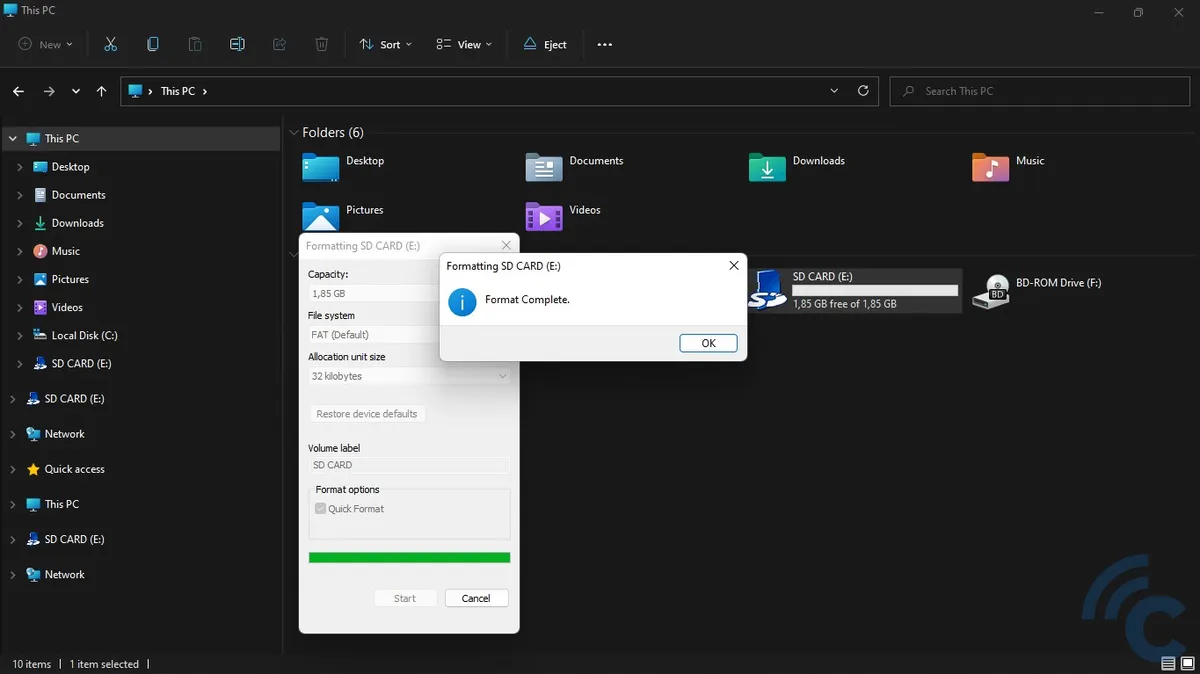

After the process is complete, all data on the SD card will be deleted. The SD card will be clean as before.
4. Using CMD Commands
The next way to format an SD card is to use the CMD command (command prompt). The equipment you need is the same, an adapter or card reader and a Windows computer. It's just that the steps you take are a little longer.
You can choose this method if your SD Card cannot be tampered with (including formatting) because it has attributes read-only. In this way, attributes read-only will be deleted before entering the format process. Here are the steps.
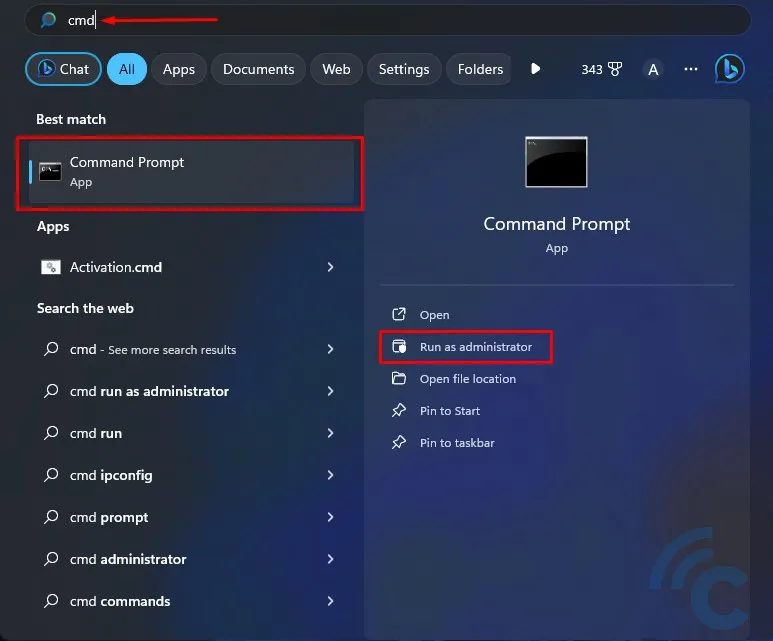
- Click “Start“, then type “cmd“.
- After the menu appears “Command Prompt“, click “Run as administrator“.

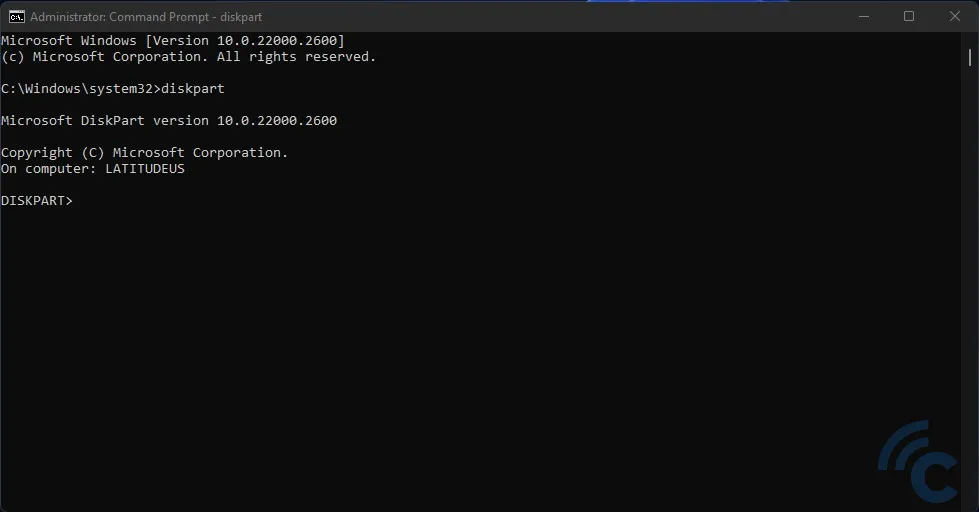
- Type “diskpart” without the parentheses, then press Enter.

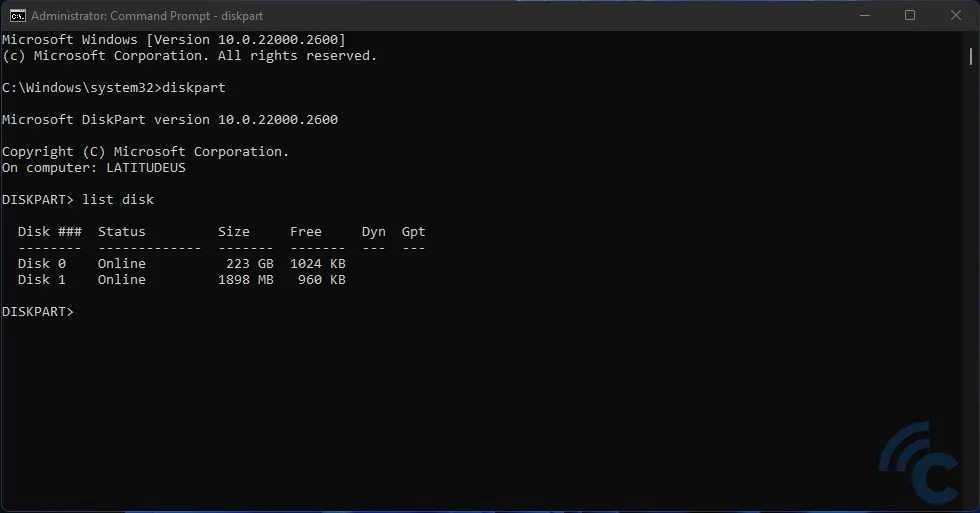
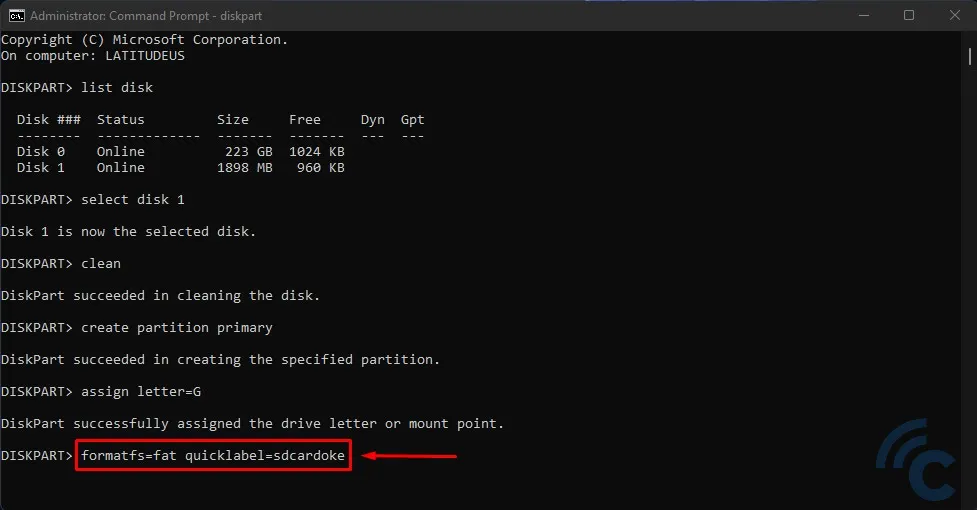
- Type “list”disk“See what order your SD Card is in. In this tutorial, the 1898 MB SD Card is in second place with the label “Disk 1“.

- Type “select disk 1” as in the illustration, then press Enter.
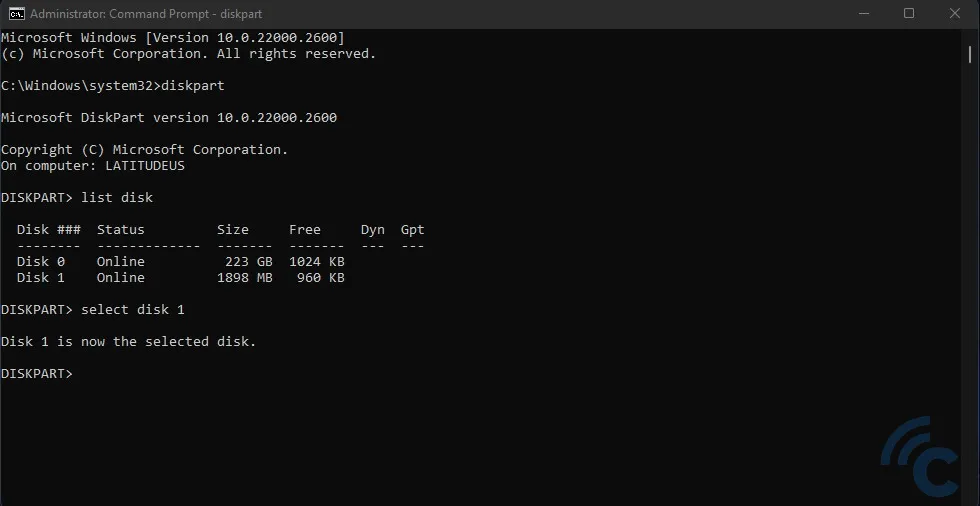

- Type “clean“, then press Enter. This command functions to delete all partitions on the SD Card.
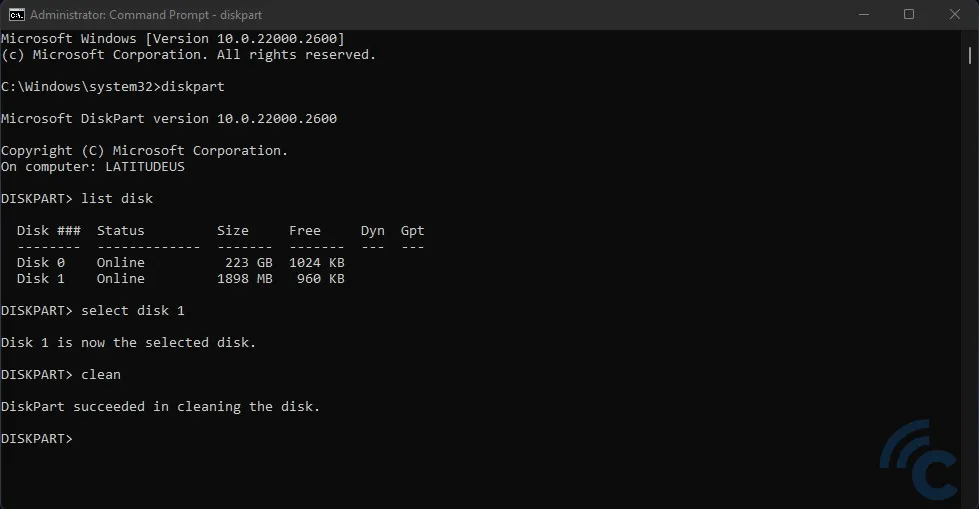

- Create a new partition by typing “create partition primary“, then press Enter.
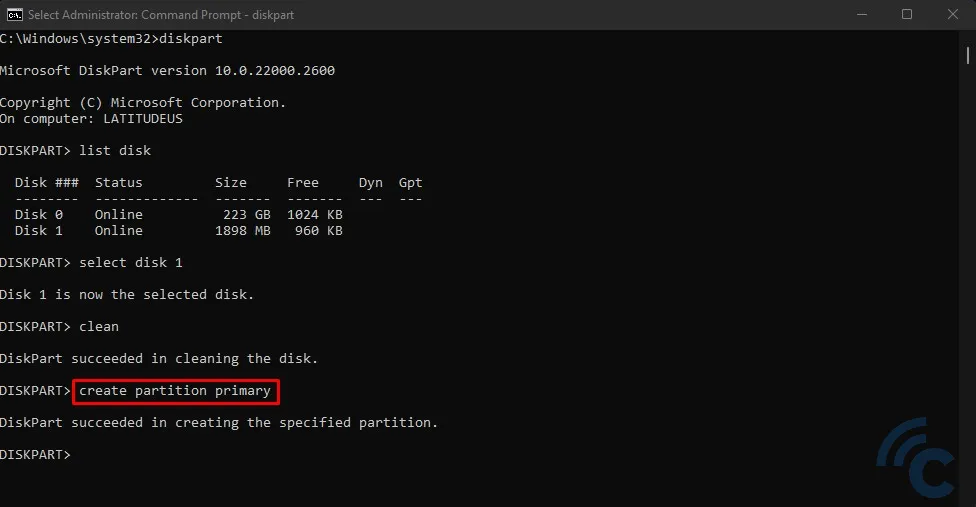

- Type “assign letter=G“, then press Enter. Then the SD card will be in the G drive position.
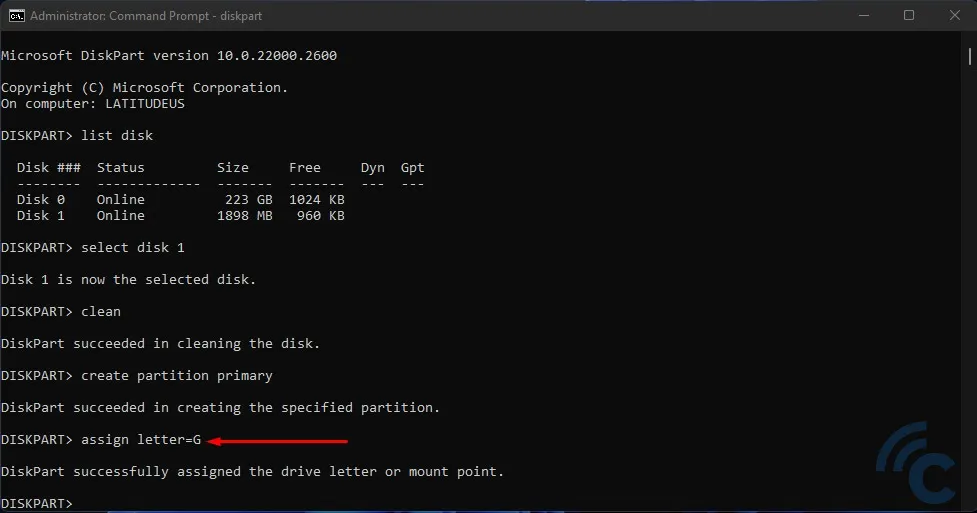

- Type “format fs=fat quick label=sdcardoke“, then press Enter. You can change the quick label according to your taste.

- Wait for a moment. The formatting process is complete.
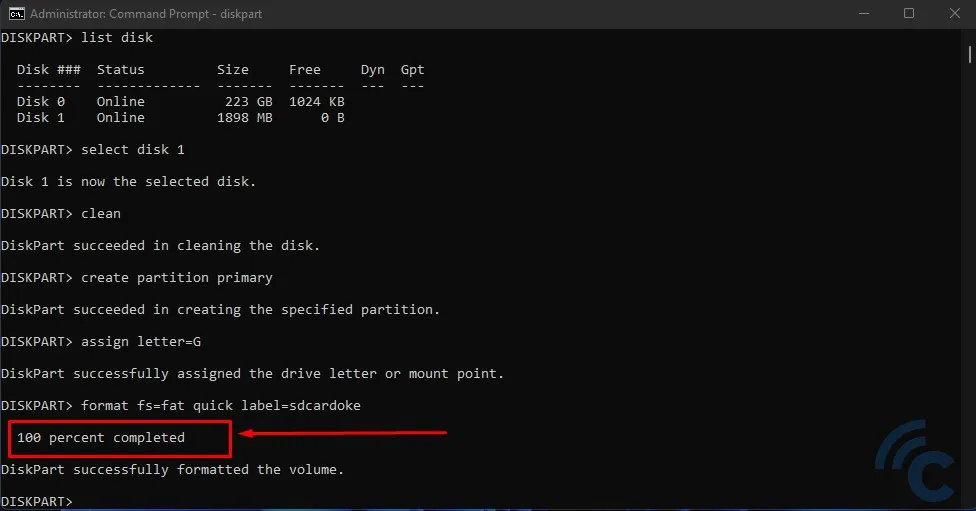

For the record, the formatting process using the FAT code is not always successful. The reason is that there are several computers that use the NTFS FAT32 code. Therefore, you have to adapt to the file system your computer uses.
5. Using EaseUS Partition Master
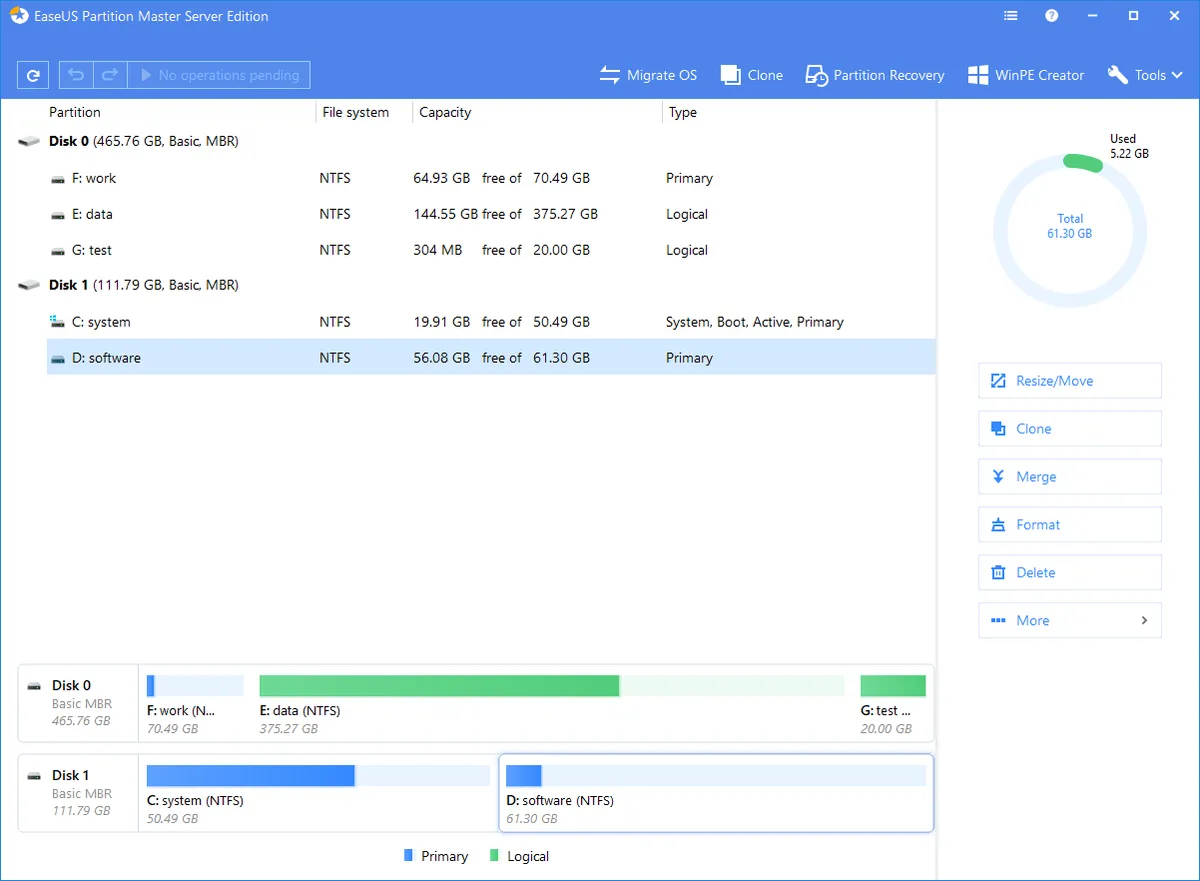

Formatting via cmd usually works for damaged SD cards. However, there are times when this method doesn't work well. So the alternative that can be done is to format with a third party application.
There are many formatter applications available, one of which is EaseUS Partition Master which I will try in this tutorial. The application is free and you can download it first at EaseUS official website. After successful download, install the application. Then follow these steps,
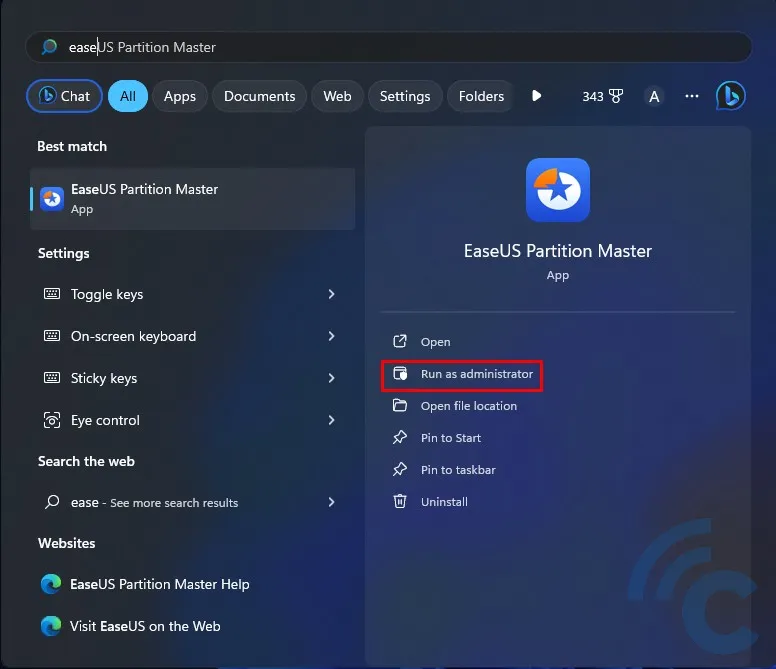
- Open the EaseUS Partition Master application, then click “Run as administrator“.

- Click where the SD Card is located. In this example, the SD Card is shown with the label “Disk 1”.
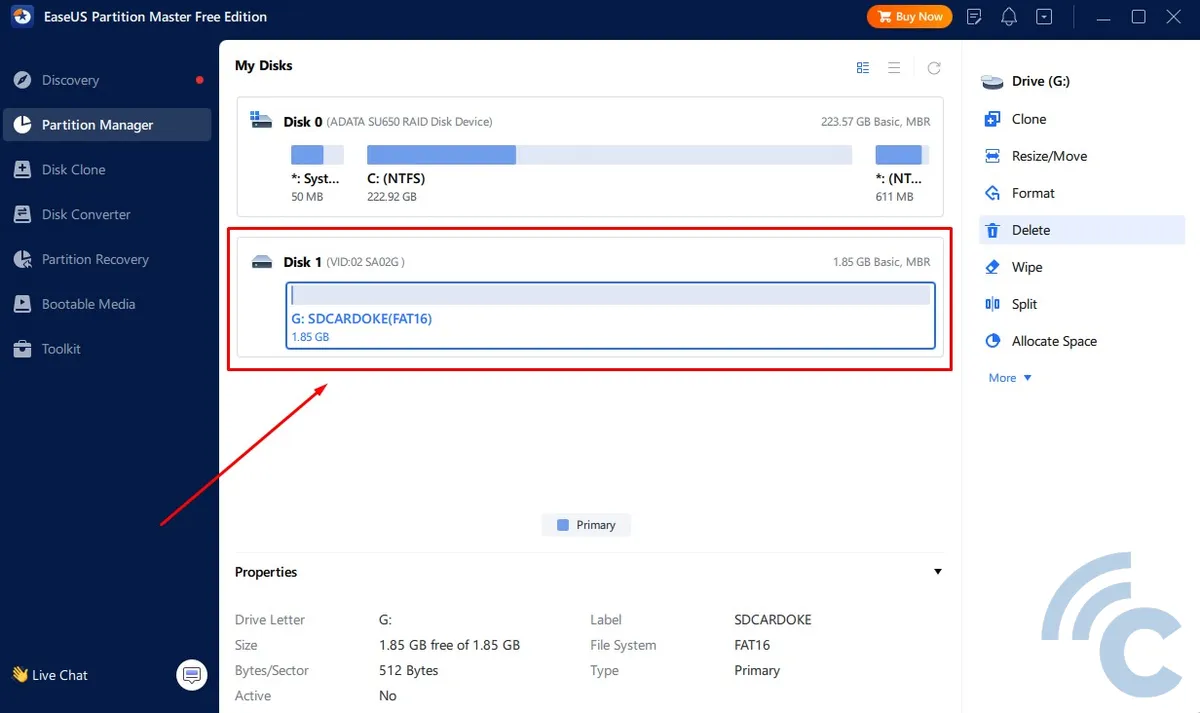

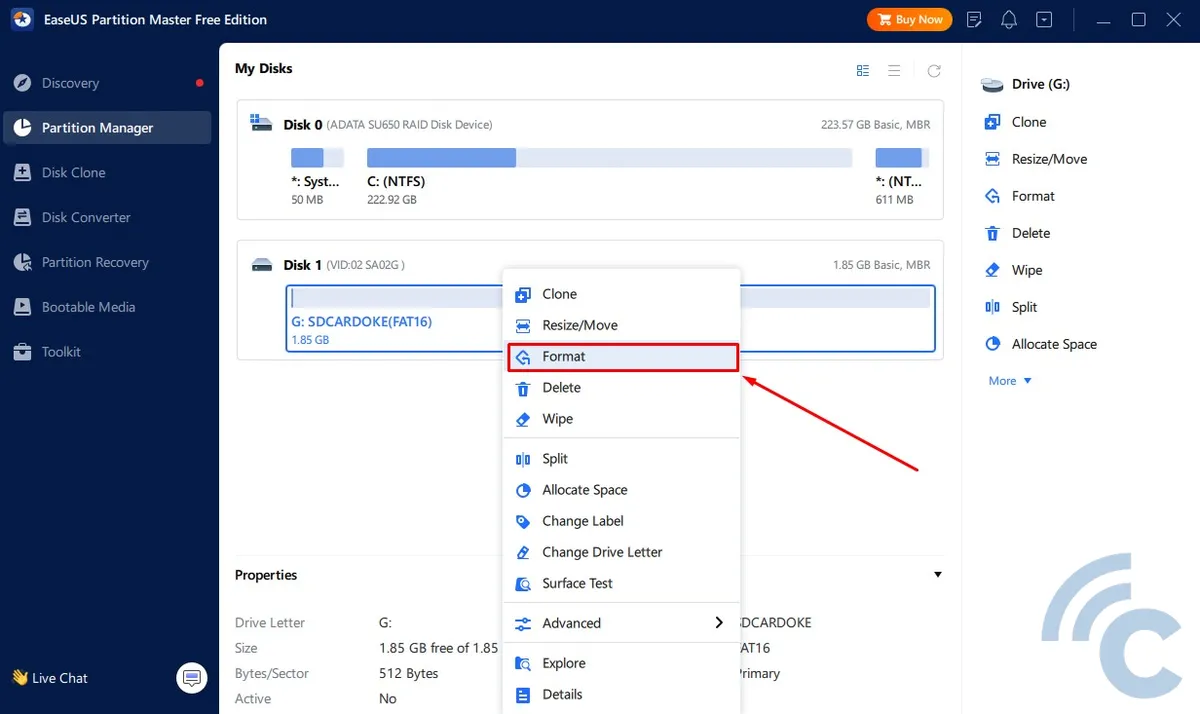
- Right click on the “Disk 1” area, then click “Format“.

- Tentukan “Partition label”, “File system”, dan “Cluster size”.
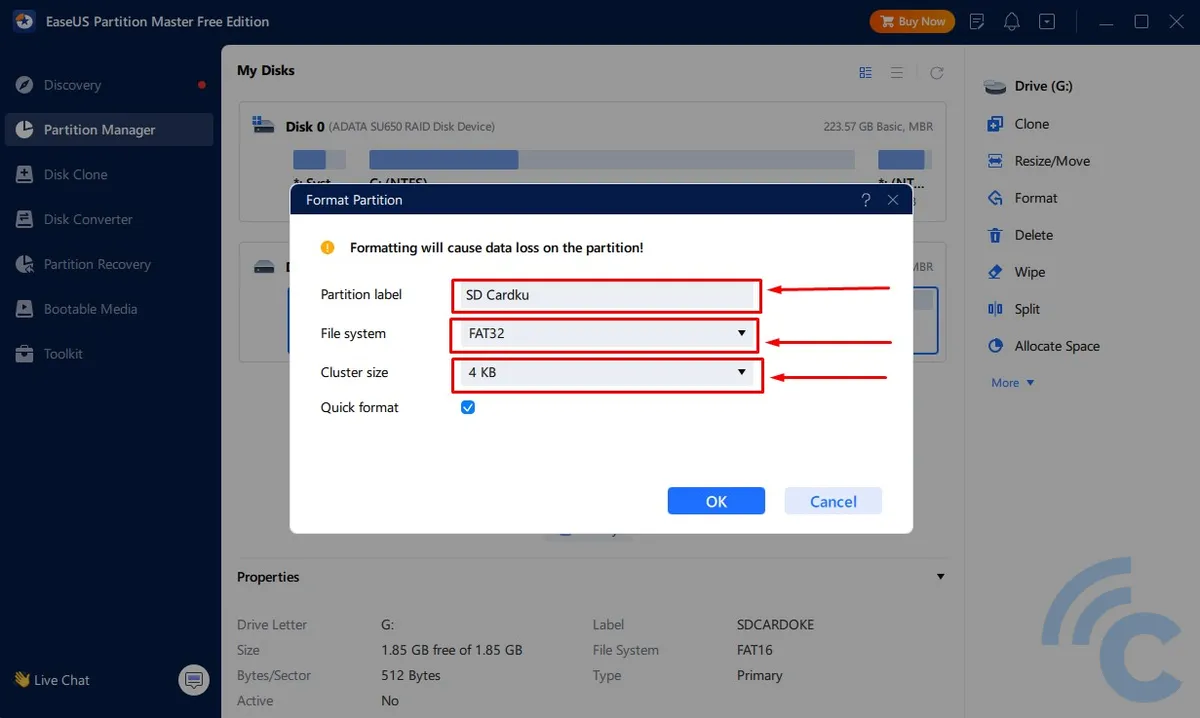

- For file systems, SD cards are generally used as storage only, not for installing applications. So you should choose “FAT 32” or “exFAT“.
- While in Cluster size, select “4K“if the SD Card is to be used as normal storage media. Select “8K” or “16K” If file What will be saved is high resolution video.
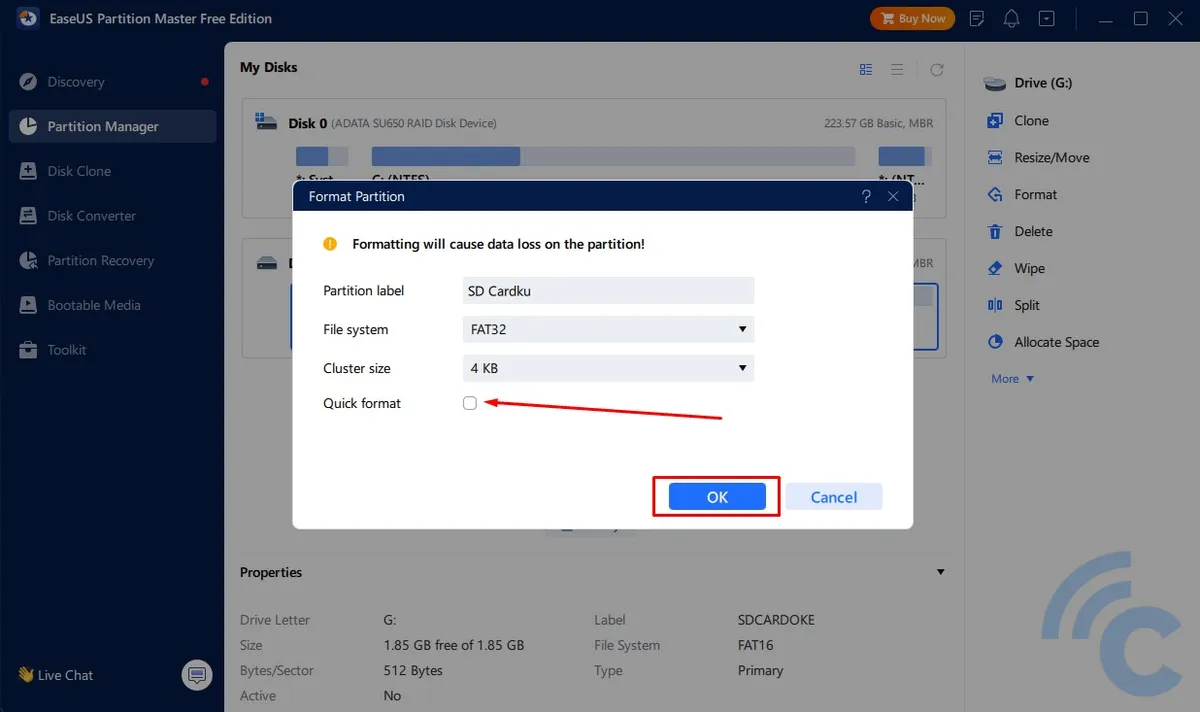
- Uncheck “Quick format“if you want to format in depth, then click the “buttonOK” and “Yes“.

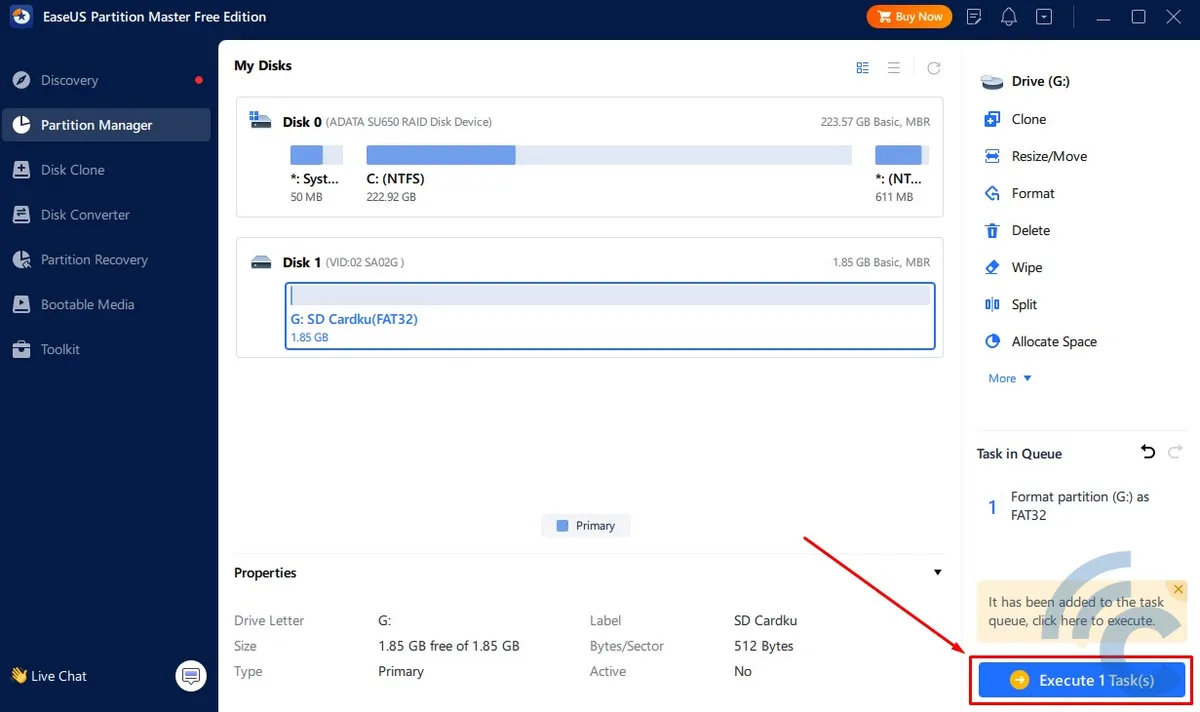
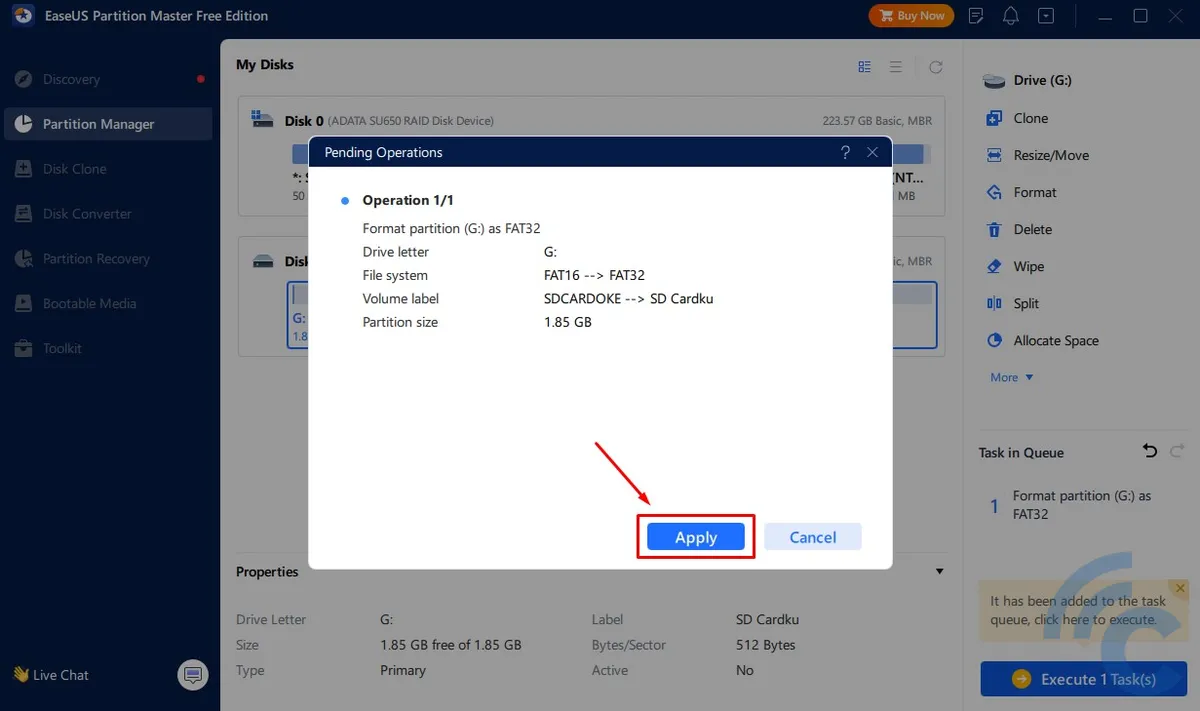
- Next, execute the format command by clicking “Execute 1 Task” in the bottom right corner, then click “Apply“.


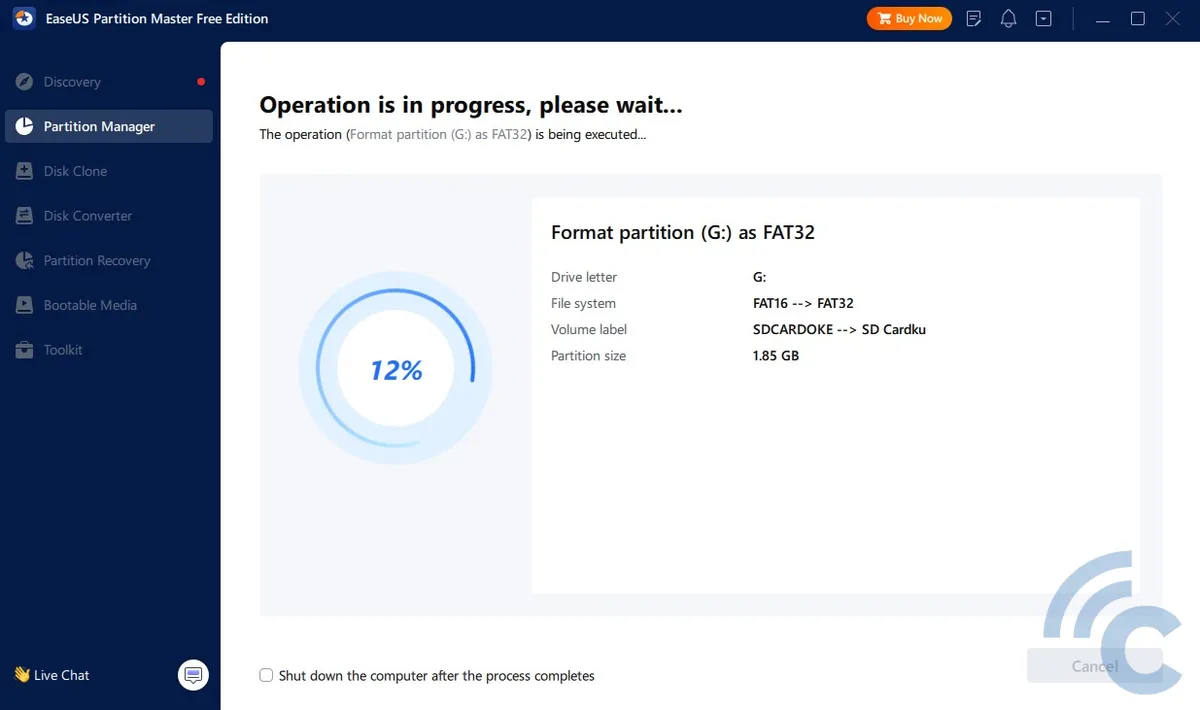
- Wait for the formatting process for a moment.

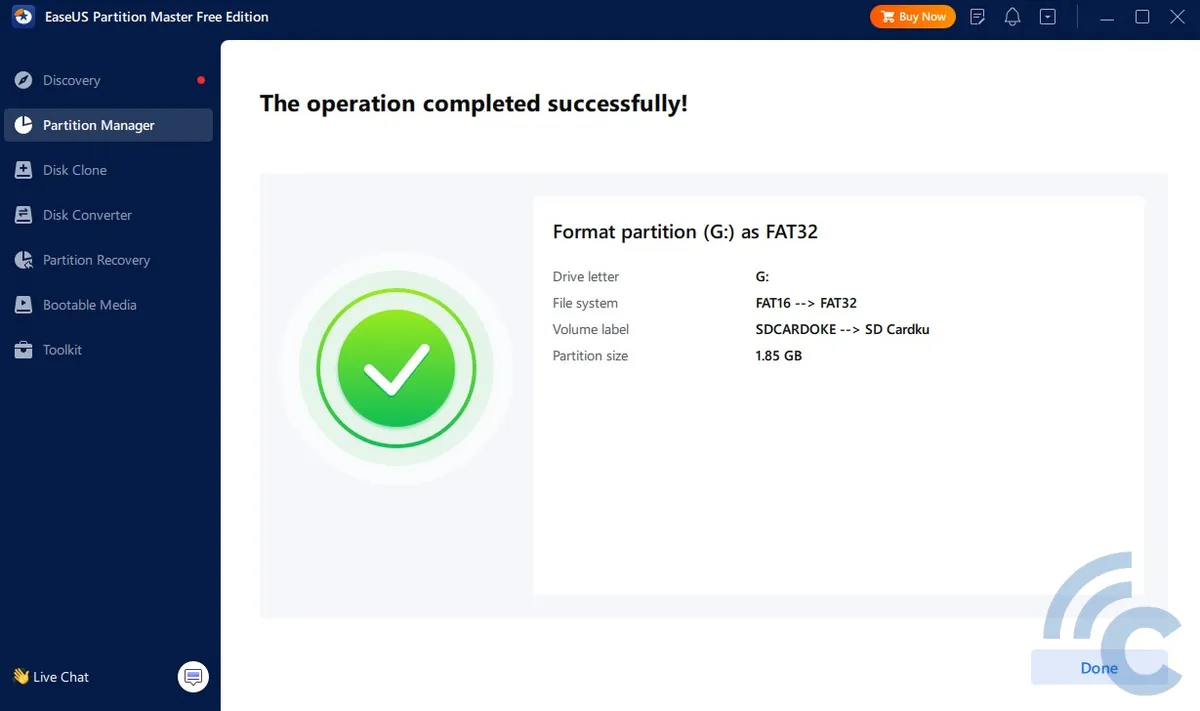
- The format process is complete, you can click “Done” and exit the application.

6. Using a MacBook to Format the SD Card
Formatting an SD card is not limited to Android devices and Windows computers. Apple computers such as MacBooks can also do this. If what you are using is a MacBook Pro 14 and 16, you are lucky because this laptop has an SD card slot.
You only need an SD Card adapter if you are formatting a microSD. However, if the laptop you are using is a MacBook Air, you need a card reader plus a USB C cable. Here are the steps to format an SD card on a MacBook.
- Connect SD Card to MacBook.
- After the SD Card is read, open Launchpad.
- Find the app “Disk utility” which is in the other folder, then open the application. You can also access it in the search bar, then type “Disk utility“.
- Click the name of the SD Card in the External section.
- Click the ” buttonErase” which is located at the top of the application window.
- Determine the name and format (file system) of the SD Card.
- For format, you can have MS-DOS (FAT32) which is usually ready-made default, or ExFAT. Both FAT32 and ExFAT are supported on Windows and Mac computers.
- Click the “Erase” button and wait for the formatting process to complete.
That's how to deal with an SD card that can't be formatted. If you can no longer delete the data using the methods described above, you can slowly clean the SD card and repeat the process.
Do you have another solution to this problem? Try sharing your experience in the comments column!
