3 Ways to Make Lines in Microsoft Word
Microsoft Word is one of them software The most widely used word processor in the world. With its complete features, Word makes it easy for users to create professional and attractive documents.
One design element that is often used in documents is lines. Lines can help separate sections of text, add aesthetics, or emphasize a point. This time, Carisinyal will provide a tutorial on how to create lines in Word using three methods: auto format, horizontal line and shapes.
1. Using Auto Format
Not many people know that this way of making lines in Microsoft Word is the easiest way. Yes, with auto format, you can create various types of lines in Word just by pressing a few keys on the keyboard. Here are the methods:
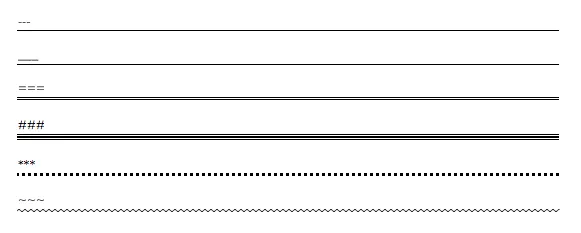
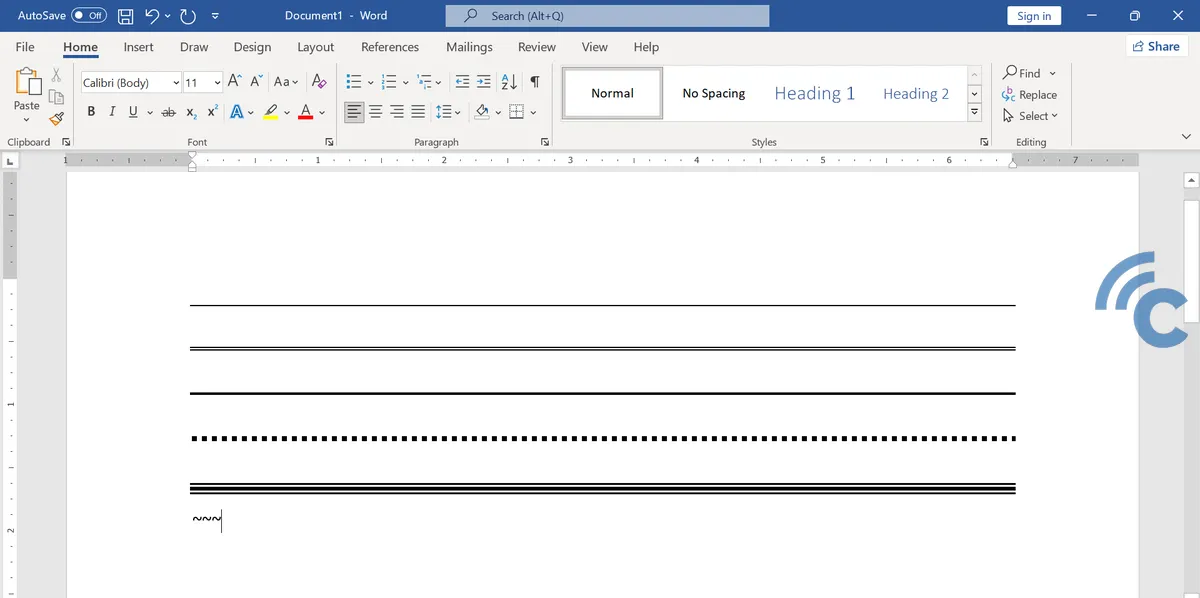
- To make straight linepress the “ symbol–“ three times on the Word work page. Then press “Enter” and a straight line will be drawn neatly.

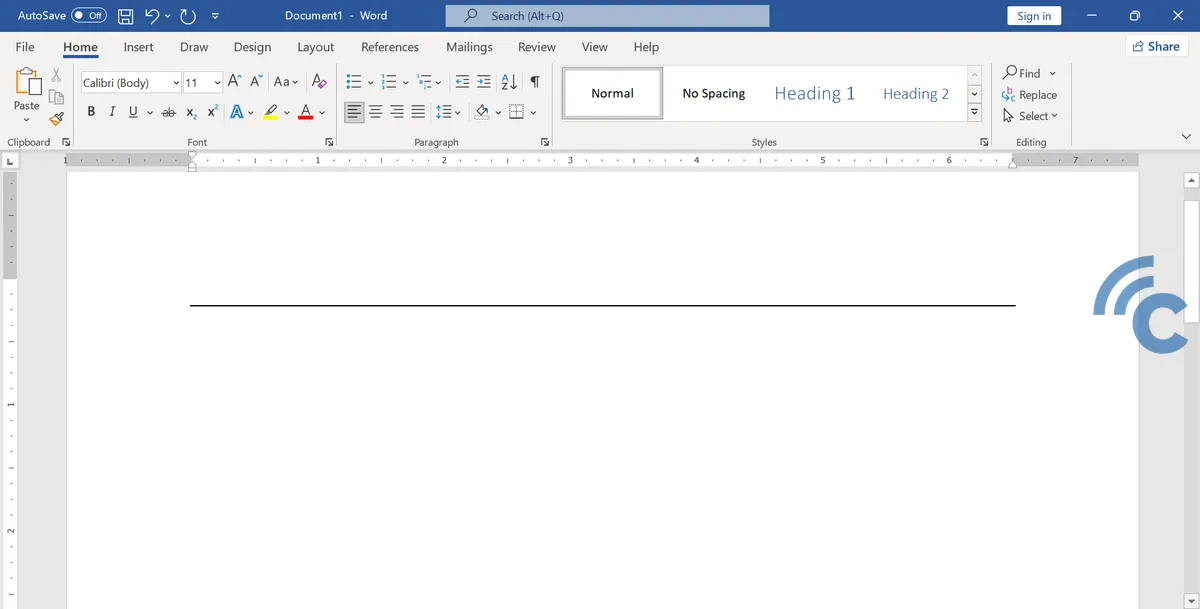
- If you want to make two thick straight linespress the “ symbol=” on the keyboard three times. Press “Enter”, then two thicker straight lines will be formed.


- When to make one thick straight linejust press “_” three times. Continue by pressing “Enter”.


- Dotted line can be created by pressing “*” on the keyboard three times. As in the previous step, press the “Enter” to create the line.


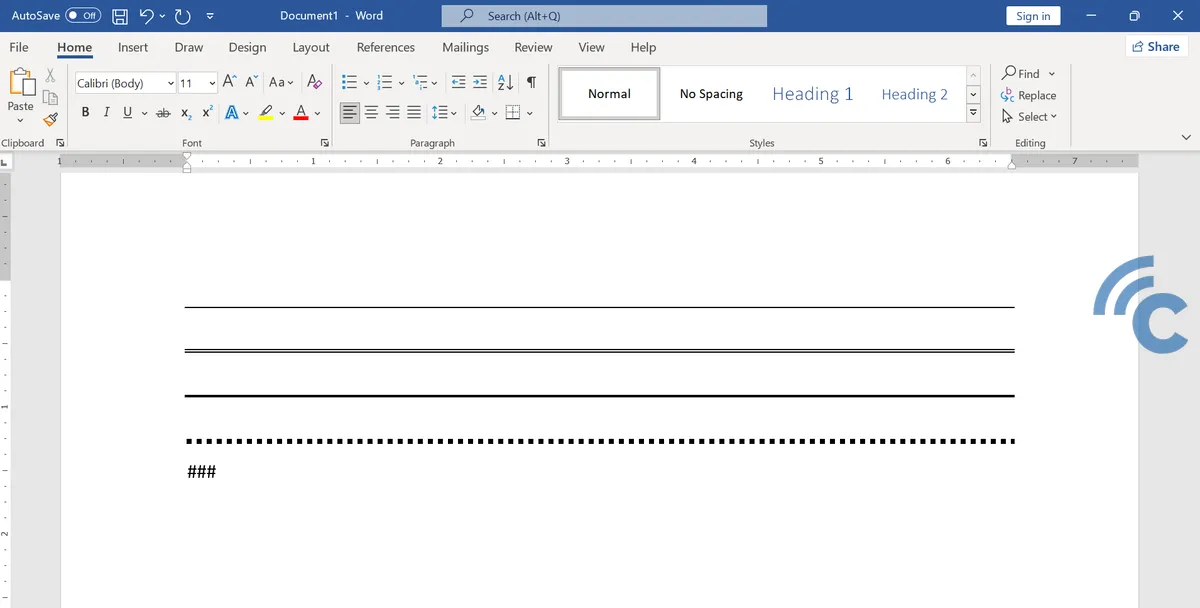
- By pressing the “#” three times, then ends with “Enter”, then it will produce a three lines where the middle is thick and the two lines outside are thin.
- The next step to create wavy line is by pressing the “~” three times and end by pressing “Enter”.

By utilizing this auto format, you can create various lines according to your needs as quickly as possible.
2. Using Horizontal Lines
Another way to add lines in a Word document is to use the horizontal line feature. Follow these steps to create a horizontal line:
- Open Document: First, open the Word document you want to add lines to.
- Position the Cursor: Place the cursor where you want the line to appear.
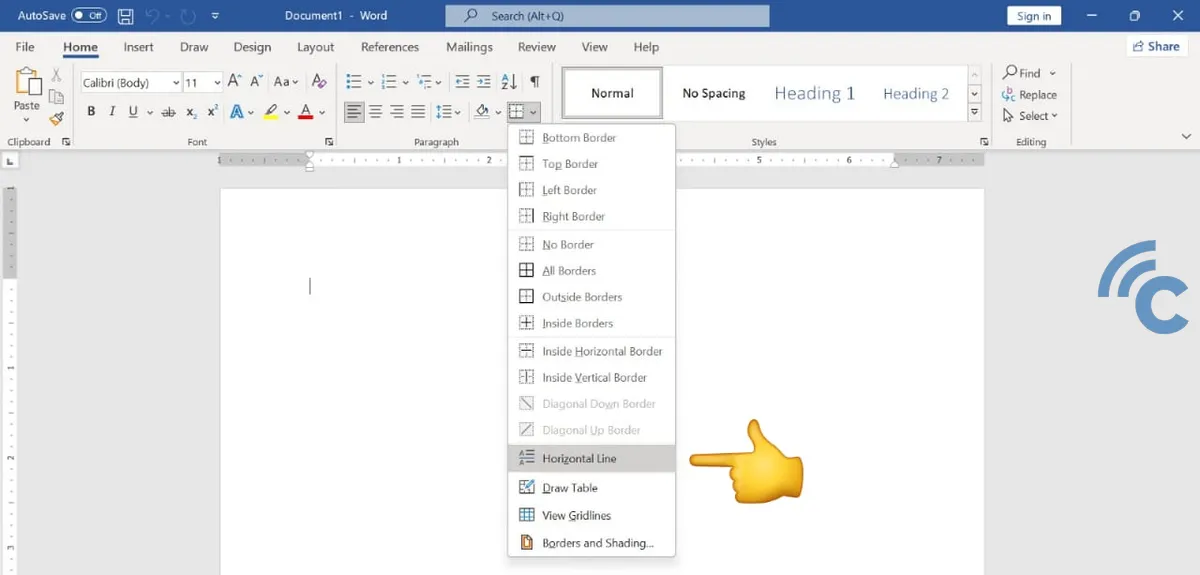
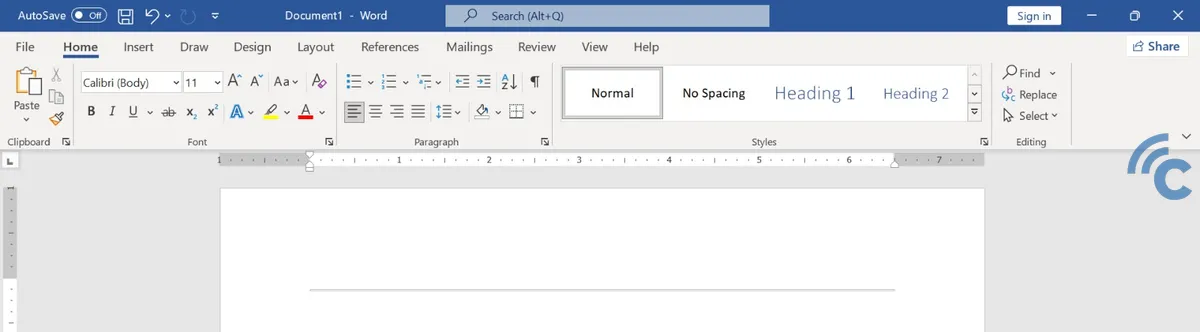
- Insert Line: On the tab “Home”, click on “Borders” which is located in the group “Paragraph”. From the menu dropdownselect “Horizontal Line”.
- Adjust Lines: Once the line appears, you can adjust the design by double-clicking on the line. You will see options to change the line style, thickness, and color.
The tutorial using horizontal lines is very suitable for separating sections or creating separators between paragraphs.
3. Using Shapes
For more design options and flexibility, you can use the shapes feature to create lines. Here's how to do it:
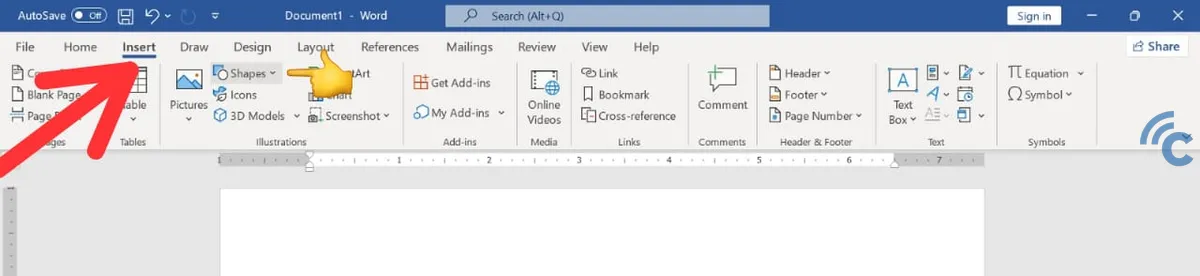
- Open a Document: As before, start by opening a Word document.
- Select Shapes: Go to the “ tabInsert” and click “Shapes”. Here, you will find various shapes, including straight lines.
- Draw Lines: Click on the “ optionLines” (straight line symbol). Then, click and drag in your document to draw a line. You can hold down the “Shift” while drawing to create perfectly straight lines.
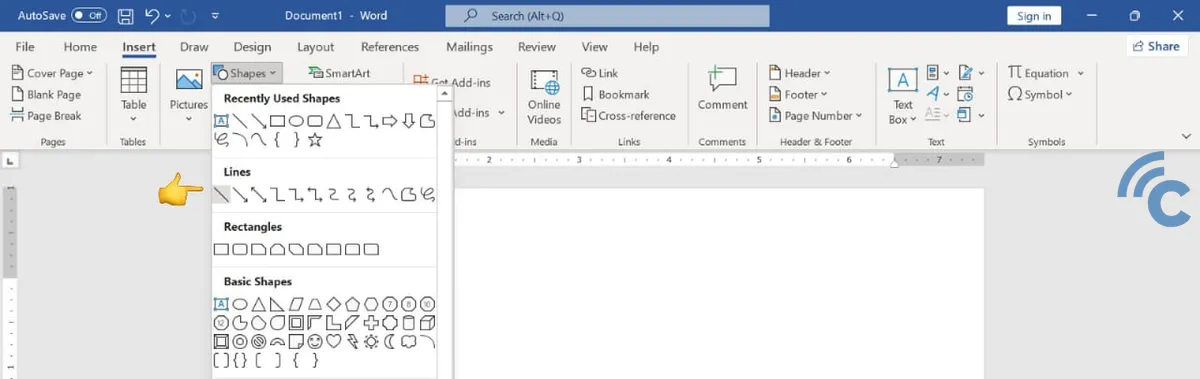
- Customize the Line: Once the line is drawn, you can change its thickness, color, and line style via the Format tab that appears after you select the line.
Using shapes gives you more freedom in designing lines, including creating curved or specially shaped lines.
Adding lines in a Word document can be done easily using the auto format, horizontal line or shapes features. These three methods offer enough flexibility for your various document design needs.
Auto format is the easiest way, but you have to memorize the keys according to the line type. Horizontal lines are suitable for quick and simple purposes, while shapes provide wider options for customization. By following the steps above, you can add these effective design elements to your Word documents, improving the visual quality and organization of the text.