How to Show Ruler in Microsoft Word
When using software a type of Microsoft Word, precision in arranging the layout and format of the document is very important. The ruler in Microsoft Word is a very useful tool for ensuring that text and other objects in your document are neat and orderly.
Ruler helps users measure and set the distance between paragraphs, tabs, margins, and various other elements accurately. However, it is not uncommon for users to find difficulty in bringing up or setting up this ruler, especially for those who are new to using Word.
In this article, Carisinyal will review in full how to bring up the ruler in Word and how to change the units of measurement on the ruler.
How to Bring Up the Ruler
In general, the ruler will appear on the Word work page by itself. However, there are times when this ruler doesn't appear and you have to make a few adjustments to display the ruler. Here is a tutorial on how to bring up the ruler:
- Open a Word Document: First, open the Microsoft Word document you want to work on.
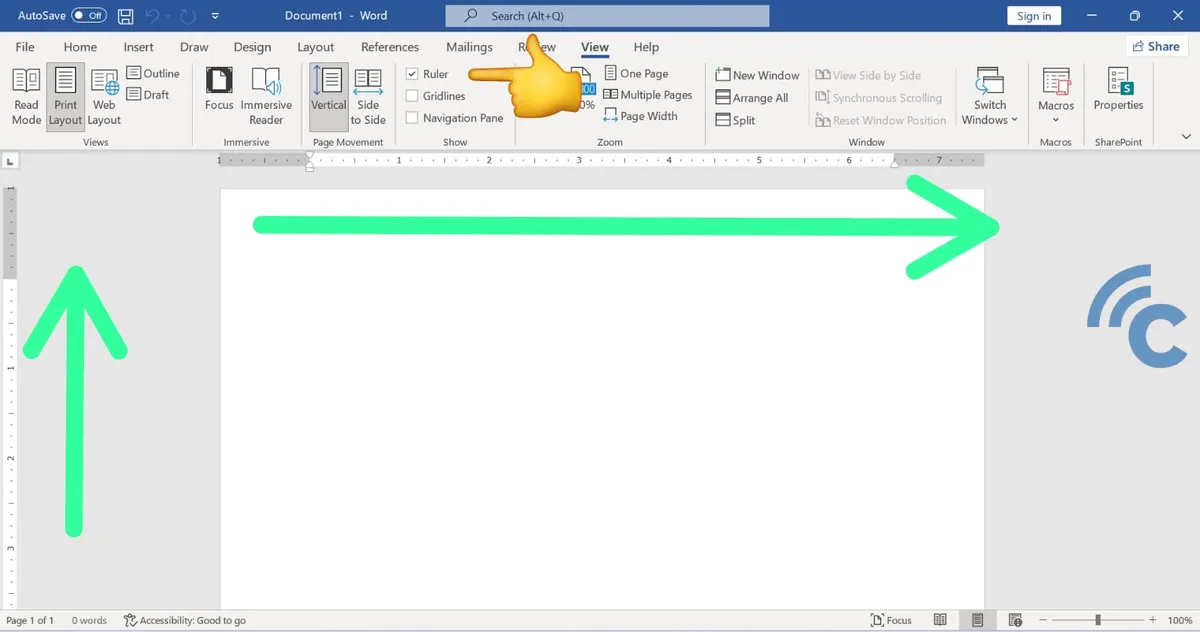
- Go to View Tab: At the top of the Word window, click on the “ tabView”.

- Activate Ruler: In group “Show”, find and check the box that says “Ruler”. After that, a ruler will appear on the top and left side of your document window.
The horizontal ruler will appear at the top of the document, while the vertical ruler will appear on the left side. These two rulers are very helpful in adjusting document layouts, such as setting margin widths, paragraph indents, and tab positions.
How to Change Ruler Units of Measure
Word users may want to change the units of measure in the ruler to suit their preferences or specific document needs. Here's how to change the units of measurement on the ruler in Word:
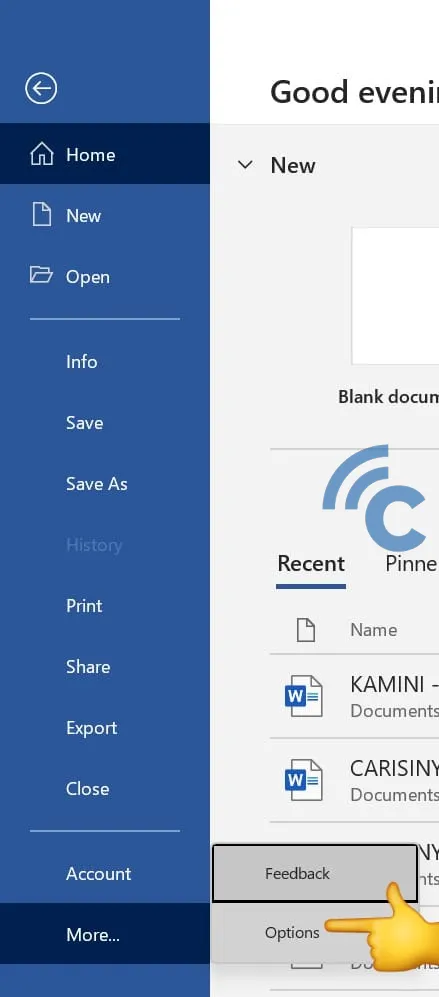
- Open Options: Click “File” in the top left corner, then select “More…” and continue by clicking “Options” to open the Word Options window.
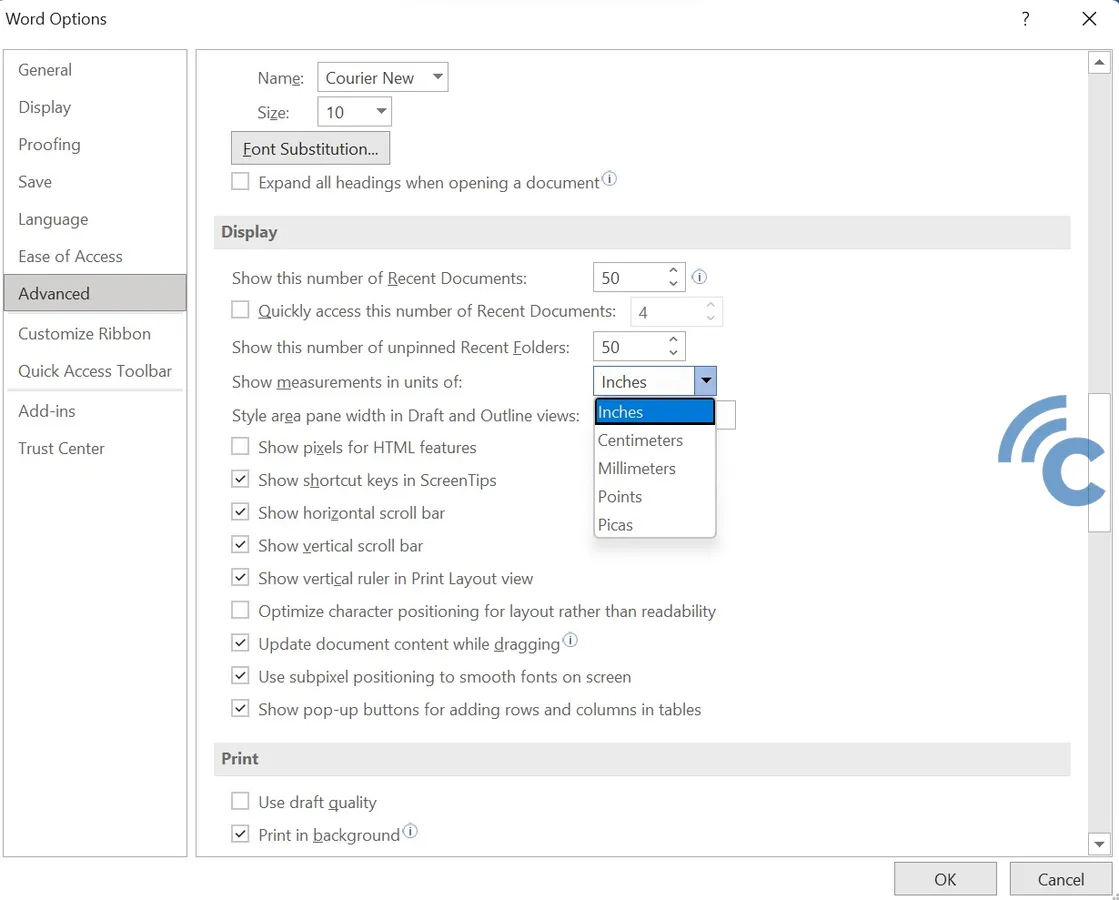
- Select Advanced: In the Word Options window, select “Advanced” which is on the left side.
- Search Display: Scroll down until you find the section that says “Display”.
- Ubah Unit of Measurement: In the section “Display”, look for the option that says “Show measurements in units of” and select your desired unit of measurement from the dropdown menu provided. You can choose between centimeters, inches, millimeters, etc.
- Save Changes: After selecting the desired unit of measurement, click “OK” to save your changes.
Changing the units of measurement on this ruler makes it easier for you to adjust documents according to a more familiar measurement system or according to the measurement standards required in a project or assignment.
Using the ruler in Word allows users to more easily organize and adjust document layouts, from margins to object placement, so that the final document results are more professional and neat.
By understanding how to bring up and set up the ruler, as well as how to change the units of measurement, you will have more freedom in managing Word documents according to your needs.