
3 Ways to Add Columns in Microsoft Excel
Microsoft Excel is one program spreadsheet which is most widely used to process data. One of the basic operations that is often required in Excel is adding a column.
This process can be done in several ways, whether adding one column, many columns at once, or even when using Excel on Android. On this occasion, Carisinyal will share a complete tutorial on how to add columns in Excel.
1. How to Add One Column
Adding a column in Excel can be done using several methods: right click, a button on the toolbar, or using a keyboard shortcut. Below are the steps for each method.
Using Right Click
- Right click on the letter of the column where you want to add a new column to the right.
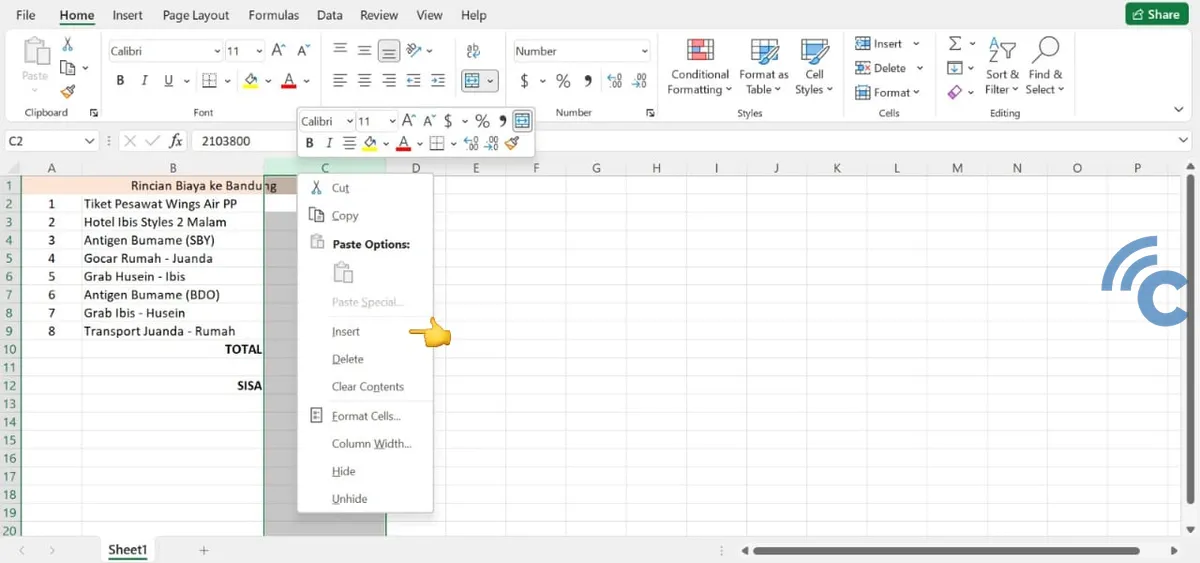

- Select option “Insert” from the context menu that appears. Excel will automatically add one new column before the column you clicked.
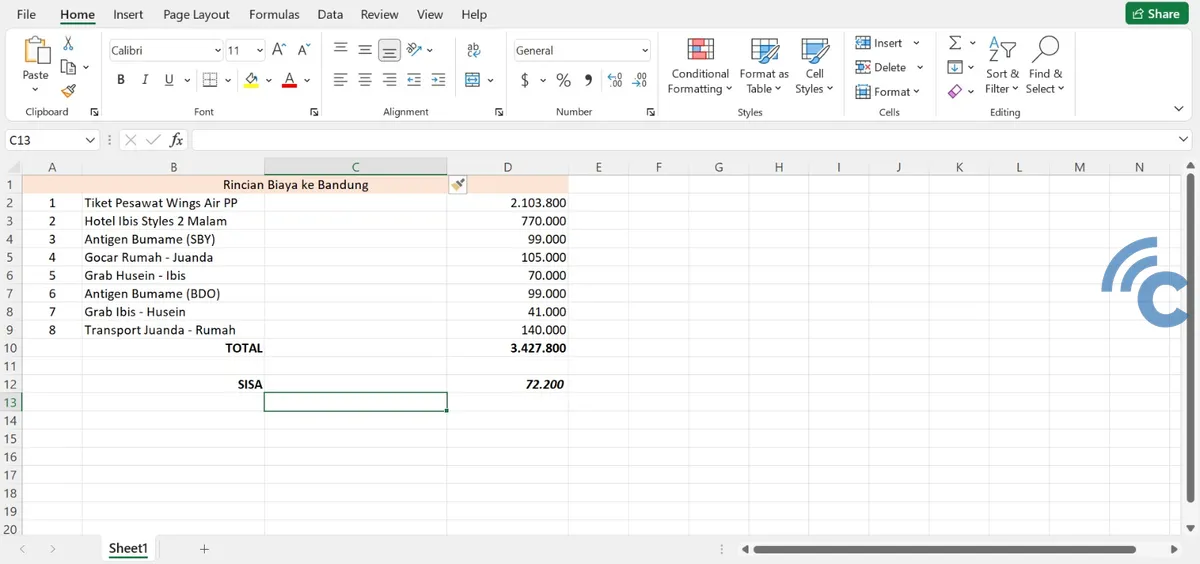

Using Buttons on the Toolbar
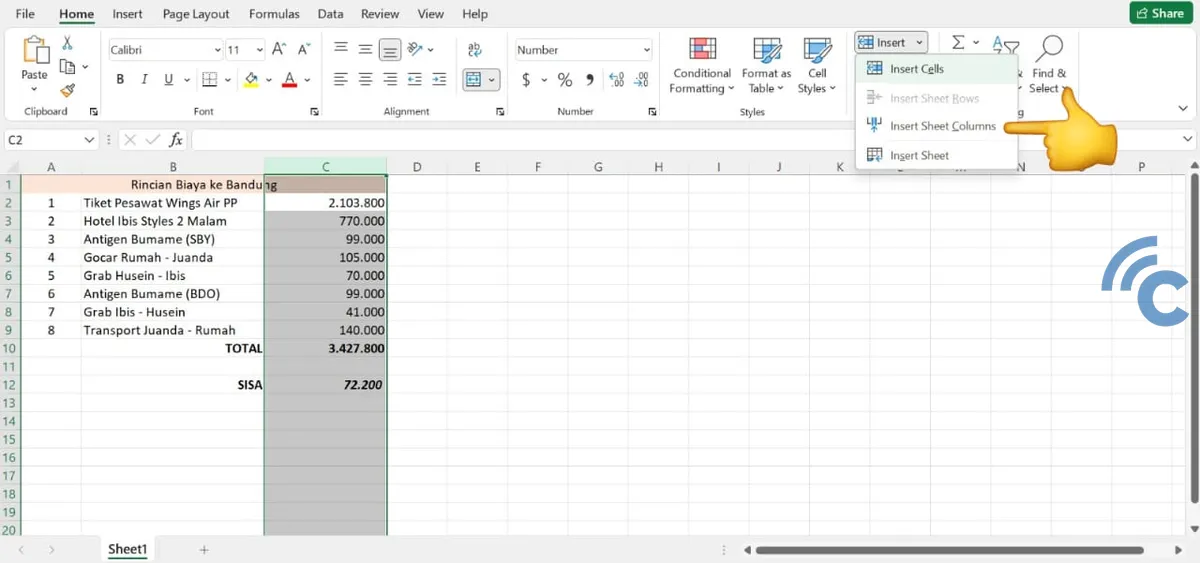

- Select a column by clicking the column letter at the top.
- Go to the tab “Home” on the Excel ribbon.
- In the group “Cells,” click “Insert,” then select “Insert Sheet Columns.” A new column will be added before the selected column.
Using Keyboard Shortcuts


- Select a column by clicking on the column letter above.
- Press Ctrl + (plus button) on the keyboard. This will display the option “Insert” which you must select to add a column.
2. How to Add Multiple Columns
In operating Excel, sometimes we need to add more than one column. However, if we do it manually one by one, of course this will take time. There is a more practical way if you need to add more than one column at a time. For more details, you can follow these steps:
- First, select the number of columns you want to add by clicking and dragging over the column letters. For example, if you want to add three columns, select three columns.
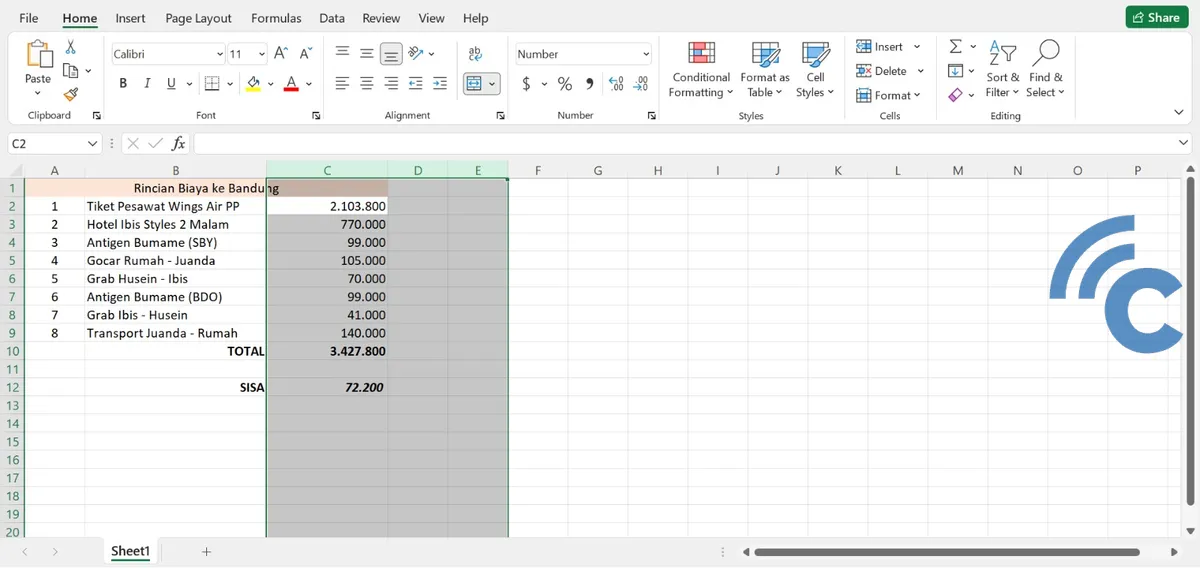

- Right click on one of the selected columns and select “Insert” from the menu that appears.
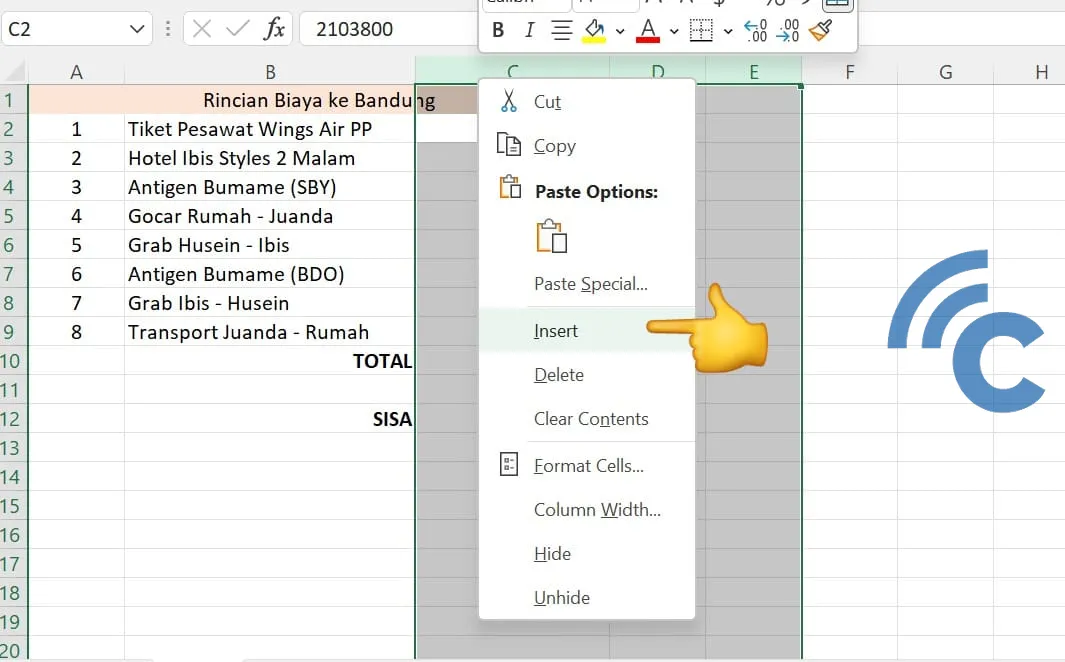

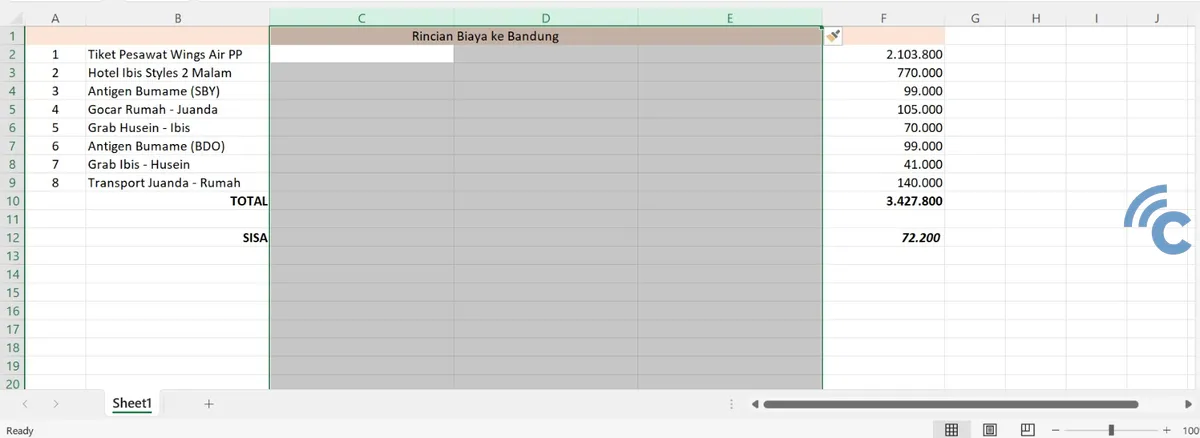
- Excel will add the same number of columns you selected before the first column selected. Or, you can use the button on the toolbar or keyboard shortcut after selecting the desired number of columns.

3. How to Add Columns in Excel Android
Microsoft Excel can not only be used on a PC or laptop. Smartphone users, especially those with the Android operating system, can also install Excel.
Adding columns in the Android version of Excel is a little different because the display is adapted for touch screens. Here is the tutorial:
- Open the Excel application on your Android device and open the spreadsheet you want to edit.
- Touch and hold on the column letter where you want to add a new column. After that, a menu will appear.
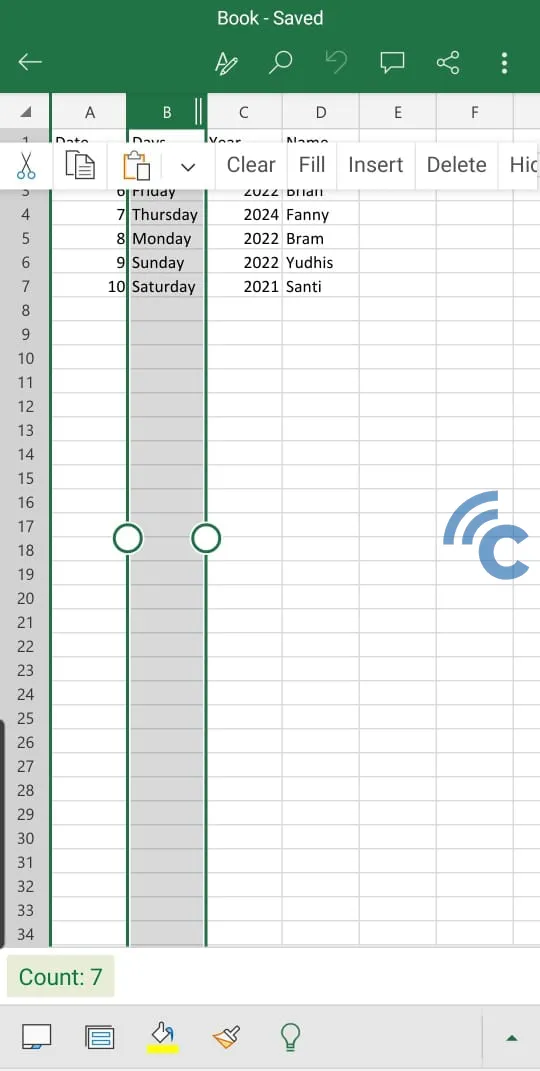

- Tap option “Insert” that appears in the menu, then select “Insert Columns” to add one new column before the column you selected.
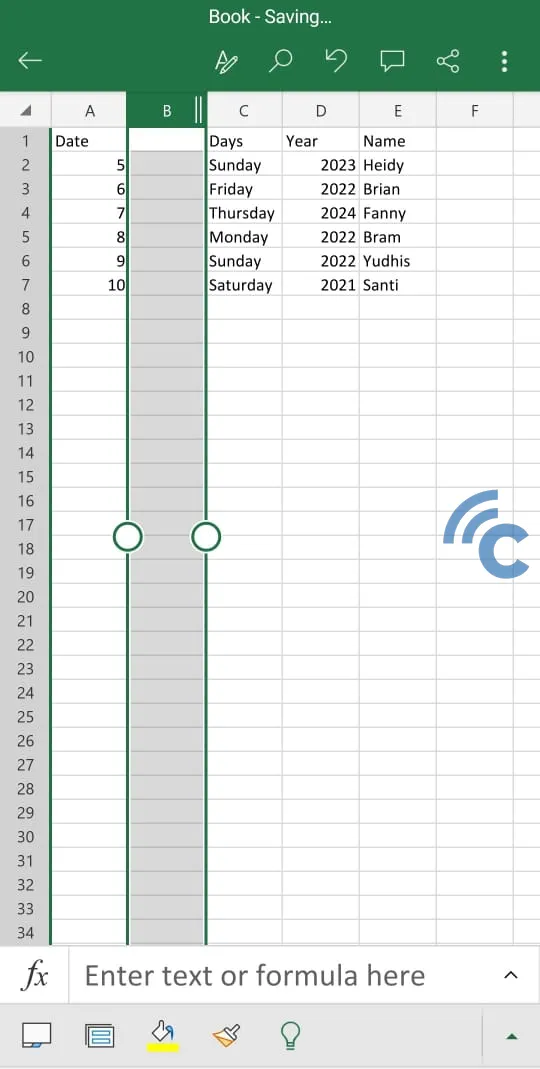

By following this tutorial, you can easily add columns in Excel on both desktop and Android versions. Adding columns is one of the many Excel functions that can increase the efficiency of your data processing.
Appearance spreadsheet Microsoft Excel on Android and desktop devices is certainly different. But basically, the way to add columns in the desktop or smartphone version of Excel remains the same.


