
Follow These 3 Ways to Enable WiFi on a Windows 11 Laptop
New laptops with the Windows 11 operating system generally don’t have a switch button to activate WiFi. Several laptop brands then replaced it with the Fn combination key with one of the F1 to F12 keys. However, the combination keys sometimes don’t work.
This phenomenon occurs not because hardware Your laptop WiFi does not have drivers installed. The reason is, Windows 11 already contains a universal WiFi driver that can be used by all kinds of laptops.
So what’s the solution? Don’t worry, don’t be confused, in this article Caris Signal will tell you several alternative ways to activate WiFi on a Windows 11 laptop. Therefore, see and follow the methods as follows.
A. Enable WiFi via the WiFi icon on the Taskbar
This method is the most familiar and the easiest to follow. Yes, especially if not by activating WiFi through the icon. Here are the steps.
1. Prepare the laptop on the home alias home screen
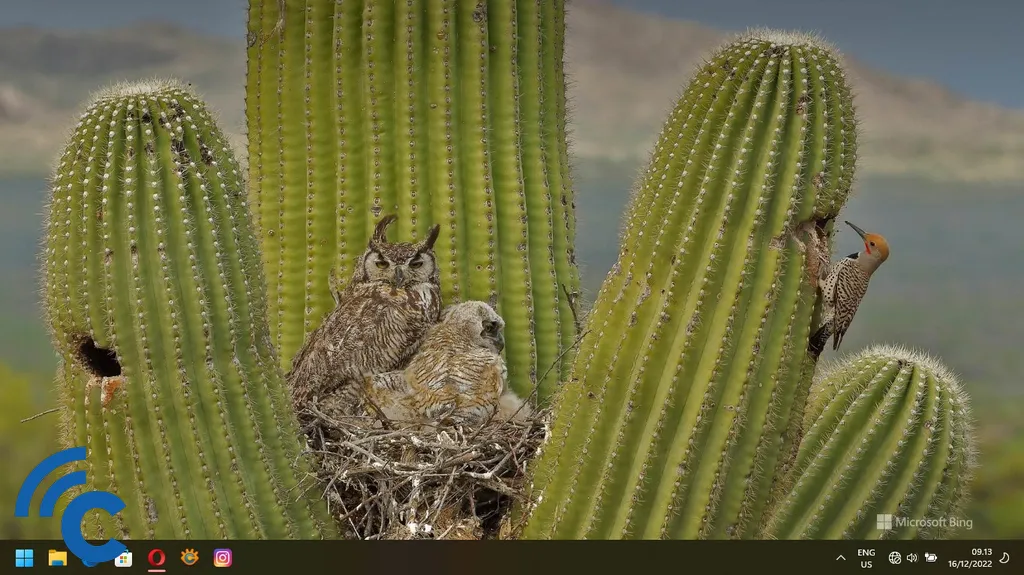
2. Navigate pointer mouse to the bottom right taskbar
3. Find the WiFi icon that looks like a globe. Later this icon will change to a stacked signal symbol when WiFi is active
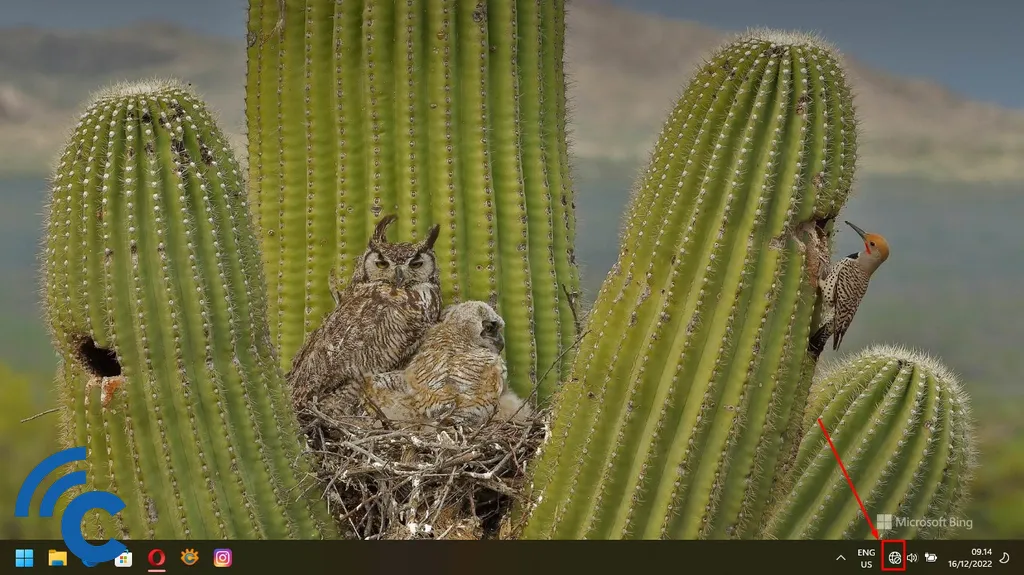
4. Click the icon
5. Make sure Flight Mode is not active. It’s an airplane-shaped icon without a blue background
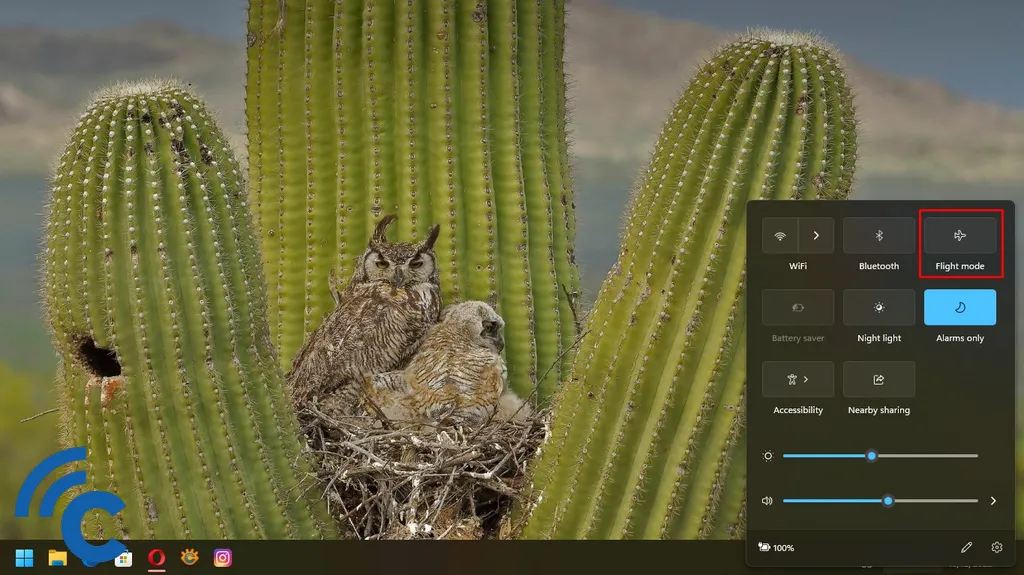
6. Click the WiFi icon next to the Bluetooth icon to enable WiFi
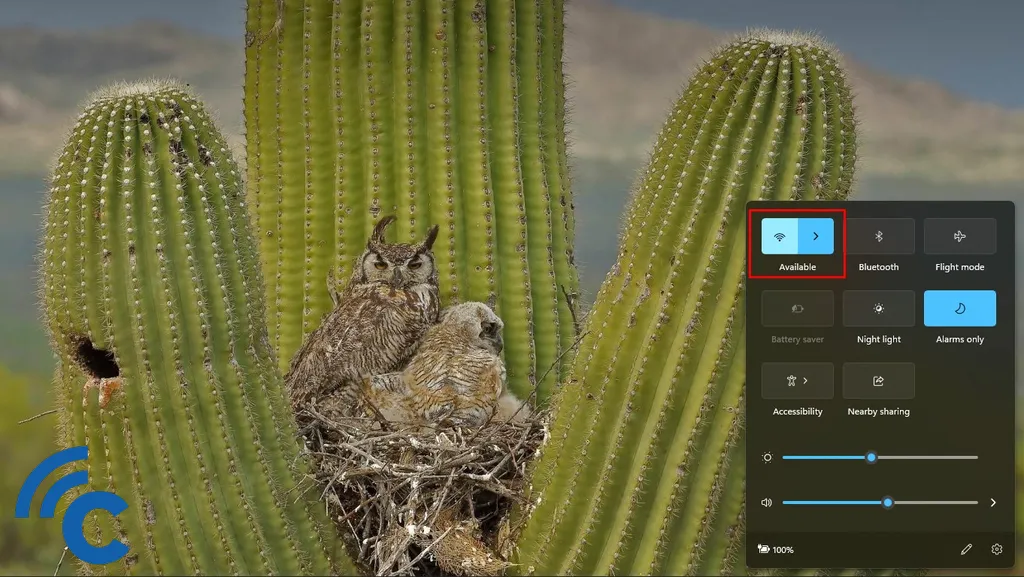
7. Click the arrow next to the WiFi icon
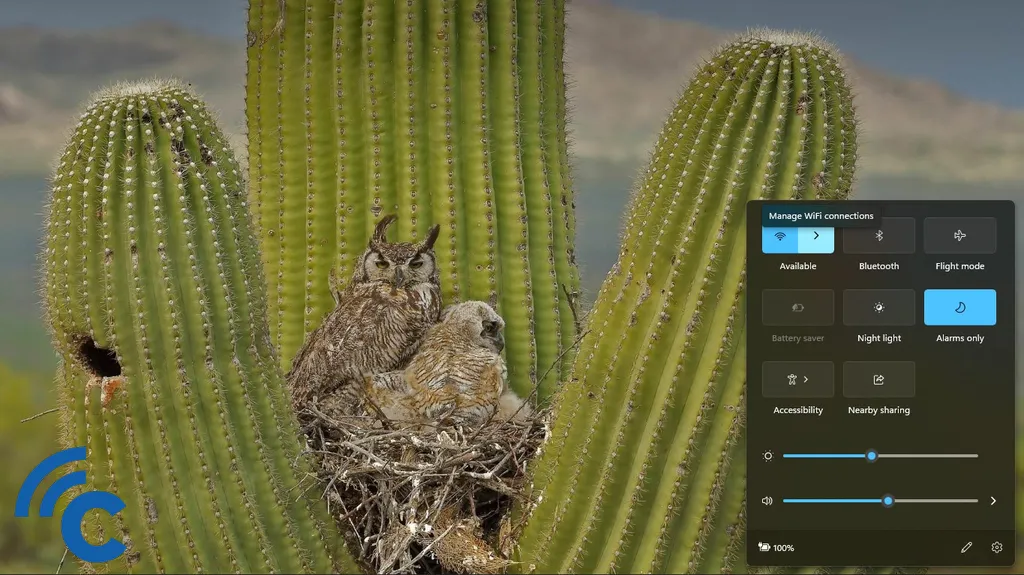
8. Select the network you want to connect to, then click “Connect”
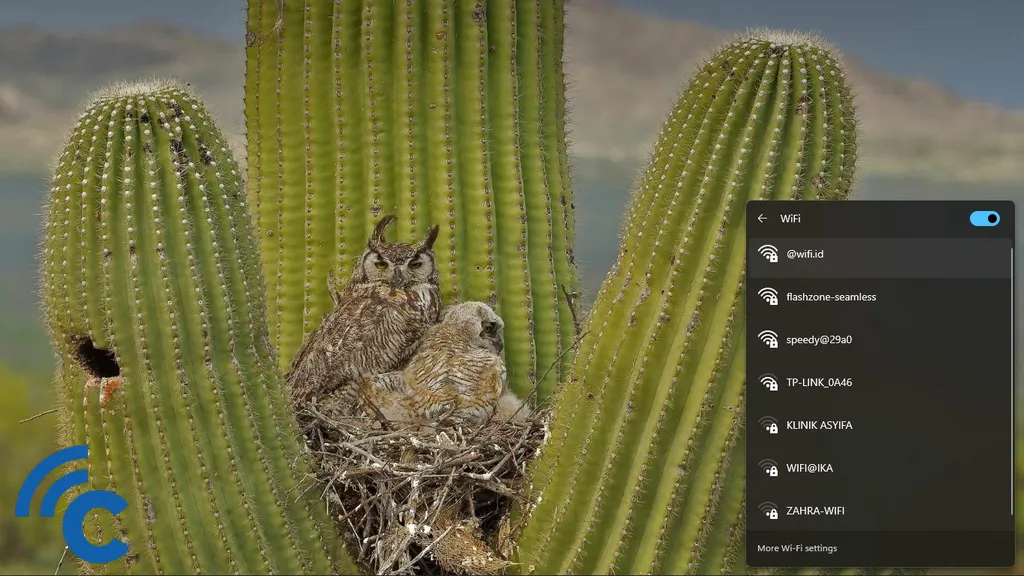
9. Fill in the password if required
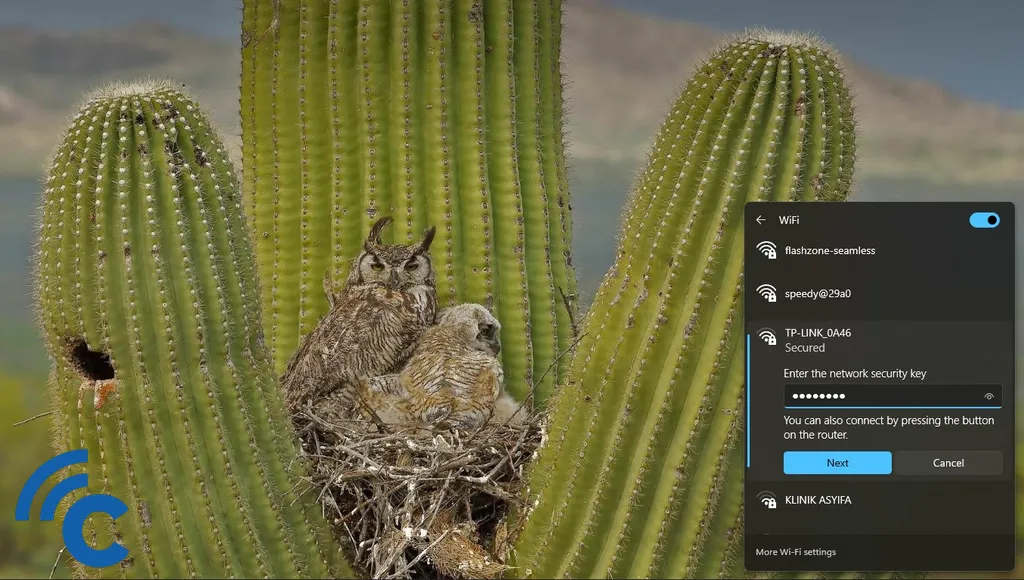
10. Click “Next” and now your laptop is connected to the WiFi network
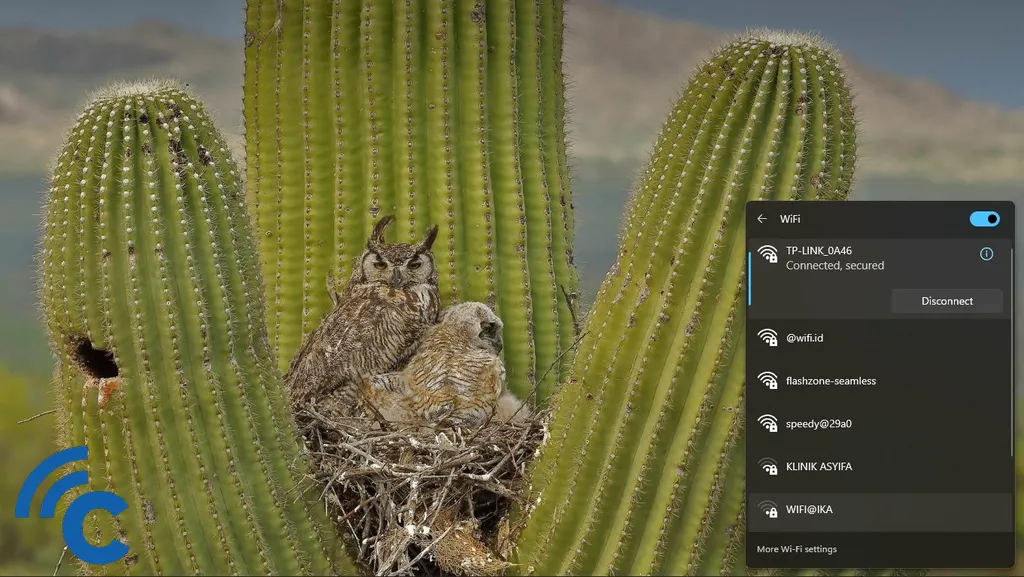
B. Enable WiFi via WiFi Settings
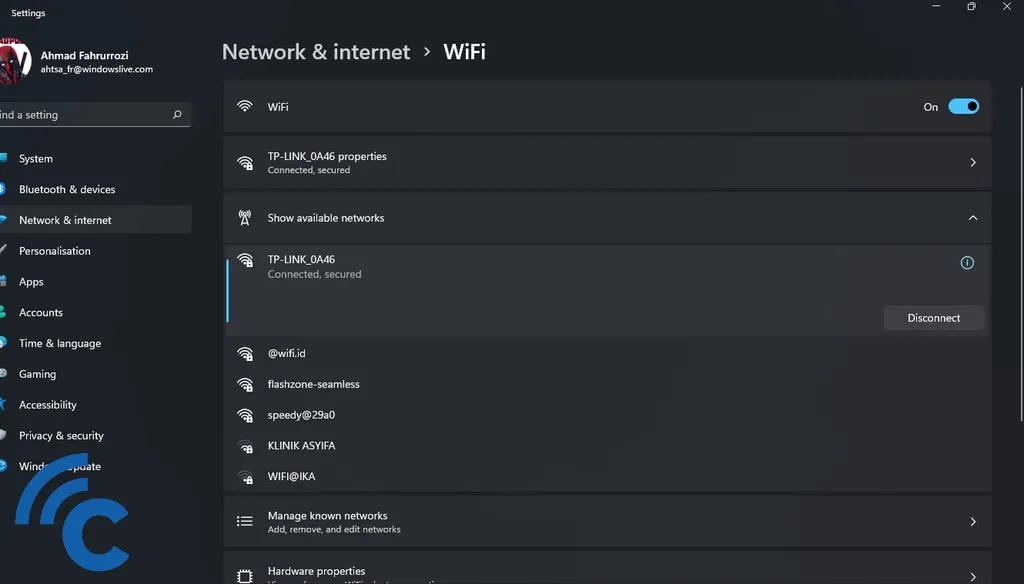
Windows 11 provides an access way other than via the WiFi icon to enable WiFi. The trick is to access the WiFi Settings menu. Follow the steps as below.
1. Set up the laptop on the home screen

2. Press the Windows key on the keyboard
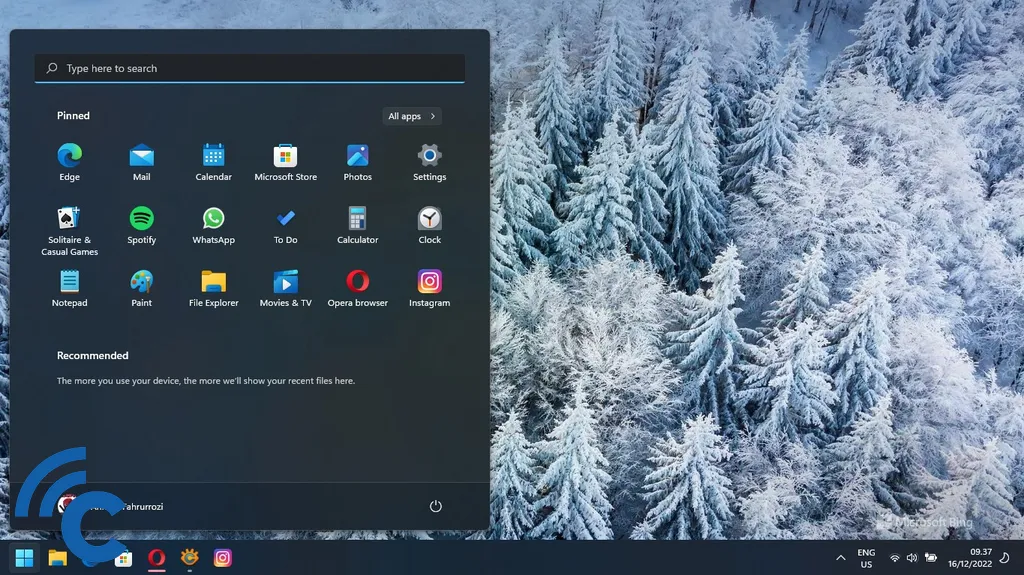
3. Type “WiFi settings” in the search field
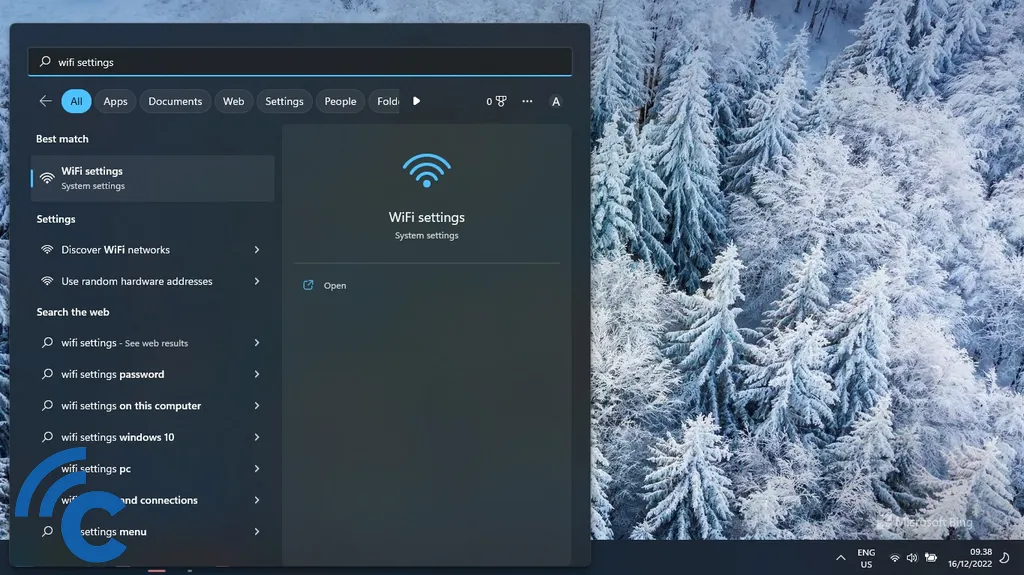
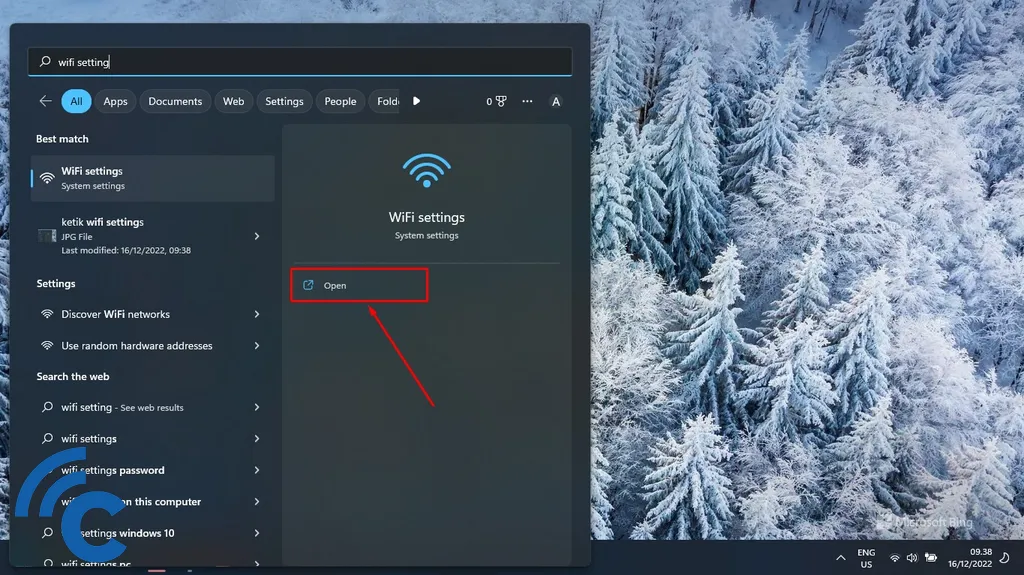
4. Click “open” to open it
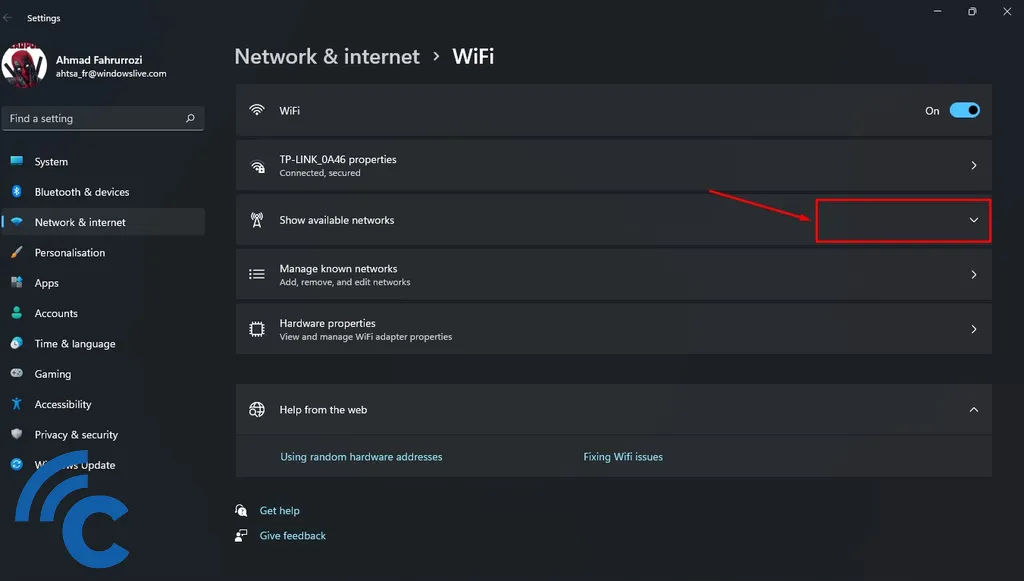
5. Slide the WiFi switch to the right, so it is in the “On” position
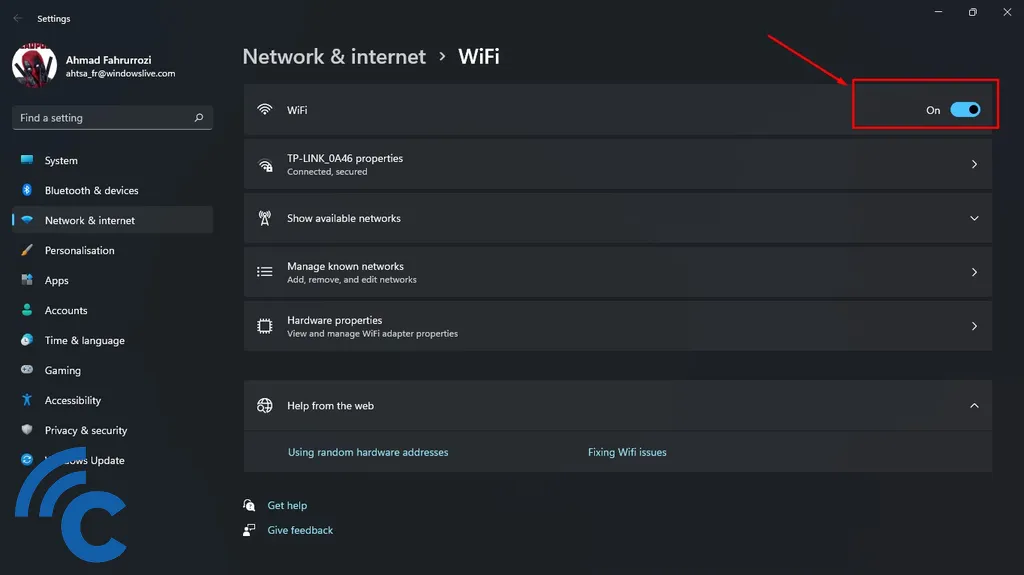
6. Click the down arrow next to the “Show available networks” bar
7. Select the network you want to connect to, then click “Connect”
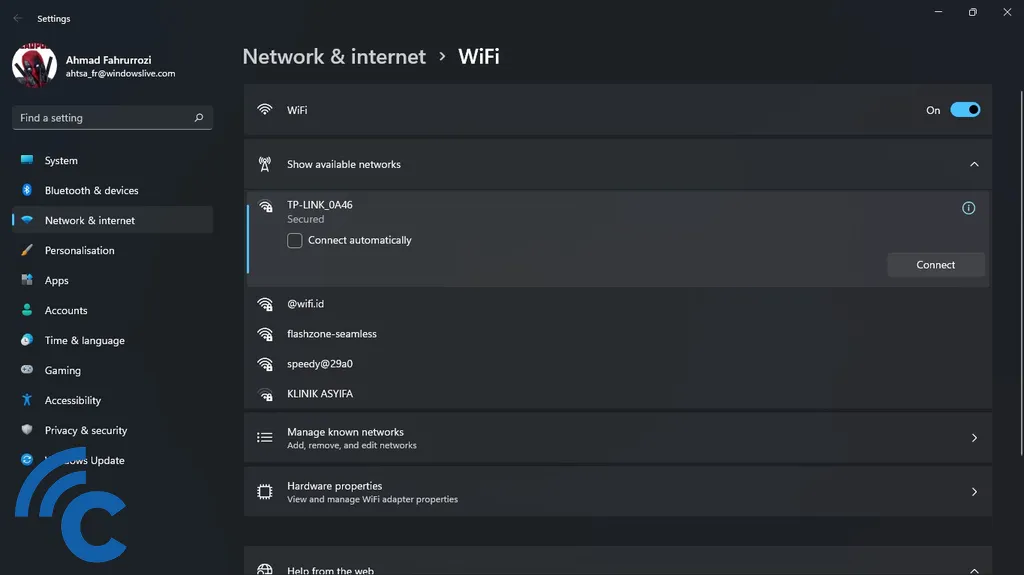
8. Fill in the password if needed
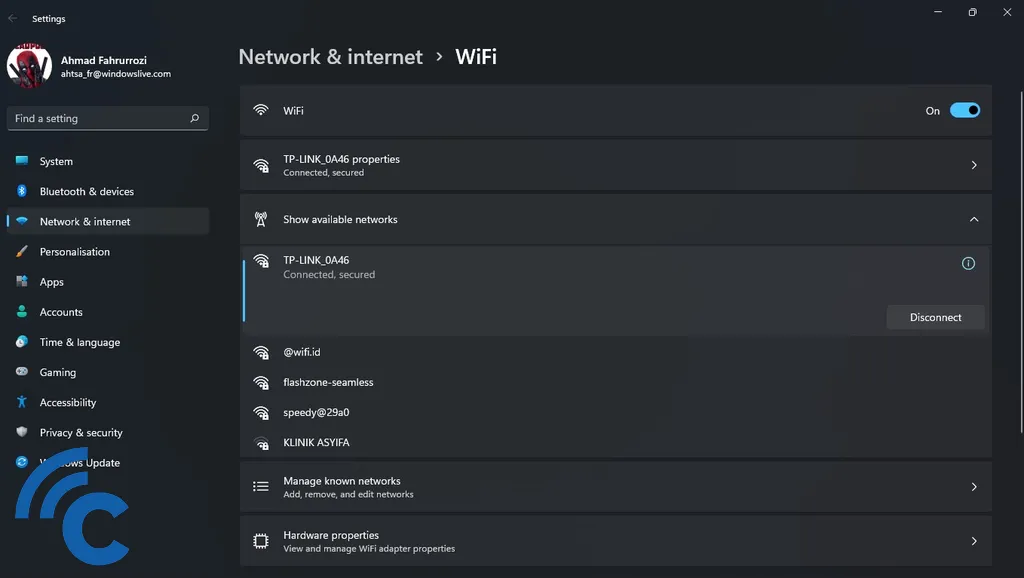
9. Click “Next” and your laptop is successfully connected to the WiFi network
C. Enable WiFi via Quick Link
How to activate WiFi in the Windows Mobility Center feature has been removed in Windows 11. However, Microsoft has replaced it in another way that is no less simple. Is the quick link feature another way. Here’s how to access the quick link to activate WiFi
1. Set up the laptop on the home screen

2. Press the Windows + X key combination on the keyboard
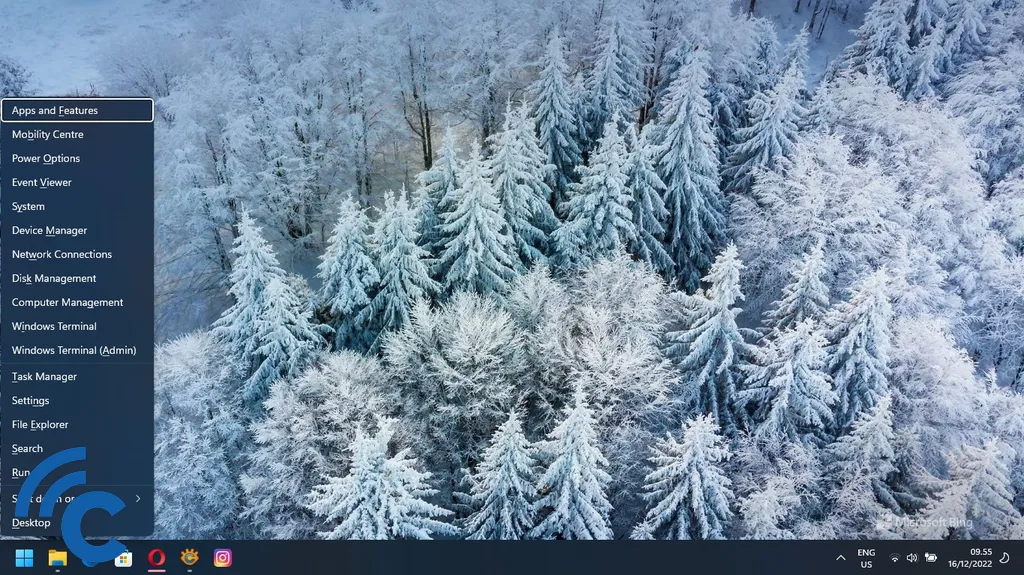
3. Click “Network Connection” or you can also press the letter W on the keyboard

4. Slide the display down, then make sure the Flight Mode switch is in the “Off” position
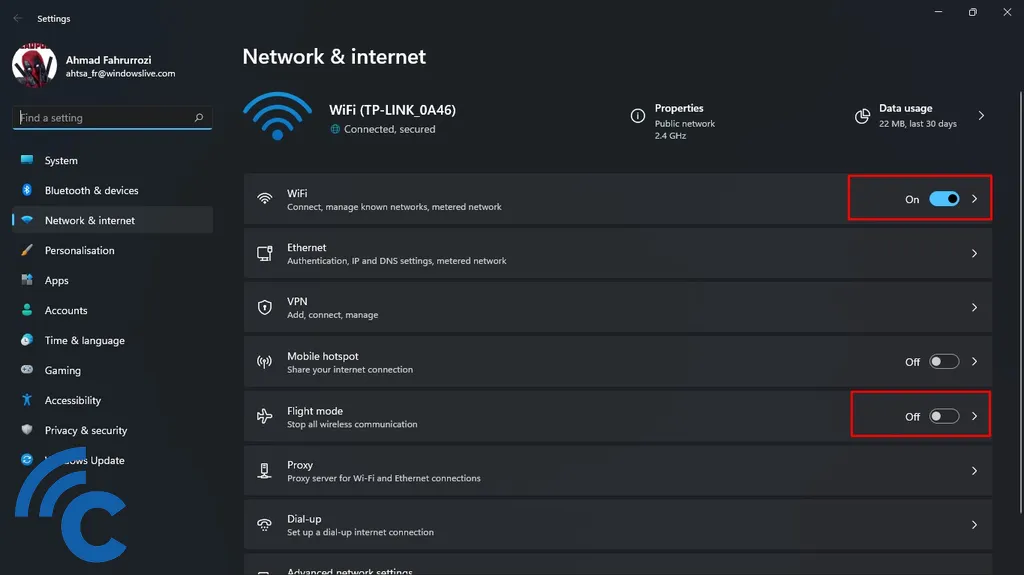
5. Then slide the WiFi switch to the right so that it is in the “On” position
6. Click the arrow to the right of the WiFi switch
7. Click the arrow next to the “Show available networks” bar
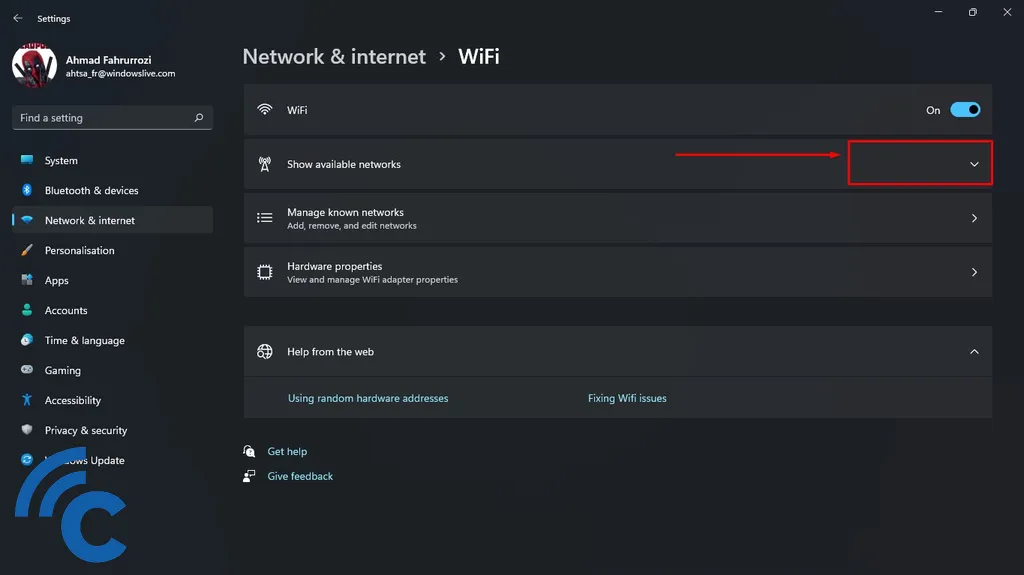
8. Select the WiFi network you want to connect to
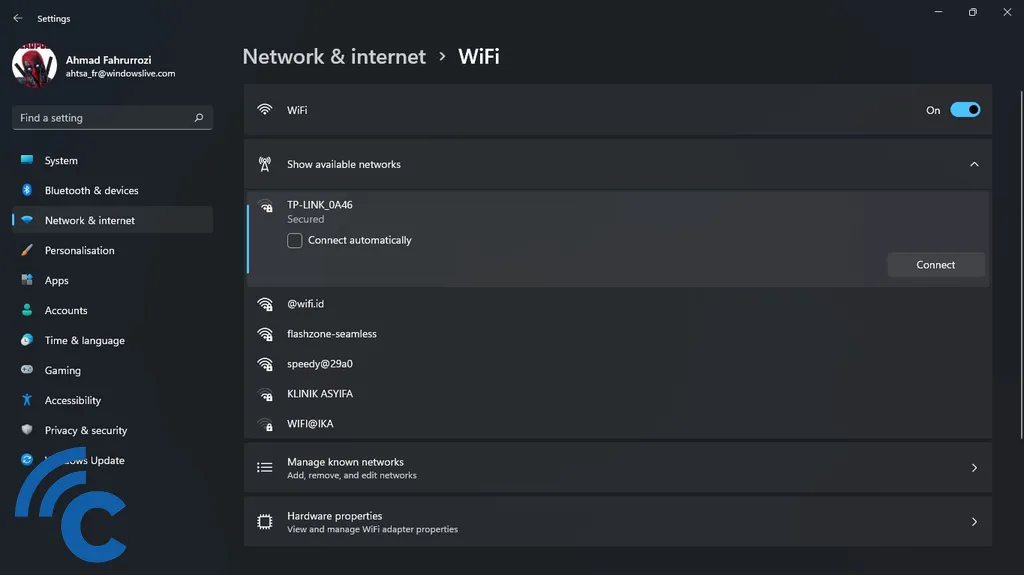
9. Klik “Connect”
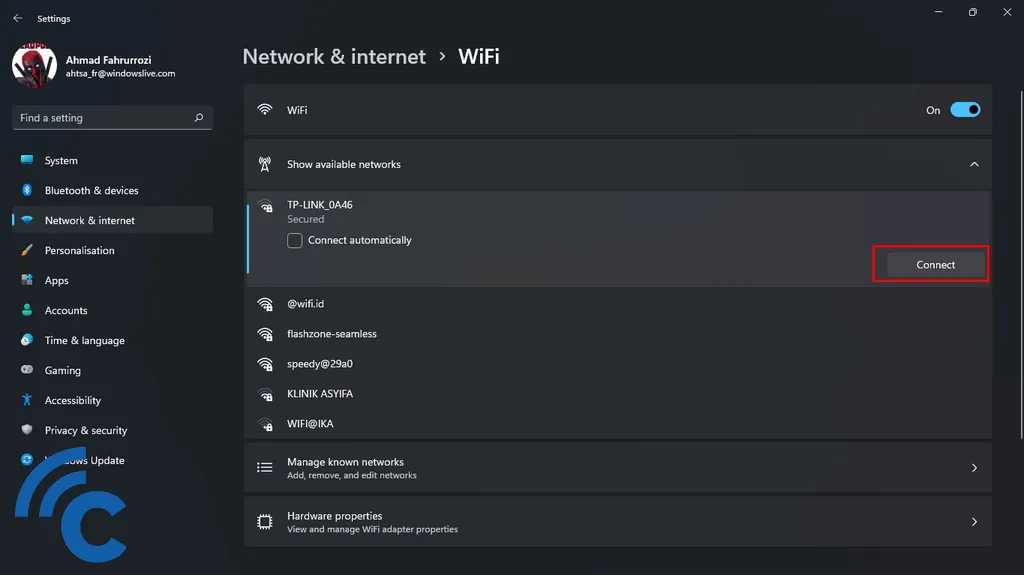
10. Enter the password if required
11. Click “Next” and finish. Now you are connected to a WiFi network
Those are the three ways to activate WiFi on a Windows 11 laptop. Basically, all methods are the same. Only the way of access is different. In essence, before you activate WiFi, first make sure your laptop’s Flight Mode is deactivated. Good luck!
