3 Ways to Record Windows 11 Screen on a Laptop or Desktop PC
The Windows operating system made by Microsoft is known for having various advanced and useful features in it. One of the most needed features is features screen recorder or screen recording. This feature is actually not only owned by Windows 11, because previous generations of Windows also have it like Windows 10 or 7.
Feature screen recorder or this screen recording has a function similar to screenshot or screenshot. With this feature, users can be used to capture ongoing activity on the screen. the difference, screenshot just captures screen activity and renders it an image, similar screenshot Of smartphone.
Meanwhile, features screen recorder able to record screen activity and make it a video. Usually, this screen recording feature is used to record an activity that lasts a long time, for example classes, webinars, creating tutorial content, and even playing games.
However, before starting screen recording, first make sure that your PC or laptop has sufficient HDD or SSD storage. Otherwise, usually the screen recording will end abruptly when there is no more space on it.
Immediately, see the following 3 ways to record the screen in Windows 11. For the record, this method can also be applied in Windows 10.
1. Using the Xbox Game Bar
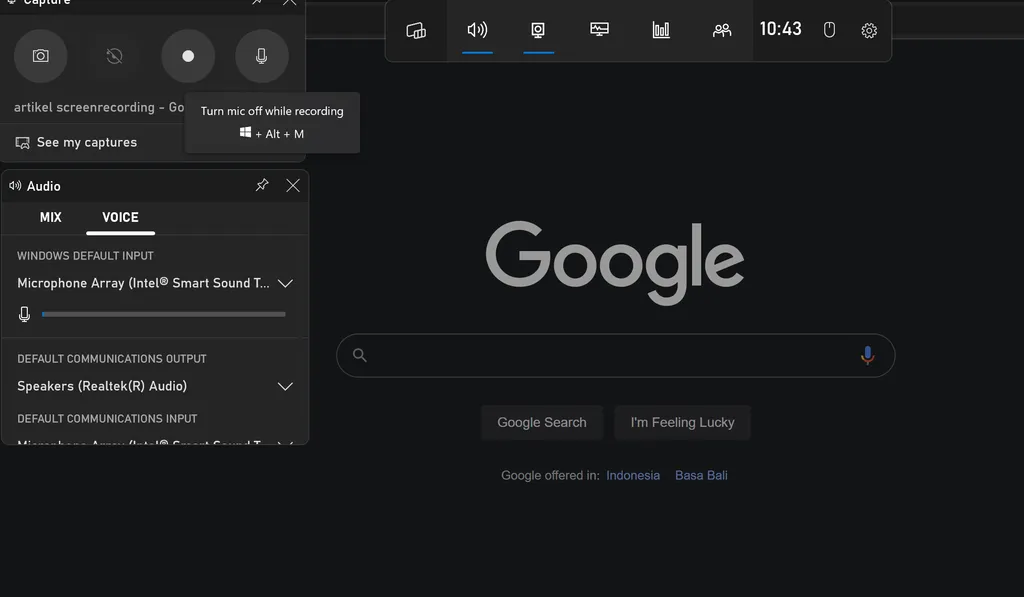
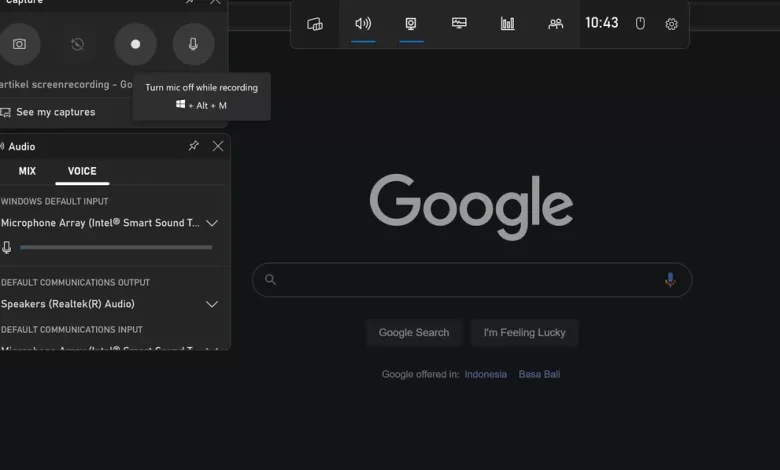
One of the most common ways to record the screen is by using the Xbox Game Bar feature. This feature is built into Windows 11 itself.
One of the advantages of the Xbox Game Bar is the recording resolution that can be set according to your wishes. Even so, keep in mind that the higher the resulting resolution, the larger the video size. This feature is also quite safe, because you cannot record the screen on the Windows desktop or File Explorer.
In addition, how to use it is also quite easy and fast. However, before using it, you must first activate it via the Settings menu. So, to make it clearer, please refer to the following steps.
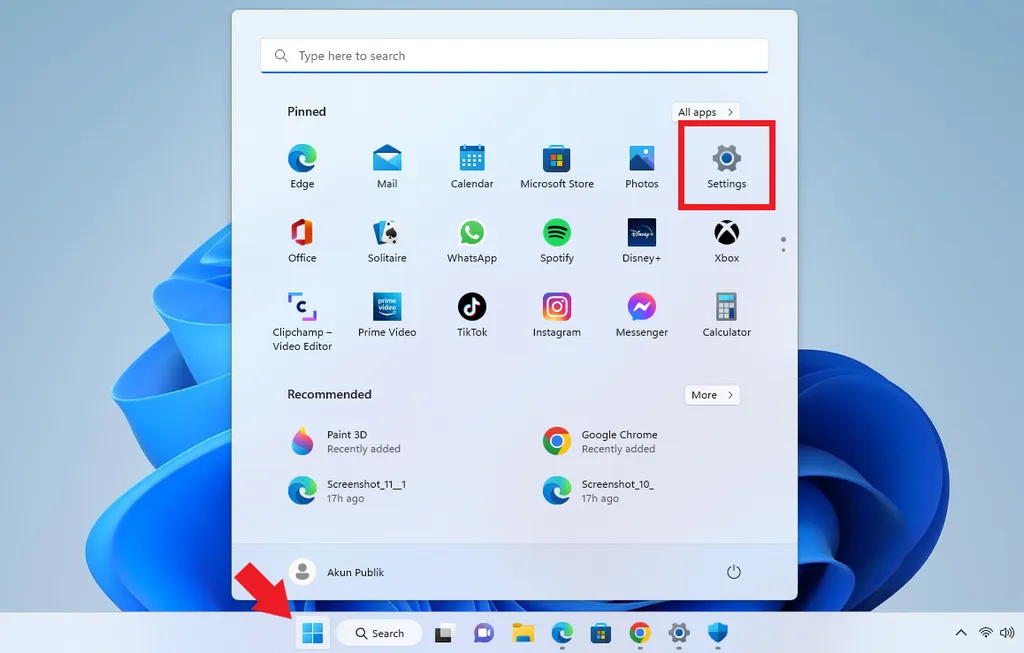
- The first step to take is to open “Settings” through the menu “Start/Windows” in the Taskbar.
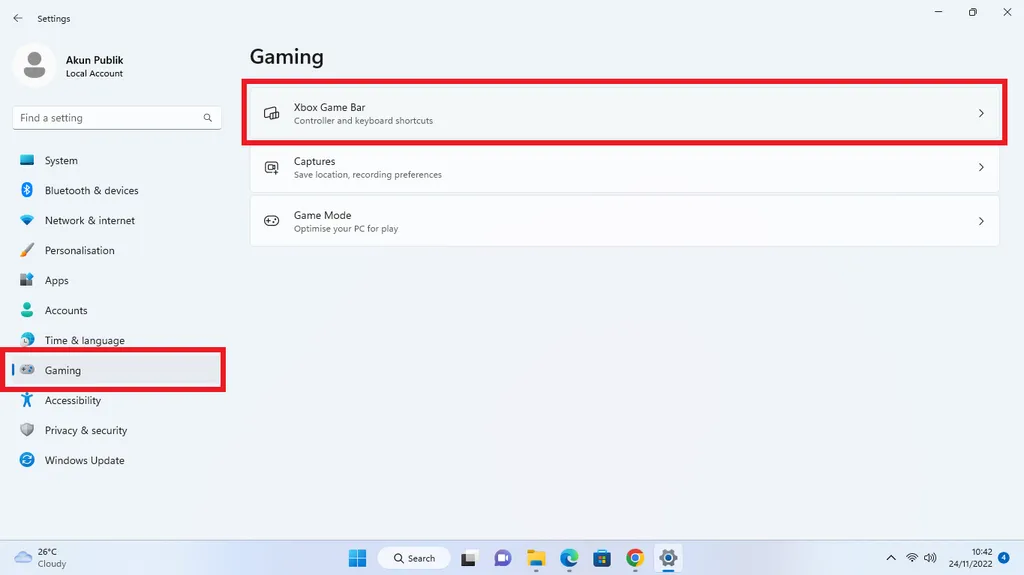
- After that, select the menu “Gaming”then enter the menu “Xbox Game Bar”.
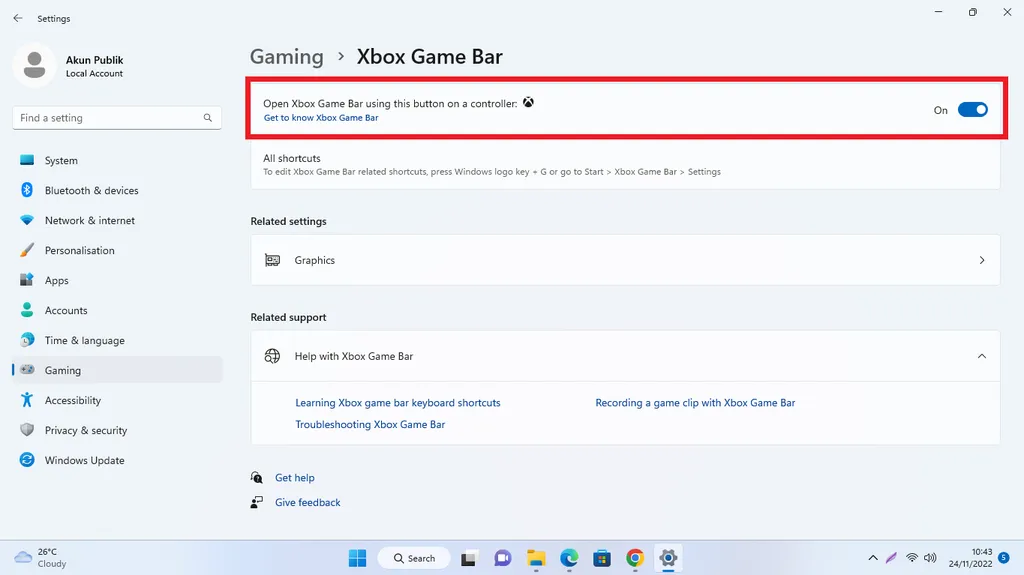
- On the very top line that says “Open Xbox Game Bar using this button on a controller”be found toggle on his right.
- Press toggle until it turns blue and reads “On”.
- Then the Xbox Game Bar on your PC or laptop is active and can be used.
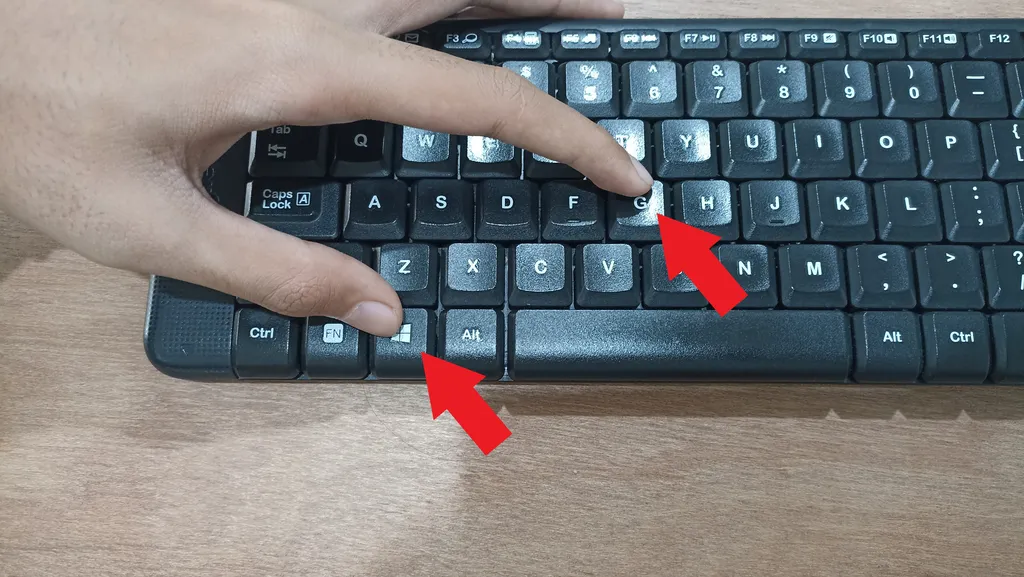
- To start using this feature, you can press the button shortcut on keyboard to be faster.
- Use shortcut knob “Windows + G” to open it.
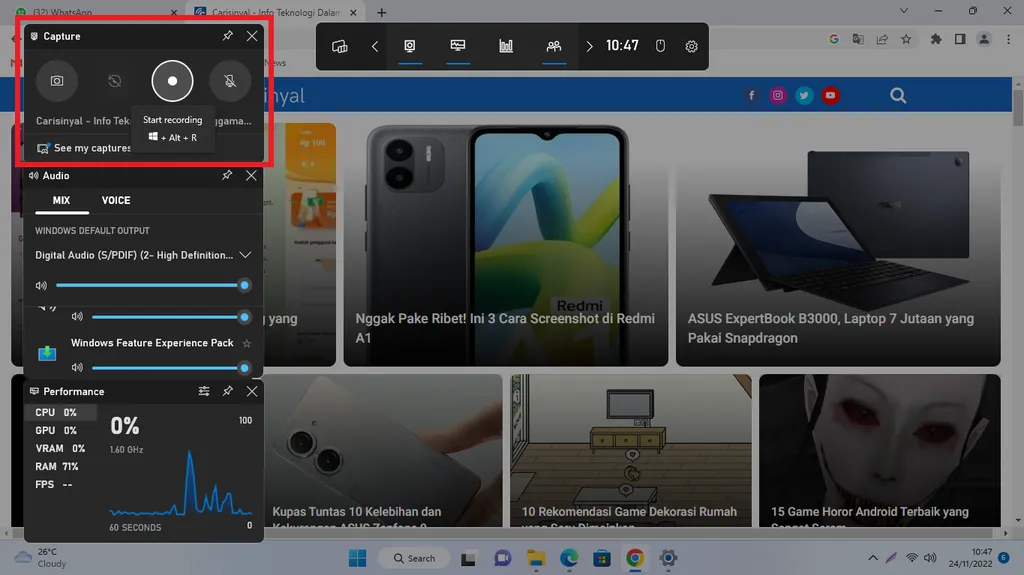
- On column “Capture”please press round button to start screen recording.
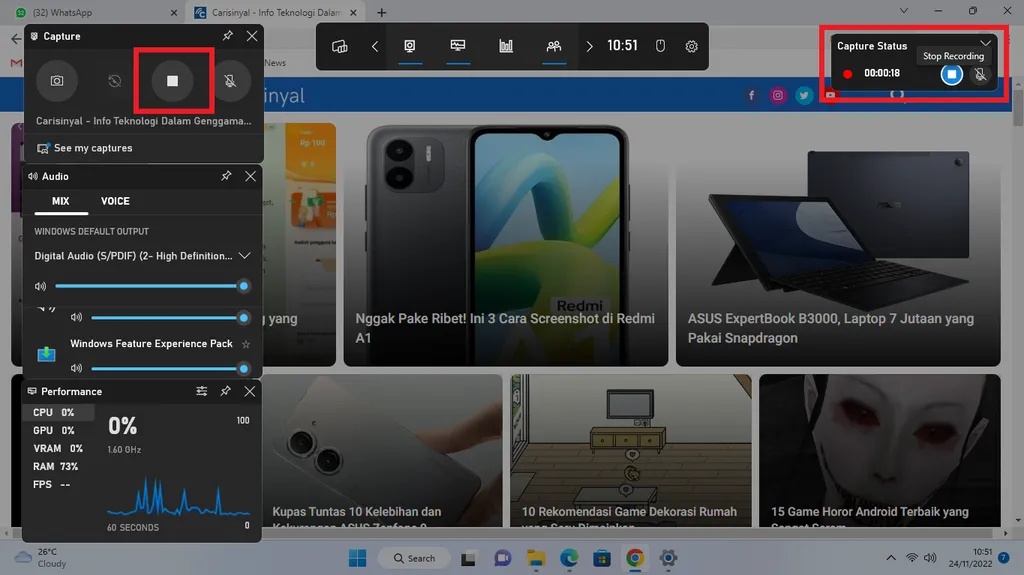
- To turn off the recording process, you can press the square button which was previously round in the column “Capture”.
- You can also turn it off by pressing the blue square button in the column “Capture Status”.
- After that, the results of the screen recording will be saved automatically.
2. Using Chrome Extensions
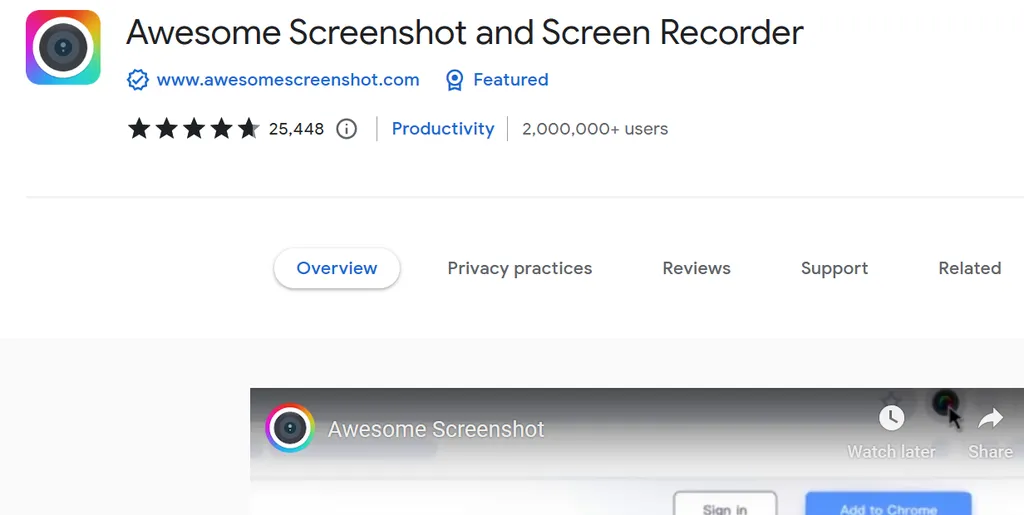
Apart from using the built-in features, you can also record your PC or laptop screen using Chrome Extensions. Screen recorder by using Chrome Extensions this can be used for those of you who often use Google Chrome or Chromium-based browsers that support adding extensions from Chrome.
One of the extensions that can be used is “Awesome Screenshot and Screen Recorder”. This one extension is quite interesting because it is 2 in 1, which is able to do screenshot and screen recorder. How to use it is also quite easy. However, before that, you must log in to Google Chrome and download it first.
Apart from that, you can also choose where to store your recording results such as PC or laptop storage, or store them in the cloud. To be clearer, please refer to the following steps.
- The first step to take is to open Google Chrome on your PC or laptop.
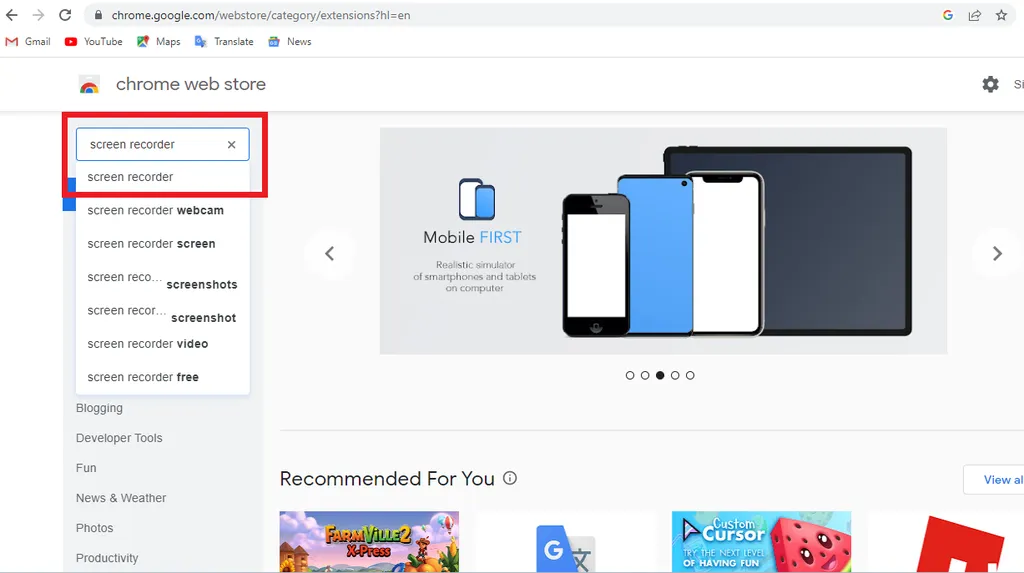
- Please go to “Chrome web store” and write “Screen recorder” in the search field.
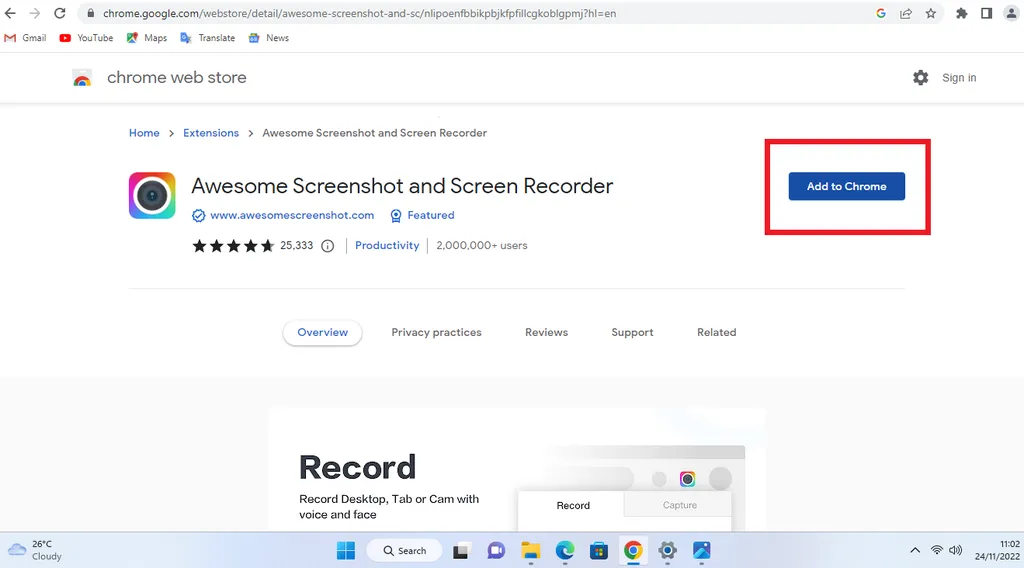
- Select the “Awesome Screenshot and Screen Recorder” extension and hit the button “Add to chrome”.
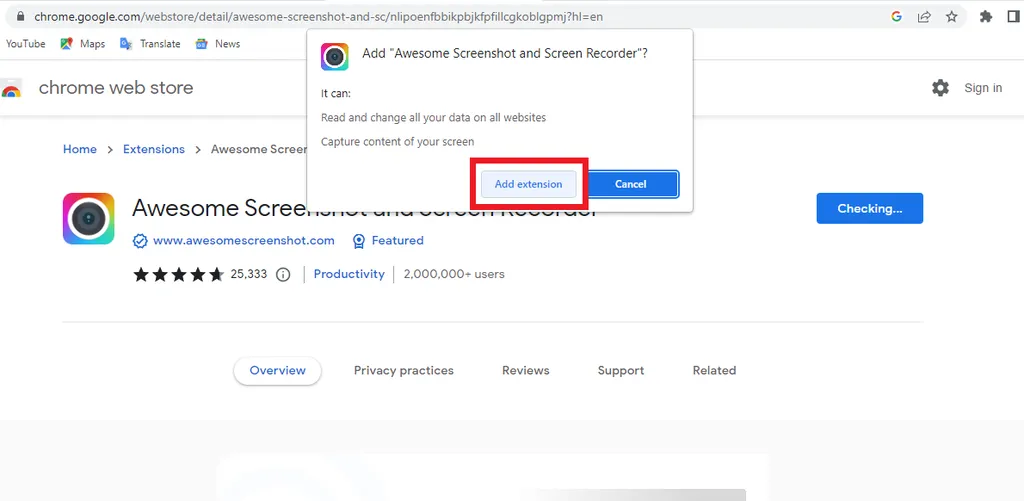
- If there is a warning window, press it “Add extension”.
- Wait for the extension download and installation process to complete.
- Once installed and usable, please press the extension icon in Google Chrome, then select the “Awesome Screenshot and Screen Recorder” extension.
- There is a small window that opens. To start screen recording, please press “Start Recording”.
- You can also choose which part to record, for example desktop screen, tab, specific area of the tab.
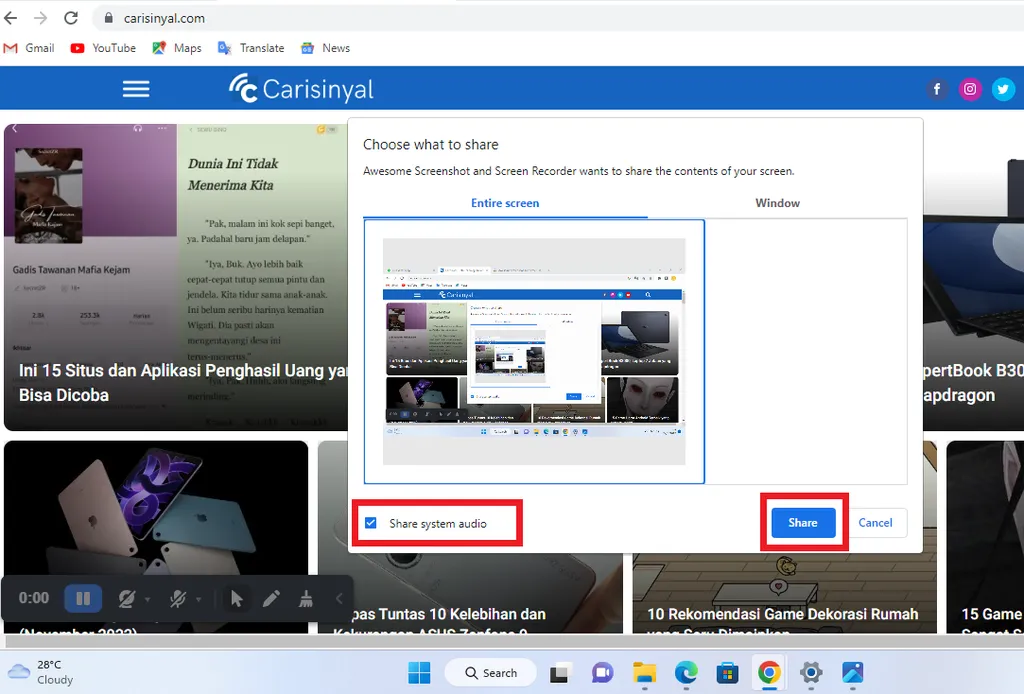
- After that, there will be a choice of which part to record or record.share. You can also choose to record with audio at once or not.
- When finished, please press the button “Share”.
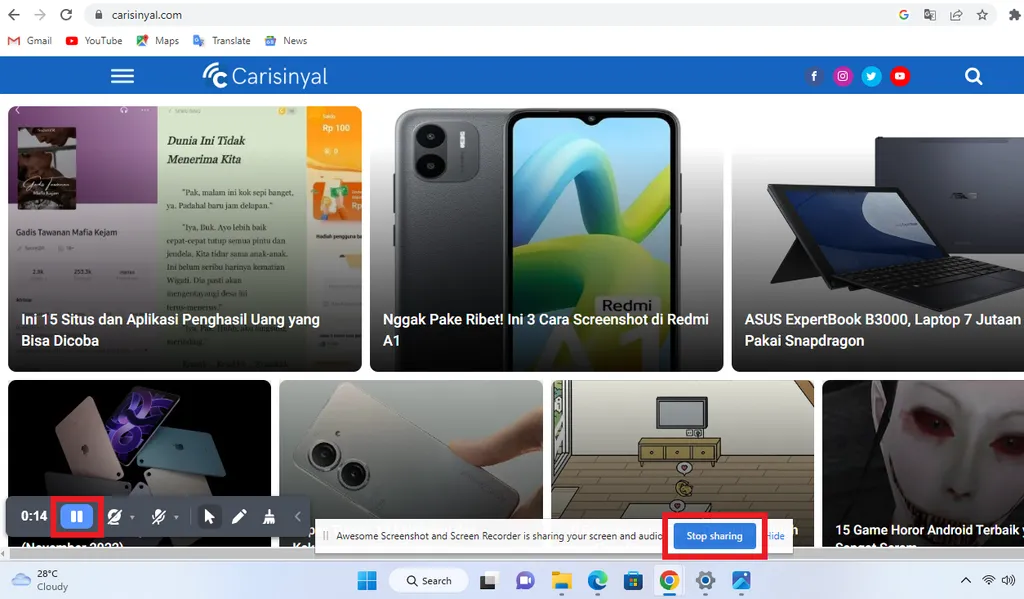
- The recording process will run automatically.
- To end the recording, you can immediately press the button “Stop sharing” blue in color
- You can also press the “pause” icon first, then press the red square button that says “Stop”.
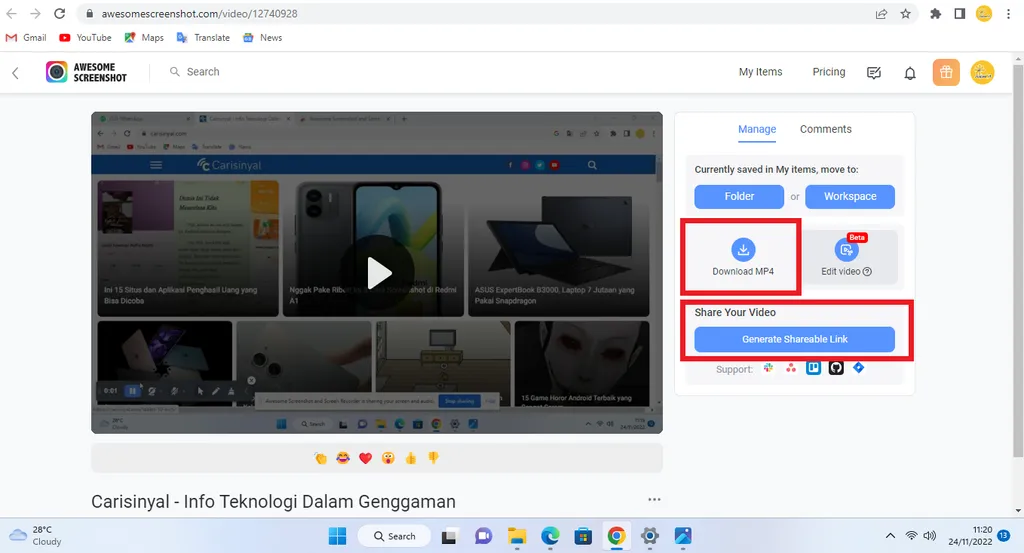
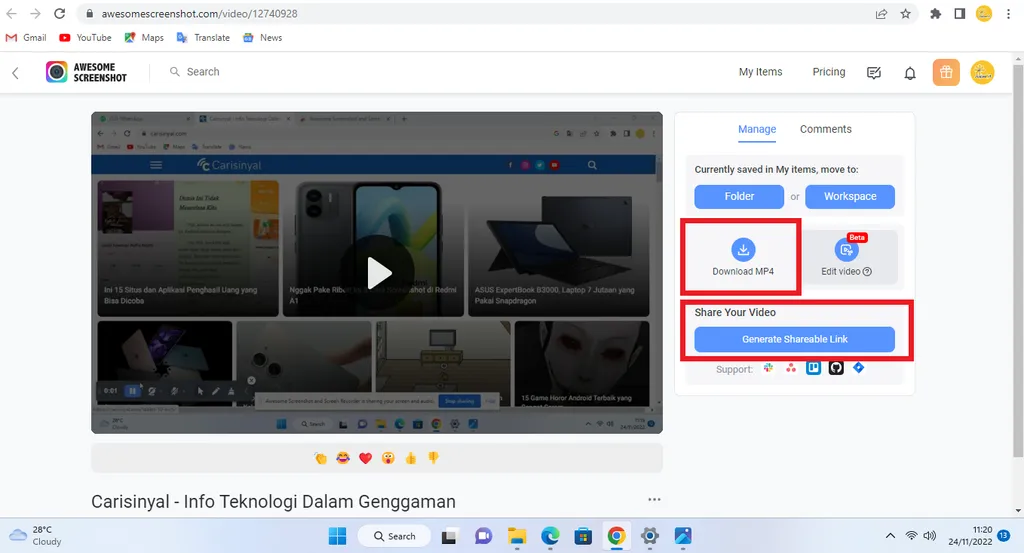
- After the recording is complete, the screen recording results are automatically stored in the Cloud account that is currently connected. You can also choose to download the MP4 file or share it by copying the link first.
3. Using PowerPoint
Not many people know that PowerPoint is possible tools which is useful for screen recording. However, PowerPoint is not a complete Windows 11 screen recording tool. You could say the features are limited.
It’s just that the screen recording feature is quite useful for screen recording needs for beginners. For testing in this article, Microsoft PowerPoint 2019 is used. Just follow the steps below.
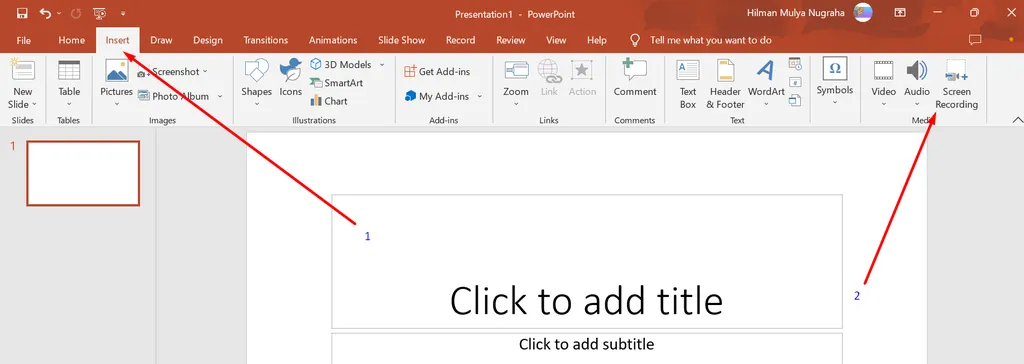
- Open PowerPoint and go to tabs Insertthen select an option Screen Recording as shown in the image below.
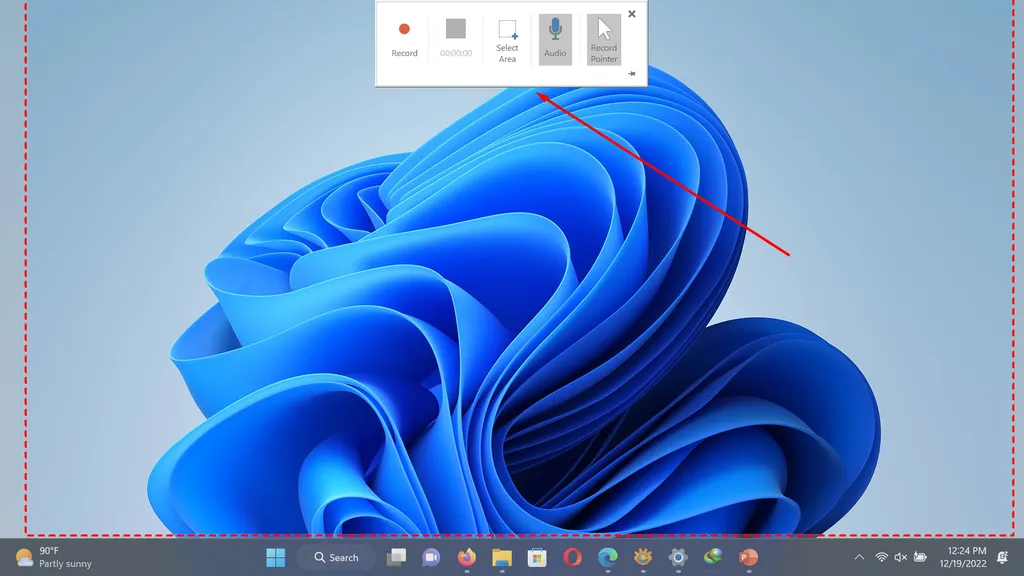
- Later a button will appear for recording, selecting an area to record, as well as a feature for adding voice to the recording.
- The screen recording features using Microsoft PowerPoint 2019 are quite simple but quite reliable for beginners.
ffgg
Nah, that’s three ways you can do to record the screen on Windows 11. Actually there are also ways to record the screen with another method, namely using third-party applications, both paid and free. However, for standard recording needs, the 3 ways above are sufficient.


